How Long Does a Bike Tire Patch Last?
A properly bonded bike tube patch can last for the tube's remaining life. Learn which punctures are safe to patch, what shortens a repair, and when to replace.

A properly installed vulcanizing patch on a compatible, otherwise sound inner tube can remain serviceable for the rest of that tube’s useful life. That is not a fixed number of days or miles. Material, puncture location, surface preparation, installation, pressure, heat, and the tube’s condition all affect the result.
Park Tool distinguishes its more durable vulcanizing repair from a temporary pre-glued roadside patch. A tire boot is also temporary and supports limited casing damage only long enough to get to safety. None of these products makes structural tire, bead, rim, valve, or incompatible-material damage safe.
Repair the correct part
An inner-tube patch seals a suitable tube puncture. It does not repair a cut tire casing, broken bead, cracked rim, or damaged valve base. Stop riding for exposed cords, a bulge, bead damage, rim damage, or a tube protruding through a tire.
The useful answer by repair type
| Repair | Intended role | Replacement trigger |
|---|---|---|
| Vulcanizing patch on compatible tube | Potentially durable bonded repair | Lifted edge, leak, tube deterioration, nearby damage, or maker limit |
| Pre-glued tube patch | Temporary roadside repair unless maker states otherwise | Replace promptly or as its instructions require |
| Tire boot | Temporary support for limited casing cut | Replace damaged tire as soon as possible |
| Tubeless plug | Product- and damage-specific tubeless repair | Follow tire, rim, sealant, and plug instructions |
Park Tool’s inner-tube repair guide says its pre-glued patch should be treated as an emergency temporary fix and its properly installed vulcanizing patch is much more durable. It also says a booted ripped tire is not a permanent repair. Those distinctions are more useful than a universal mileage claim.
Which punctures are patchable?
A small puncture in the main body of a conventional butyl tube may be suitable when the surrounding rubber remains flexible, clean, and undamaged. Confirm the patch maker lists the tube material. Latex and TPU tubes require their own approved systems; instructions for butyl cannot be transferred automatically.
Replace rather than patch when the valve or valve base is damaged, a seam separates, the rubber is brittle, the cut is too large for the approved patch, patches would overlap, or the tube has widespread abrasion. Replace the tire for exposed casing threads, a broken bead, a bulge, or structural sidewall damage.
Why some patches last and others fail
The original cause remains
A thorn, wire, glass chip, rim-tape fault, sharp rim edge, pinch event, or installation error can puncture the replacement tube in the same place. Mark the tube’s valve orientation before removal and map the hole back to the tire and rim. Our recurring-flat diagnostic covers that process.
Preparation was incomplete
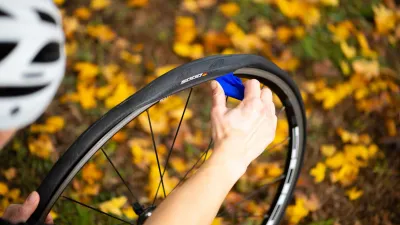
Follow the kit’s cleaning and abrasion instructions. Park Tool advises light abrasion and warns that excessive sanding can groove the rubber and contribute to failure. The surface must be dry and free of residue that prevents bonding.
Adhesive timing was wrong
For a vulcanizing kit, use only the included or specified fluid, spread the directed amount, and wait as instructed before applying the patch. More fluid is not stronger. Do not substitute household glue, duct tape, paper, or an unrelated adhesive.
The tube was pinched during installation
Reinstall without twisting the tube or trapping it beneath the bead. Inflate gradually while checking the bead witness line on both sides. Deflate immediately if the bead becomes uneven or begins to climb off the rim.
A durable tube-patch workflow
- Stop riding and remove the wheel safely.
- Preserve valve-to-tire orientation and locate the leak.
- Inspect the matching tire and rim position for the cause.
- Confirm the tube material and damage are approved for the kit.
- Clean, dry, and lightly prepare the specified area.
- Apply the correct fluid or patch exactly as directed.
- Center the patch and maintain the required pressure and time.
- Inspect the entire bond, tube, tire, tape, rim, and valve.
- Reinstall without a twist or pinch and seat the bead evenly.
- Inflate within both tire and rim limits, then recheck before riding.
Do not overinflate a loose tube to test a fresh patch if the patch maker warns against it. The installed tire normally supports the tube; unsupported stretching can stress the bond.
When should you replace a patched tube?
Replace it when the patch lifts, bubbles, cracks, or leaks; the tube deteriorates; a new puncture is too close; the valve or seam is damaged; or you cannot identify the repeated-flat cause. There is no safe universal number of patches. Location, spacing, rubber condition, and product limits matter more than a count.
Carry a correctly sized spare tube on long or remote rides even when a repair appears sound. A backup is not evidence the current repair is safe; it simply reduces the consequence of another ordinary puncture.
Tube patch versus tubeless repair
Traditional tube instructions do not apply to a tubeless tire body. Park Tool directs tubeless punctures to a compatible plug system. Tubeless tires also depend on compatible rims, tape, valves, sealant, beads, and pressure limits. A plug cannot correct a torn bead, sidewall damage outside its maker’s limits, or a cracked rim.
FAQ
Is a bike tube patch permanent?
A correctly bonded vulcanizing patch can be durable for a compatible tube, but no repair deserves an unconditional permanent label. Inspect it and replace the tube when the bond, material, or surrounding system is no longer sound.
Are peel-and-stick patches permanent?
Treat them as temporary unless the specific maker explicitly states otherwise. Park Tool describes its pre-glued patch as an emergency trailside fix.
Can I patch a sidewall cut?
An inner-tube patch cannot restore a cut tire casing. A manufacturer-approved boot may provide temporary get-home support for limited damage, but replace a ripped tire promptly and never ride exposed cords, a bulge, bead damage, or a tube pushing through.
Bottom line
Patch life is a condition, compatibility, and workmanship question—not a countdown. Use the correct system, remove the original cause, respect every component’s limit, and replace anything structurally damaged. A sound bonded repair can be long-lived; a wrong repair is unsafe from the start.