Why Does My Bike Tire Keep Popping? (5 Possible Reasons)
If your bike tire keeps popping, map the old tube's hole to the tire and rim. Use the puncture pattern to find debris, rim tape, pressure, or fit problems.
Table of Contents
- First, identify what actually failed
- 1. Debris is still in the tire
- 2. Rim tape, spoke holes, or burrs are cutting the tube
- 3. Low pressure is causing pinch flats
- 4. The tire, tube, or rim is incompatible or damaged
- 5. Installation is pinching or twisting the tube
- What about tubeless tires?
- Preventing the next flat
- Frequently asked questions
- Bottom line
A bike tire that keeps popping after a tube change usually has one of five unresolved causes: debris remains in the casing, the rim or tape is damaging the tube, low pressure causes pinch flats, the tire or tube is damaged, or the tube is being pinched during installation.
Do not install another tube until you locate the previous puncture and match it to a position on the tire and rim. That pattern is the fastest way to avoid repeating the same failure.
| Puncture pattern | First place to inspect |
|---|---|
| One small tread-side hole | Matching point inside the tire for debris |
| Two parallel slits | Pressure, load, rim contact, and pinch-flat damage |
| Rim-side hole | Rim tape, spoke holes, burrs, and valve-hole edges |
| Tear near the valve | Tube movement, installation, pressure, and valve-hole condition |
| Long split or blowout | Tire bead, casing, sizing, seating, and pressure limits |
First, identify what actually failed
Remove the wheel and tire using the bicycle manufacturer’s instructions. Keep the tire’s orientation relative to the valve so you can map the tube puncture back to the casing and rim.
Park Tool’s tire and tube service guide recommends inflating the removed tube to locate the leak, then inspecting the tire and rim for its cause.
Replace a tire with a cut bead, bulge, exposed casing threads, severe cracking, or structural damage.
1. Debris is still in the tire
A thorn or wire can remain embedded and puncture each new tube. Mark the leak location, align the tube with the tire, and inspect the matching area from both inside and outside.
Run a cloth carefully around the inside of the casing. A snag may reveal a sharp object without putting your fingertip directly on it. Flex the tire to expose fragments hidden in the tread.
Remove the object completely. If it created a large cut or exposed casing cords, replace the tire rather than relying on a tube to hold the structure together.
2. Rim tape, spoke holes, or burrs are cutting the tube
The rim-side surface should be smooth and fully covered where required. Tape that has shifted, split, wrinkled, or sunk into a spoke hole can expose a sharp edge.
Inspect:
- Every spoke hole
- Rim-tape width and alignment
- Valve-hole edges
- Rim seams and dents
- Protruding spoke ends
- Corrosion or metal burrs
Use rim tape of the type and width specified for the wheel. Do not cover a structural rim crack or protruding spoke with household tape and continue riding.
3. Low pressure is causing pinch flats
When a tire compresses fully against the rim, the tube can be pinched in two places. This often leaves the classic paired “snake-bite” cuts.
Inflate within the lower of the tire and rim limits, accounting for rider and cargo weight, tire size, and terrain. A larger-volume tire may be appropriate if the current setup cannot safely support the load and surface.
Low pressure is not the only explanation for paired marks. Confirm that the rim is not damaged and the tire is the correct size.
Use the mountain-bike tire pressure guide to establish a measured starting point for trail tires, then adjust in small steps instead of guessing.
4. The tire, tube, or rim is incompatible or damaged
Check the tire and rim sizing standards, not only the marketing name printed on the sidewall. Similar labels can hide different bead-seat diameters.
Also verify:
- Tube size matches the tire
- Valve type fits the rim hole
- Tire width falls within the rim maker’s range
- The bead sits evenly on both sides
- No part of the tube is trapped under the bead
- The rim is not bent, cracked, or sharply dented
Our guide to bike tire direction covers rotation markings, while the rear tire wobble guide explains how to separate tire seating from rim damage.
5. Installation is pinching or twisting the tube
Add just enough air for the new tube to hold its shape. Insert the valve squarely, place the tube evenly inside the casing, and mount the bead without trapping the tube.
Before inflation, push the tire inward around the entire rim and look for tube material beneath the bead. Inflate gradually while watching the seating line. Stop if a section rises above the rim or the tube begins to escape.
Avoid levering the final bead directly over the tube. If the fit is unusually tight, move both beads into the rim’s center channel to create slack.
What about tubeless tires?
A tubeless system can lose air through a puncture, dried sealant, damaged tape, a leaking valve, a cut casing, or an unseated bead. Do not add sealant repeatedly without inspecting the system.
Use our guides to inflating a tubeless tire and adding tubeless sealant for the correct diagnosis sequence.
Preventing the next flat
- Record the puncture location before discarding the old tube.
- Inspect the matching tire and rim positions.
- Replace damaged structural parts.
- Install the correct tube and tire without pinching.
- Inflate within the tire and rim limits.
- Recheck pressure regularly with a reliable gauge.
Tire liners and sealants have specific use cases, but they do not correct an incompatible tire, sharp rim, damaged casing, or poor installation.
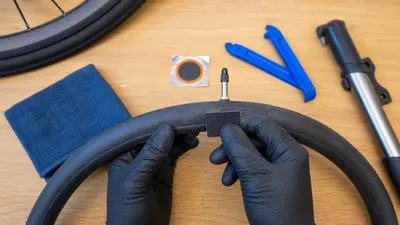
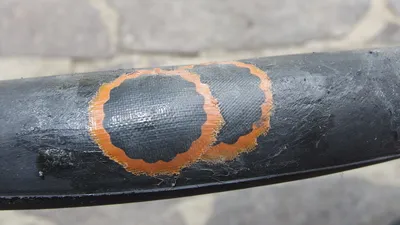
If the tube is patchable, follow the step-by-step tube repair after removing the original cause.
Frequently asked questions
Why does the new tube go flat in the same place?
The original cause probably remains. Match the puncture to the tire and rim, then look for debris, a spoke hole, shifted tape, a burr, or casing damage.
Why are there two holes next to each other?
Paired slits often indicate a pinch flat caused when the tire compressed against the rim. Check pressure, load, tire volume, rim condition, and tube installation.
Can too much pressure pop a bike tube?
Yes. Excess pressure, an unseated bead, incompatible parts, damaged casing, or a trapped tube can cause a blowout. Never exceed the lower stated limit of the tire or rim.
Is it safe to ride after a tire pops?
No. Stop without making an abrupt steering input, then inspect the tire, tube, rim, and wheel before riding again. Replace structurally damaged parts and do not ride on a tire that cannot retain the tube or stay seated on the rim.
Bottom line
Repeated flats are evidence, not bad luck. Locate the hole, map it to the casing and rim, and fix the corresponding debris, tape, pressure, compatibility, or installation problem before fitting another tube.