How to Change a Valve Stem on a Tubeless Tire?
Replace a tubeless bike valve by fully deflating the tire, opening one bead, removing the old stem, inspecting the tape, and installing a compatible valve.
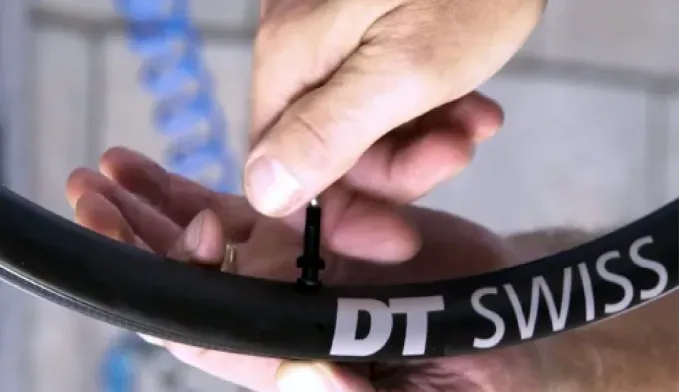
Table of Contents
- Confirm that the valve is the problem
- Choose a compatible replacement
- Tools and supplies
- Step 1: Deflate and control the sealant
- Step 2: Remove the old valve
- Step 3: Inspect the valve hole and tape
- Step 4: Install the new stem
- Step 5: Reinstall the tire and sealant
- Step 6: Inflate and leak-test
- When tightening does not fix the leak
- Frequently asked questions
- Bottom line
To change a tubeless bicycle valve stem, deflate the tire completely, unseat one bead near the valve, remove the retaining nut and old valve, inspect the rim tape and valve hole, then install a compatible replacement with its rubber base seated flat inside the rim.
Do not replace the stem while the tire is pressurized. Wear eye protection, expect liquid sealant, and keep all sealant and oily residue away from brake rotors and pads.
Confirm that the valve is the problem
A leak near the valve can come from:
- A loose or damaged removable core
- Dried sealant inside the core
- A damaged valve body
- A rubber base that does not match the rim bed
- A loose retaining nut
- Torn or lifted rim tape around the valve hole
- A crack or burr in the rim
Use soapy water only if the component makers permit it. Bubbles at the core may require core cleaning or replacement, while bubbles around the valve base can indicate the stem, tape, or rim.
If air escapes through several spoke holes, inspect the entire tape seal rather than tightening the valve harder.
Choose a compatible replacement
Match:
- Presta or Schrader type
- Rim-hole diameter
- Valve length for the rim depth
- Rubber-base shape for the rim bed
- Retaining hardware
- Removable-core and sealant requirements
Stan’s current tubeless Schrader valve, for example, uses a removable core and a molded base intended to seal on many rim shapes. That does not make it compatible with every rim. Follow the rim and valve manufacturers’ fit instructions.
Do not drill a rim to fit a larger valve unless the rim maker explicitly provides that procedure.
Tools and supplies
You may need:
- Compatible replacement valve
- Valve-core tool
- Tire levers approved for the rim
- Clean rags and gloves
- Replacement tubeless rim tape if damaged
- Compatible sealant
- Pump with an accurate gauge
- Torque tool only if the valve maker specifies one
Remove the wheel for safer access if needed. Support it without placing weight on the brake rotor.
Step 1: Deflate and control the sealant
Rotate the valve above the bottom of the wheel. Release all pressure through the valve. If the core is removable, take it out with the correct tool after pressure reaches zero.
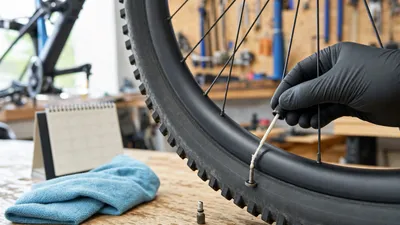
Move the valve away from the lowest point, then push both beads into the rim’s center channel. Open a short section of one bead near the valve and collect liquid sealant.
Dispose of old sealant according to its label and local requirements.
Step 2: Remove the old valve
Unscrew the external retaining nut by hand while holding the valve inside the rim. Remove washers or grommets in their original order.
Push the stem inward and lift it from the rim bed. Do not pull hard against the tape or use the valve body as a lever.
If the nut is seized, protect the rim and use only the method approved by the valve maker. Stop if the stem spins in a way that tears the tape.
Step 3: Inspect the valve hole and tape
Clean the area with products compatible with the rim and tape. Look for:
- Tape that is split, lifted, stretched, or punctured
- Sealant channels under the tape
- A sharp valve-hole edge or metal burr
- Corrosion
- Cracks, dents, or deformation
Replace damaged tape using the wheel maker’s width, overlap, and layer instructions. Do not enlarge a tape hole by cutting a wide X. Many tape makers recommend a small controlled puncture so the valve seals against intact tape.
Have a damaged rim inspected before reuse.
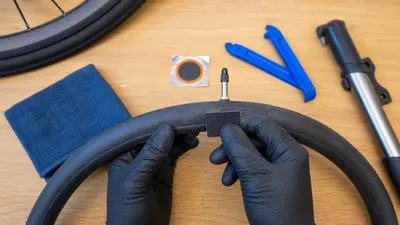
Step 4: Install the new stem
From inside the rim:
- Align the rubber base with the rim bed.
- Push the stem straight through the tape and valve hole.
- Hold the base flat while adding the external hardware.
- Tighten the retaining nut by hand or to the valve maker’s stated procedure.
More force does not always create a better seal. Overtightening can deform the rubber base, damage tape, or make roadside removal difficult.
Do not add an unapproved gasket or sealant under the valve base to compensate for poor fit.
Step 5: Reinstall the tire and sealant
Inspect the bead, then return it to the rim while keeping sealant away from the brake.
Add the quantity specified by the sealant maker. Use our tubeless sealant guide for pour and injection methods.
If injecting through the valve, confirm the core is removable and the sealant particles can pass through the injector and stem.
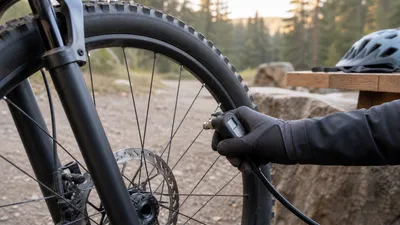
Step 6: Inflate and leak-test
Inflate using the tire and rim instructions, never exceeding the lowest component limit. Watch the bead-seating line around both sides.
Distribute sealant across the tread, sidewalls, beads, and valve area. Then check:
- The core
- The stem body
- The retaining-nut area
- The valve base
- Nearby spoke holes
- Both beads
Our tubeless inflation guide covers controlled airflow and diagnosis when a bead will not seat.
When tightening does not fix the leak
Stop tightening and inspect again if bubbles continue. Likely causes include:
- Incompatible base shape
- Tape damage
- Debris under the rubber base
- A cracked valve
- A loose or clogged core
- Rim damage
Repeatedly adding sealant may temporarily hide the symptom while leaving the air path through the tape or valve unchanged.
Frequently asked questions
Can I replace a tubeless valve without removing the whole tire?
Yes. Usually only a short bead section near the valve must be opened. The tire must still be fully deflated, and you need enough access to inspect the valve base and tape.
How tight should the valve retaining nut be?
Follow the valve maker’s instructions. Many bicycle tubeless valves are secured by hand, but designs vary. Do not use pliers simply to make the nut tighter.
Why does air come out of the spoke holes?
Air at spoke holes generally means the sealed rim cavity is leaking through damaged tape or around the valve. Inspect the tape and valve base before adding pressure.
Bottom line
Depressurize the tire, expose the valve, and treat the tape and rim bed as part of the repair. Install a stem whose length, hole size, and base shape match the rim, then verify the core, base, tape, and beads all remain airtight.
Our tubeless valve-stem guide explains how length, base shape, and tire inserts affect compatibility.