How to Add Sealant to Tubeless Tires? [2 Different Methods]
Add tubeless sealant either through an open tire bead or a removable valve core. Learn how to measure it, avoid contamination, and verify the tire holds air.
Add tubeless sealant by either pouring the measured amount through a partly open tire bead or injecting it through a compatible removable valve core. Use the amount and refresh interval printed by the sealant manufacturer because tire volume and formulas differ.
Deflate the tire completely before opening the bead or removing the valve core. Wear eye protection and keep sealant away from brake rotors, pads, rim-brake tracks, and floors.
If you have not chosen a product, compare the research-based picks in our tubeless sealant guide before opening the system.
Before you add sealant
Confirm that:
- The tire, rim, tape, and valve are tubeless-compatible
- The tire bead and rim are undamaged
- The rim tape is airtight and covers every spoke hole
- The sealant is approved for the tire and rim materials
- You know whether the sealant can pass through an injector and valve
- The sealant is not frozen, clumped beyond recovery, or past its stated shelf life
Do not mix different sealant formulas unless both manufacturers explicitly allow it. If you are changing products, remove the old material and clean the system according to their directions.
Park Tool’s tubeless tire procedure describes both the pour and valve-injection methods.
How much sealant should you use?
Read the container or the manufacturer’s current fit chart. Road, gravel, cross-country, enduro, downhill, and fat-bike tires hold very different volumes. Porous new casings may also need a different initial quantity than a routine top-up.
Too little may leave parts of the casing dry. Too much adds weight, can collect into lumps, and may clog the valve. Measure rather than guessing.
If you cannot determine the tire volume or product amount, contact the sealant or tire maker before proceeding.
Method 1: Pour sealant through the bead
The pour method works with any tubeless valve and with formulas that contain particles too large for an injector.
1. Deflate and unseat a short bead section
Move the valve away from the bottom of the wheel, then release all air. Push both beads toward the rim’s center channel. Use a compatible tire lever only if necessary, and open a short section of one bead.
Keep the rest of the tire mounted. Inspect the exposed bead, tape, and rim bed for damage or dried debris.
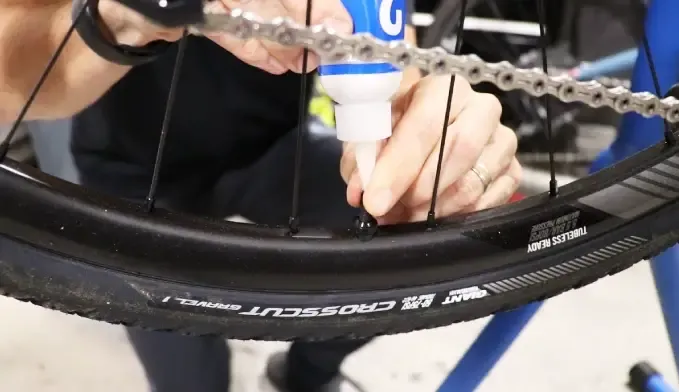
2. Measure and pour
Shake or prepare the sealant exactly as its label directs so the active particles are distributed. Measure the specified amount with a dedicated cup, then pour it into the bottom of the tire.
Do not use the measuring tool for food afterward.
3. Close the bead
Rotate the open section to the top so the liquid stays at the bottom. Reinstall the remaining bead while keeping already mounted sections in the center channel.
Check that the bead is not pinched and the valve base remains flat.
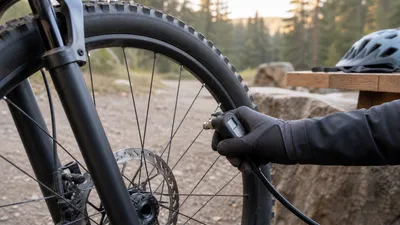
4. Inflate safely
Inflate according to the tire and rim instructions. Never exceed the lower pressure limit of the tire, rim, or tubeless system. Watch the seating line on both sides.
Our guide to inflating a tubeless tire explains floor pumps, boosters, valve-core removal, and leak diagnosis.
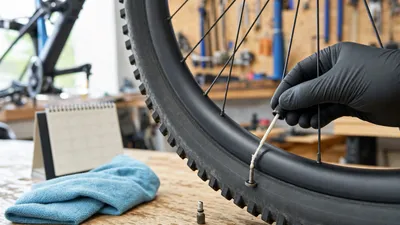
Method 2: Inject through a removable valve core
Injection is convenient for a top-up or a system whose beads are already seated. It requires a removable core and an injector that works with the sealant.
1. Place the valve and deflate
Rotate the valve above the bottom of the wheel and release all pressure. Keep your face away from the valve because residual sealant can spray out.
2. Remove the core
Use a valve-core tool and turn the core counterclockwise. Do not grip the threads with pliers. Place the core on a clean cloth.
Our guide to removing a valve core without the dedicated tool covers emergency options, but a purpose-made tool is the safer choice for routine service.
3. Check the old sealant
If the tire is still mounted, use the sealant maker’s dipstick or inspection method when available. A tire full of dried latex sheets or clumps may need removal and cleaning instead of a blind top-up.
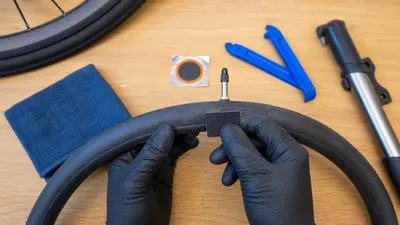
4. Measure and inject
Prepare and measure the product according to its label. Attach the injector firmly and transfer the sealant slowly. Stop if the particles clog the hose or valve; switch to the pour method rather than forcing the tool.
5. Reinstall the core and inflate
Clean the valve opening, thread the core in by hand, and secure it with the correct tool. Do not overtighten the small brass core.
Inflate within all pressure limits and check for leakage at the core and valve base. If the complete stem leaks or is damaged, use our guide to replacing a tubeless valve stem.
Distribute the sealant
Once the beads are seated and the tire holds air:
- Rotate the wheel slowly.
- Shake it gently to move liquid across the tread and sidewalls.
- Hold the wheel horizontally on one side and oscillate it.
- Flip it and repeat.
- Recheck pressure after the product’s stated resting period.
A short ride can help distribute sealant only after the wheel is secure, the bead is even, the tire holds pressure, and the brakes are uncontaminated.
When to refresh tubeless sealant
Follow the product label. Climate, casing porosity, tire volume, puncture history, storage, and formula all affect how quickly sealant dries.
Start with the maintenance framework in how often to add tubeless sealant, then shorten or extend the check interval based on what remains in your exact tire.
Inspect sooner when:
- Pressure loss increases
- No liquid can be heard or detected by the approved check
- The bike has been stored in hot, dry conditions
- The tire sealed several punctures
- The valve begins to clog
Do not assume a tire that holds air still contains enough liquid to seal the next puncture.
Common mistakes
- Adding an unmeasured amount
- Mixing incompatible formulas
- Opening a pressurized tire
- Forcing particulate sealant through a narrow injector
- Overtightening the valve core
- Letting sealant reach braking surfaces
- Inflating past the rim or tire limit
- Using more sealant to hide damaged tape, a bad valve, or a cut casing
Frequently asked questions
Can I add sealant without removing the tire?
Yes, if the valve has a removable core and the sealant is compatible with injection. Otherwise, open a short bead section and use the pour method.
Can I add new sealant on top of old sealant?
Only if the product maker permits it and the old material is compatible and in serviceable condition. Dried sheets, large clumps, contamination, or a formula change may require cleaning first.
Why is sealant coming out of the valve?
The valve may be positioned at the bottom, the core may be loose or clogged, the system may contain too much sealant, or the valve base may be damaged. Deflate fully before inspecting.
Does tubeless sealant replace tire pressure?
No. Sealant closes small leaks. It does not inflate the tire or remove the need to check pressure.
Bottom line
Measure the product-specific amount and add it through an open bead or compatible removable core. Keep the system depressurized while open, protect the brakes, distribute the liquid thoroughly, and repair tape, valve, bead, or casing defects instead of masking them with extra sealant.