How to Use Your Phone as a Bike Computer
Turn an iPhone or Android phone into a bike computer for ride recording and navigation, including offline use, battery settings, mounts, and sensors.
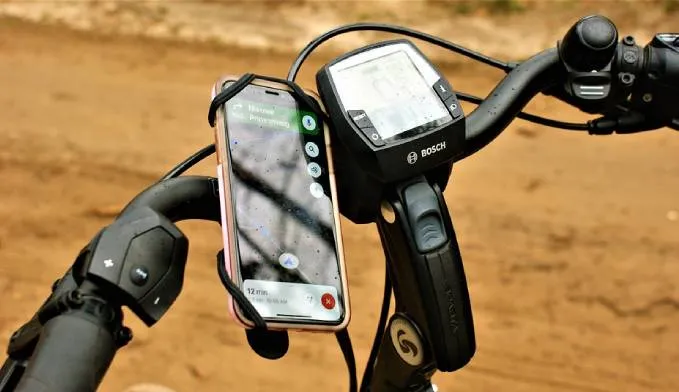
Table of Contents
- What a phone can and cannot do
- Step 1: Choose the job and the app
- Step 2: Use a secure, compatible mount
- Step 3: Set location permissions correctly
- Step 4: Download the route before leaving
- Step 5: Configure the ride screen
- Step 6: Pair sensors only when they add value
- How to make the battery last
- Protect the phone from weather and crashes
- Phone versus a dedicated bike computer
- Frequently asked questions
Yes, you can use an iPhone or Android phone as a bike computer. A phone can record a ride, show speed and distance, provide turn-by-turn directions, and connect to some Bluetooth sensors. You need a secure mount, a cycling app, the correct location permissions, and a battery plan.
An old phone can work, too. It does not necessarily need an active cellular plan: download the app, route, and offline maps over Wi-Fi before the ride, then upload the activity when you reconnect. Ride with GPS specifically documents this workflow for phones without data plans.
What a phone can and cannot do
A phone is a practical bike computer when you mainly want:
- GPS ride recording
- Current and average speed
- Distance, moving time, and elevation estimates
- A map or planned route
- Audio or on-screen turn prompts
- Ride history and sharing
It is less suitable when you need an all-day battery, physical buttons in rain or winter gloves, a small crash-resistant device, or broad support for ANT+ sensors. A dedicated cycling computer is also easier to leave mounted during long events and multi-day tours.
Phone GPS is good enough for navigation and ordinary ride logs, but the displayed speed and distance can vary with signal quality and the app’s processing. For precise training data, use compatible wheel-speed, cadence, heart-rate, or power sensors rather than assuming GPS alone is exact.
Step 1: Choose the job and the app
Start with what you need the phone to do. Installing several apps and running them together can add battery drain and duplicate activities.
Simple ride recording
Strava is a straightforward choice when your priority is recording and reviewing rides. Its current mobile recorder can show a map and ride statistics, load a saved route, provide off-route alerts, and pair with a Bluetooth Low Energy heart-rate sensor. See Strava’s recording instructions for the current controls and requirements.
Route planning and voice navigation
Ride with GPS and komoot are stronger starting points when navigation is the main goal. Both support downloaded routes for use without a cellular connection, although offline features can depend on the app and subscription level.
- Ride with GPS offline routes include downloaded directions and maps.
- Komoot offline navigation requires you to download the route or region before disconnecting.
Offline navigation is not identical to online navigation. Komoot notes that it cannot calculate a new route while offline if you leave the planned course. Test the exact app and route before relying on it in an unfamiliar area.
Step 2: Use a secure, compatible mount
Choose a mount designed for your phone’s dimensions, case, handlebar diameter, and riding surface. A secure mount should:
- Hold the phone on all sides or use a positive locking interface
- Prevent the phone from rotating into the brake or shift controls
- Keep buttons and the charging port accessible
- Leave enough room for normal steering and cable movement
- Include a retention tether when the mount supports one
Install the mount according to its manufacturer instructions. Tighten it only to the stated torque or hand-tightening guidance; overtightening can damage a lightweight handlebar or the mount itself.
Before the first ride, put the phone in the mount and firmly shake and turn the handlebar while the bike is stationary. Then test it on a short, low-speed ride. Stop before adjusting the phone. Do not tap, type, or reposition it while moving.
Repeated high-frequency vibration can be hard on a phone’s camera stabilization hardware. Riders using a phone on rough gravel, trails, or a motorized bicycle should consider a mount with vibration isolation and keep the phone protected from direct impacts.
Step 3: Set location permissions correctly
The recording app needs access to the phone’s location while a ride is in progress. The exact wording varies by operating-system version, but the useful checklist is consistent:
- Turn on Location Services or Location.
- Allow the cycling app to use precise location.
- Allow the app to continue tracking when the screen is locked, if the app requires it.
- Exempt the app from settings that put it to sleep during a ride.
- Confirm the app shows a strong GPS fix before pressing start.
Do a short test with the screen locked. Afterward, verify that the map contains the entire route rather than a straight line or a large missing section. A battery-saving setting that suspends the app is a common cause of incomplete recordings.
Step 4: Download the route before leaving
If you plan to ride outside reliable coverage, prepare the phone on Wi-Fi:
- Save the planned route in your chosen app.
- Download the route and its map for offline use.
- Open the downloaded route once while still online.
- Switch off Wi-Fi and mobile data, then confirm that the map still loads.
- Pack a second navigation option for remote rides.
GPS positioning does not itself require a cellular plan, but live tracking, new route calculations, traffic information, messages, and emergency calls may require a network connection. A phone without service should not be treated as your only way to call for help.
Step 5: Configure the ride screen
Keep the display simple enough to read with a quick glance. Useful fields include:
- Current speed
- Distance
- Elapsed or moving time
- Next navigation instruction
- Heart rate or cadence, if a sensor is connected
Large type and high contrast matter more than fitting every metric on one screen. Position the phone so the display is visible without lowering your head for long. If you need to inspect the map or change a setting, pull over safely first.
An always-on screen is convenient but consumes much more power. Strava currently offers a display setting that can prevent the screen from turning off during recording. Use it only when the ride length, phone temperature, and battery capacity make that reasonable.
Step 6: Pair sensors only when they add value
Sensor support depends on both the phone and the app. Most current phones can connect to compatible Bluetooth Low Energy sensors. ANT+ support is less consistent and may require additional hardware.
Pair the sensor inside the cycling app when the app instructs you to do so. Pairing only in the phone’s general Bluetooth menu does not always make the sensor available to the app.
A Garmin watch does not automatically send every live metric to every phone app. Some Garmin wearables can broadcast heart rate, but the receiving app must support the broadcast protocol and the watch model must support the feature. In many setups, the simpler workflow is to record on the watch and sync the finished activity rather than using the watch as a live sensor for the phone.
Test the complete setup before an important ride:
- Wake the sensor or start broadcasting from the wearable.
- Connect it in the cycling app.
- Confirm live values appear.
- Lock the phone for several minutes.
- Reopen the app and confirm the connection and recording continued.
How to make the battery last
The display is usually the largest avoidable drain. Ride with GPS recommends keeping the screen off as much as possible and using voice prompts where practical. Its battery-saving guide also recommends downloading maps first and using airplane mode when a connection is not required.
For longer runtime:
- Start with a fully charged, healthy battery.
- Download maps and routes over Wi-Fi.
- Reduce screen brightness.
- Let the screen sleep between navigation prompts.
- Turn off unneeded background apps and live-sharing features.
- Use airplane mode only after confirming GPS and downloaded navigation still work.
- Carry a weather-protected power bank and short cable for long rides.
Extreme heat and cold reduce battery performance. Direct summer sun can also make a mounted phone dim its display or shut down temporarily. Shade the phone when stopped and avoid charging an overheated device.
Protect the phone from weather and crashes
A water-resistant phone is not the same as a weatherproof handlebar setup. Rain can trigger false touches, obscure the screen, enter a damaged charging port, or exceed the phone’s protection over time.
Use a case or cover rated for the conditions, but check that it does not trap excessive heat. Secure cables so they cannot reach the wheel, brake rotor, or steering. Keep emergency identification and route details available somewhere other than the mounted phone in case the device breaks or its battery dies.
Phone versus a dedicated bike computer
Use a phone when you already own a suitable device, rides are moderate in length, and you value a large map and familiar apps. It is an economical way to learn which cycling metrics and navigation features you actually use.
Consider a dedicated computer when:
- You regularly ride for many hours
- You ride in heavy rain, cold, or rough terrain
- You need reliable physical controls
- You use several training sensors
- You want navigation without risking your primary phone
- You need the phone free for communication and photos
If navigation is your main requirement, also compare the phone setup with a GPS cycling computer with maps. For shorter everyday rides, a well-mounted phone can be all the computer you need.
For longer trips, combine offline navigation with the route and backup planning in our bikepacking guide. Riders who already record with a watch can also compare the current Garmin options.
Frequently asked questions
Can an old iPhone work without a service plan?
Yes, if the phone still supports a suitable app and has working GPS and battery hardware. Download the app, route, and offline maps over Wi-Fi. Ride with GPS explicitly supports downloading on Wi-Fi and uploading later for phones without data plans. You will not have cellular live tracking or dependable emergency calling without service.
Does the screen need to stay on?
No. Many apps continue recording with the screen locked when location and background permissions are correct. Voice prompts can provide navigation while saving battery. Run a locked-screen test before a long ride.
Can a phone show live data from a Garmin watch?
Sometimes, but compatibility is model- and app-specific. The watch must be able to broadcast the desired data, usually heart rate, and the phone app must accept that broadcast. Recording on the watch and syncing afterward is often more reliable.
Will airplane mode stop GPS recording?
Airplane mode can still allow GPS recording on many phones, and both Ride with GPS and komoot document offline workflows. Download everything first, keep location enabled, and test your specific phone and app before relying on it.
Is a power bank safe to use while riding?
It can extend runtime if it is mounted securely and protected from weather. Route the cable so it cannot snag or interfere with steering, brakes, or wheels. Stop the bike before connecting or adjusting it.