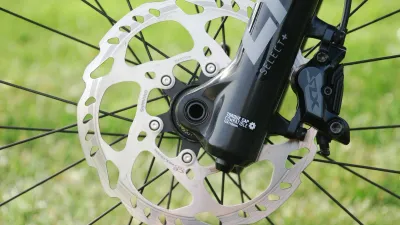
How To Change A Rear Bike Tire With Disc Brakes?
Change a rear bike tire with disc brakes: shift to the smallest cog, remove the wheel without squeezing the brake, replace the tire, then secure the axle.
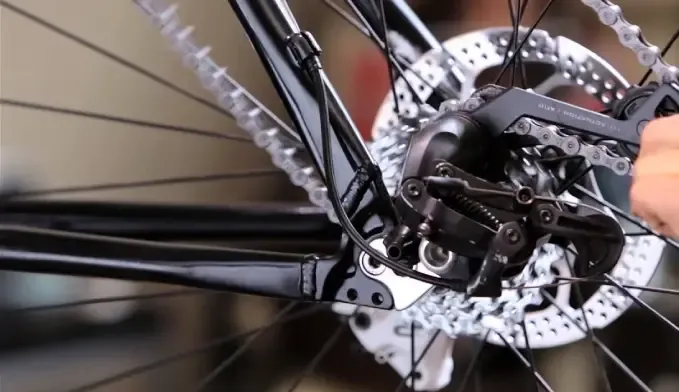
Table of Contents
- Identify the axle and tire system
- Tools and preparation
- Step 1: Shift and prepare the drivetrain
- Step 2: Release the axle
- Step 3: Remove the rear wheel
- Step 4: Remove the tire or tube
- Step 5: Install the replacement
- Step 6: Reinstall the wheel
- Step 7: Final safety checks
- Frequently asked questions
- Bottom line
To change a rear bike tire with disc brakes, shift onto the smallest rear cog, remove the axle according to its manual, pull the derailleur back, guide the rotor out of the caliper, replace the tire or tube, then reinstall the wheel with the rotor between the pads and the axle fully secured.
Do not squeeze a hydraulic brake lever while the rotor is out of the caliper. The pistons can advance and close the pad gap. Keep grease, oil, sealant, and dirty hands away from the rotor and pads.
Identify the axle and tire system
Rear wheels commonly use:
- A thru axle
- A quick-release skewer
- Solid axles with nuts
The bicycle, frame, hub, and axle instructions determine removal, closing force, and torque. Do not copy a torque value from another bike.
Also identify whether the tire uses an inner tube or is tubeless. A tubeless system contains liquid sealant and requires compatible tape, valve, tire, and rim.
Tools and preparation
You may need:
- Correct thru-axle handle, hex tool, or axle-nut wrench
- Tire levers compatible with the rim
- Pump with an accurate gauge
- Replacement tube, tire, patch, or tubeless supplies
- Gloves and clean rags
- A clean brake-pad spacer for a hydraulic caliper
- Torque wrench where specified
Work away from traffic on a stable surface. If no repair stand is available, Park Tool’s wheel removal guide advises laying a bike on its left side rather than standing it upright on the rear derailleur with the wheel removed.
Step 1: Shift and prepare the drivetrain
Shift the rear derailleur onto the smallest rear cog. On a multi-chainring bike, use the small front ring for more chain slack.
If the derailleur has a clutch, follow its maker’s wheel-removal procedure. Some Shimano units have an on/off lever; some SRAM designs have a cage lock. Do not force the cage.
Turn off an e-bike and remove its battery if the manufacturer instructs you to do so.
Step 2: Release the axle
Support the wheel before releasing it.
- Thru axle: Open or engage its handle or tool, then unthread and withdraw it according to the manual.
- Quick release: Open the lever. Loosen the adjusting nut only enough to clear the dropout system.
- Solid axle: Loosen both axle nuts with the correct wrench while noting any washers or retention hardware.
A quick-release lever is a cam, not a wing nut. It must be adjusted and closed through its full range during installation.
Step 3: Remove the rear wheel
Pull the derailleur body or cage backward as the bicycle manual permits. Lower the wheel so the smallest cog clears the chain.
Guide the brake rotor straight out from between the pads. Do not bend it sideways or rest the wheel on the rotor. Insert a clean transport spacer between hydraulic pads if recommended.
Never pull the brake lever with the wheel removed.
Step 4: Remove the tire or tube
Deflate the tire fully. Push both beads into the rim’s center channel, starting opposite the valve.
For a tubed setup:
- Lift one bead over the rim.
- Remove the tube, beginning opposite the valve.
- Inspect the puncture and map it to the tire and rim.
- Remove debris and inspect rim tape.
For tubeless:
- Keep the valve away from the lowest point before opening the bead.
- Expect liquid sealant.
- Collect and dispose of old sealant according to its label.
- Inspect the bead, tape, valve, and casing.
Our guide to repeated bike flats explains how puncture shape reveals the cause.
Step 5: Install the replacement
Confirm tire and rim compatibility, rotation direction, and pressure limits.
Install the first bead. For a tube, add enough air to give it shape, place the valve squarely, and tuck the tube evenly inside the tire. Install the second bead while keeping the mounted sections in the center channel.
Check both sides for trapped tube material or an uneven bead. Inflate gradually and remain below the lower limit of the tire and rim. A tubeless setup should follow the component and sealant instructions in our tubeless inflation guide.
Step 6: Reinstall the wheel
Remove the pad spacer without touching braking surfaces. Pull the derailleur back, place the chain on the smallest cog, and guide the rotor cleanly between the brake pads.
Seat the axle fully in both dropouts. Then secure it:
- Tighten a thru axle to its specified procedure and torque.
- Adjust and close a quick release with the required cam resistance.
- Tighten solid axle nuts evenly to the manufacturer’s torque.
Park Tool emphasizes that a disc brake applies loads at the hub, making correct axle or skewer security especially important.
Step 7: Final safety checks
Before riding:
- Confirm the axle is fully seated and secure.
- Spin the wheel and check it is centered.
- Verify the rotor passes between the pads without severe contact.
- Squeeze the rear brake repeatedly until it feels firm.
- Check tire pressure and the bead seating line.
- Shift through the rear gears while the bike is safely supported.
- Look for chain, tire, rotor, or frame contact.
During that brake check, use the bike brake-pad wear inspection guide if either pad looks thin, uneven, damaged, or contaminated; symptoms alone do not identify the fault.
If the hydraulic lever pulls to the bar, the rotor is bent, the wheel shifts, or the axle will not secure, do not ride. Have the system inspected.
Frequently asked questions
Do I need to open disc brake pads to remove the wheel?
No. A normal disc-brake wheel should guide out with the rotor passing between the pads. Do not pry pads apart unless the brake manufacturer’s procedure requires piston reset.
What if I squeezed the brake with the wheel out?
Do not force the rotor back between closed pads. Use the brake manufacturer’s piston-reset procedure and a purpose-built, clean spreader, or have a mechanic correct it.
Why does the disc rub after reinstalling the wheel?
The axle may not be fully seated, the quick release may be adjusted differently, the rotor may be bent, or the caliper may need alignment. Verify wheel installation before adjusting the brake.
Bottom line
Protect the disc brake from contamination, never squeeze a hydraulic lever without the rotor or spacer in place, and treat axle installation as the safety-critical final step. Test wheel security, tire seating, shifting, and braking before the next ride.
For the matching front-wheel precautions, see our disc-brake front-wheel guide.