
How to Protect a Bike From Road Salt
Remove road salt with a gentle rinse, dry the bike, relube the chain, and inspect corrosion without contaminating brakes or electrical parts.

Table of Contents
- Why road salt causes bicycle corrosion
- Step 1: Rinse salt off after the ride
- Step 2: Wash without spreading contamination
- Step 3: Dry every place salt can hide
- Step 4: Clean and relubricate the chain
- Step 5: Protect approved non-friction surfaces
- Inspect common salt traps
- Protect the brakes by keeping them clean
- E-bike and electronic precautions
- How often should you repeat the routine?
- Product selection
- Frequently asked questions
- Bottom line
- Sources
To protect a bike from road salt, rinse salt away with fresh water soon after a salty ride, wash with a bicycle-safe cleaner, dry the frame and components thoroughly, relubricate the chain, and inspect chips, bolts, cables, brakes, and connectors. Store the bike indoors or in a dry covered space when possible. Keep protectant, oil, grease, and cleaner off brake pads, rotors, rims, tires, and electrical contacts.
Salt is most damaging when it remains in a wet film. Tern explains that salt and moisture together speed oxidation and recommends a regular fresh-water cleaning routine, thorough drying, approved protective spray where appropriate, touch-up paint for chipped paint, indoor storage, and regular service (Tern Bicycles, “How to Prevent Salt Corrosion on Your Bike”, retrieved September 1, 2026). The steps below apply that principle to a bicycle without assuming every finish, component, or coating reacts the same way.
Key Takeaways
- Remove visible salt and spray as soon as practical after a treated-road ride.
- Use fresh water and gentle pressure, then dry the bicycle instead of trapping moisture under a cover.
- Clean and relubricate the chain separately from brake and tire surfaces.
- Apply a protective product only where the maker allows it, preferably to a rag rather than directly at the bicycle.
- Treat brake contamination, deep corrosion, loose hardware, damaged cables, and battery damage as service issues.
Why road salt causes bicycle corrosion
Road salt is not only a cosmetic nuisance. Tern describes salt corrosion as metal degradation caused by salt and moisture, with oxidation progressing more quickly when the two remain together. Steel and aluminum are common bicycle metals, and the guidance recommends paying attention to reddish-brown spots and repeated corrosion across several areas (Tern, “How to Prevent Salt Corrosion on Your Bike”, retrieved September 1, 2026).
The risk depends on exposure, finish, material, storage, and how long the residue stays wet. A small mark on one bolt may be surface corrosion, but multiple spots around the drivetrain, fasteners, rack, cables, or frame deserve closer inspection. Do not scrape aggressively or sand a structural part based only on a photo. Ask a qualified bicycle mechanic to evaluate cracks, severe pitting, seized parts, or corrosion at a joint.
Step 1: Rinse salt off after the ride
Move the bicycle to a place where water and runoff are safe. Remove bags and loose accessories so you can reach the fork, stays, chainstays, rack mounts, axles, fender hardware, and lower frame. If the bike has a removable e-bike battery, follow its manual before cleaning and keep the battery and charger away from water.
Use fresh water and gentle pressure to soften and remove road spray. Work from the top of the bicycle downward. Rinse the frame, fork, wheels, fenders, drivetrain exterior, rack hardware, and accessible cable stops. Do not aim a pressure washer or concentrated hose stream at hubs, headsets, bottom brackets, suspension seals, brake interfaces, battery connectors, or other seals and bearings.
Trek’s winter maintenance guidance recommends a rinse after winter riding and cautions riders to use gentle water pressure around bushings, seals, and bearings (Trek, “Winter wrenching: maintain your ride for happy trail days ahead”, retrieved September 1, 2026). If the salt has dried into a crust, let water loosen it before brushing instead of grinding crystals into the finish.
Step 2: Wash without spreading contamination
Use a bicycle-safe wash or mild soap solution on non-friction surfaces. A soft brush can reach the fork crown, chainstay, cassette, chainrings, derailleur, fender stays, rack mounts, and the underside of the frame. Rinse the brush frequently so it does not carry salty grit back over clean paint.
Keep a separate cloth and brush for the braking area. Brake pads, disc rotors, and rim braking surfaces must remain free of oily cleaner, protectant, grease, and chain lube. Do not wash the chain with a brush that you then use on the brake rotor. If a rotor or pad has been contaminated, stop and follow the brake maker’s cleaning or replacement instructions.
For a dirty chain, use a purpose-made bicycle degreaser according to its label and the drivetrain maker’s instructions. Park Tool says not to use highly flammable liquids such as gasoline, kerosene, or diesel as cleaning solvents and recommends a purpose-made degreasing solvent (Park Tool, “The Park Tool Guide to Bicycle Lubricants and Compounds”, retrieved September 1, 2026). The bike chain cleaning guide explains why a household shortcut can create a new problem.
Step 3: Dry every place salt can hide
Wipe the frame, fork, wheels, drivetrain, rack, fenders, cable stops, bolts, and accessible crevices with clean rags. Turn the cranks slowly while holding a dry cloth around the chain. Open or remove bags and covers so trapped water can evaporate. Let the bicycle air-dry in a ventilated area before applying lube or putting it away.
Do not use compressed air to force water into bearings, seals, or connectors. Do not apply a heat gun or direct high heat to paint, tires, hydraulic hoses, batteries, or electronic parts. If a connector remains wet, follow the maker’s drying instructions. A bike that looks dry on the top tube can still hold salty water around a bottom bracket, axle, fender bolt, or cable stop.
Never put a wet bicycle under an airtight cover. If outdoor storage is unavoidable, use the best dry, sheltered location available and allow air movement around the bicycle. Indoor storage is preferable when practical, as Tern recommends.
Step 4: Clean and relubricate the chain
Salt and wet grit can strip or dilute chain lubricant. After the chain is clean and dry enough for the product to work, apply bicycle chain lube to the rollers or as the lube maker directs. Turn the cranks to distribute it, allow time for it to reach the links, and wipe off surface excess with a clean rag.
Park Tool describes wet lube as a higher-viscosity option for humid or rainy climates and notes that chains need regular cleaning and relubrication because rain and puddles can wash lube away (Park Tool, “The Park Tool Guide to Bicycle Lubricants and Compounds”, retrieved September 1, 2026). The chain lubrication guide can help select a category for the rider’s conditions. Do not use a general penetrating oil as the regular chain-lube plan just because it displaces water.
Wipe excess from the chain, cassette, chainrings, jockey wheels, and nearby frame surfaces. Do not spray lubricant at the drivetrain and hope it reaches only the chain. Overspray can contaminate the brakes or tire tread. If the chain is rusty, stiff, or measures beyond the maker’s wear limit, clean-up alone may not make it safe to ride. Use the chain-wear guide and replace or service it when the inspection calls for it.
Step 5: Protect approved non-friction surfaces
A protective spray or wax may help a clean, dry frame or hardware, but it is not universal armor. Read the bicycle, frame-finish, and component instructions first. Tern lists approved protective spray as one possible prevention step and recommends touching up chipped paint to limit further corrosion (Tern, “How to Prevent Salt Corrosion on Your Bike”, retrieved September 1, 2026).
Apply an approved product to a rag and wipe the intended non-friction surface. This gives you better control near the head tube, fork, stays, rack, and fasteners. Keep it away from brake pads, rotors, rims, tires, grips, saddle material, suspension seals, and connectors unless the maker explicitly permits that use. Wipe away any accidental overspray before riding.
Paint chips should be cleaned, dried, and treated with a finish-compatible touch-up product according to its instructions. Do not fill a crack or deep gouge with paint and treat it as repaired. Paint hides surface appearance; it does not restore a damaged tube, fork, rack weld, or fastener.
Inspect common salt traps
After washing, use a bright light and check:
- lower frame tubes, chainstays, and seatstays;
- fork crown, dropouts, and axle interfaces;
- rack, fender, bottle-cage, and kickstand bolts;
- chain, cassette, chainrings, derailleur, and cable ends;
- brake calipers, pads, rotors, and rim surfaces;
- spokes, nipples, hubs, headset, and bottom-bracket area;
- suspension stanchions and seals when the bicycle has suspension;
- e-bike battery contacts, charging port cover, wiring, and connector seals.
Look for reddish-brown residue, white or powdery deposits, flaking finish, pitting, seized bolts, frayed cables, new play, leaks, or a component that no longer moves normally. A single superficial spot may be manageable after cleaning and monitoring. Multiple spots, deep pits, a cracked part, seized hardware, or corrosion near a brake, axle, steering part, or frame joint warrants professional inspection.
Protect the brakes by keeping them clean
Brake friction surfaces should be the cleanest parts of the bike. Do not put a corrosion protectant on a rotor or rim, and do not wipe a chain rag over a pad. Check that the brake lever feels normal, the pads meet the correct surface, and the wheel stops without a new scrape, vibration, or pull.
If salt has dried on the rotor, use only the cleaner and procedure the brake maker permits. If a pad absorbed oil or protectant, cleaning may not restore it. The bike brake-pad wear guide can help with inspection, but a contaminated or damaged brake is a stop-and-service condition.
E-bike and electronic precautions
Treat an e-bike battery and connector as system-specific parts. Remove a battery for cleaning only when the bicycle and battery manuals direct you to do so. Keep the charge port closed, do not pressure-wash contacts, and do not open a battery case to investigate corrosion.
If the battery, charger, connector, or wiring is cracked, swollen, punctured, unusually hot, wet beyond its rating, or producing an unusual odor, stop using it and contact the maker or a qualified service provider. Do not charge a damaged battery to see whether it still works. REI recommends storing removable batteries indoors in cold conditions and following the maker’s instructions for long-term storage (REI, “Intro to Electric Bike Maintenance”, retrieved September 1, 2026).
How often should you repeat the routine?
Repeat the rinse and dry routine whenever the bike comes home with visible salt or wet road spray. REI recommends wiping or cleaning the chain and other bike parts after especially grimy rides, at least weekly when riding regularly, and doing a more thorough clean and lube every few weeks (REI, “Biking in Winter: Gearing Up”, retrieved September 1, 2026). Those are starting points, not permission to leave a visibly salty bike until the next scheduled day.
Shorten the interval for coastal air, treated roads, slush, wet storage, or repeated commutes. If the bike is only ridden occasionally, inspect it before each ride because residue can sit unnoticed between outings. The winter maintenance pillar gives the broader pre-ride and component checklist.
Product selection
These are concrete examples of the consumable categories discussed above. Bright Data verified each exact Amazon listing title, ASIN, brand, and selected listed fields on September 2, 2026. This is research-based product selection, not hands-on testing. The cards are also not corrosion testing or a hands-on use report. Confirm the maker’s directions and keep every product away from brake friction surfaces.
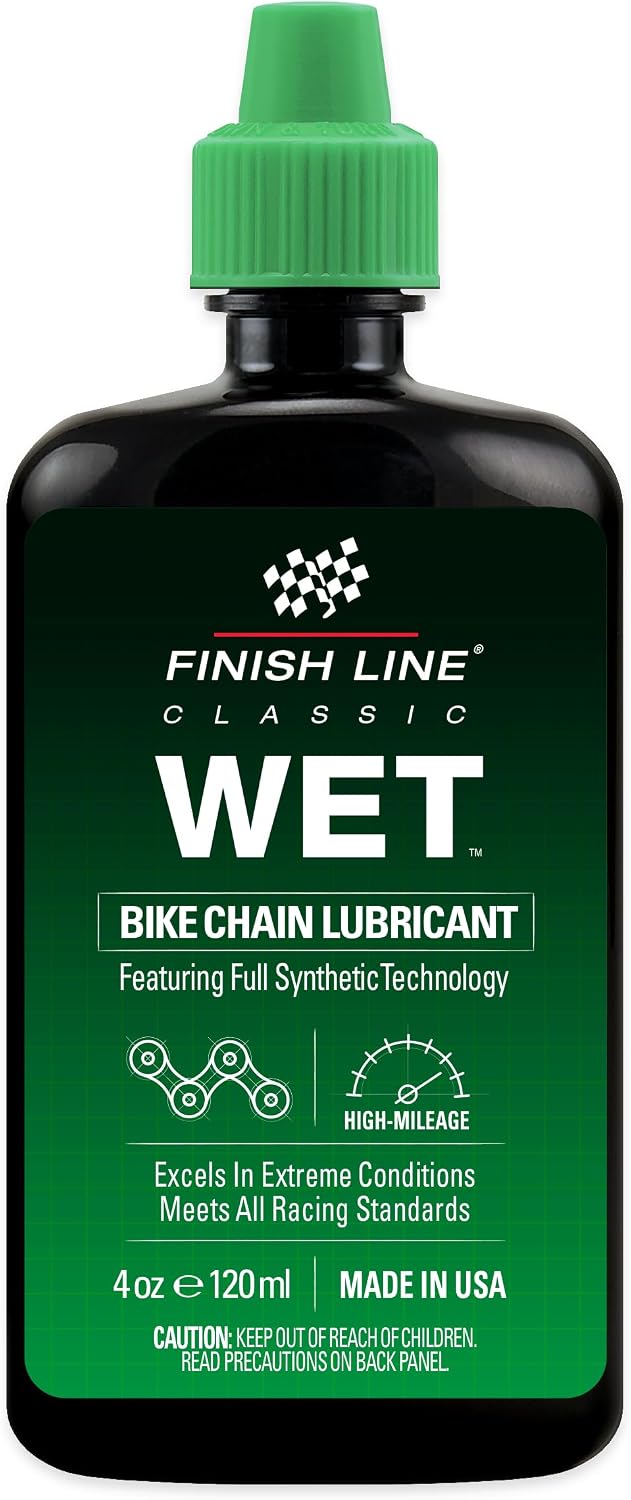
Wet-chain lube example
Finish Line Wet Bike Chain Lubricant 4 fl oz
A practical category example after salt and moisture have been removed from the chain.
Bright Data verified the Finish Line title, ASIN, wet-style type, volume, and listed bicycle uses.
Best for: A clean, dry chain that regularly sees wet road spray
- Type
- Wet-style bicycle chain lubricant
- Volume
- 4 fluid ounces listed
- Listed uses
- Chains, cables, and freewheels
Trade-off: It can attract grit when over-applied, and it must never reach brake pads, rotors, rims, or tires.
Check price on AmazonWet-condition lube alternative
Muc-Off chain oil Wet Lube 125ml
A second research example for matching a wet-weather product to the maker's application guidance.
Bright Data verified the Muc-Off title, ASIN, 120-milliliter volume, wet-lube description, and model detail.
Best for: Riders comparing a wet-weather chain-lube category
- Format
- Wet bicycle chain lube
- Volume
- 120 milliliters listed
- Model
- 967US listed
Trade-off: A wet lube still requires a clean chain, careful application, and an excess-wipe step.
Check price on AmazonFrequently asked questions
Does rinsing a bike make corrosion worse?
Leaving the bike wet can make the problem worse, but fresh water removes salt when used gently and followed by thorough drying. Avoid pressure at bearings, seals, brake interfaces, and connectors. Do not cover or store the bicycle while it is still wet.
Can I use WD-40 to protect a bike from road salt?
Use only a product that the component or frame maker permits for the intended surface. A general penetrating oil is not a substitute for regular chain lubricant, and any overspray near brake pads, rotors, rims, tires, or connectors creates a new risk. Apply approved protectant to a rag when practical.
Should I spray the chain after every salty ride?
Clean and dry the chain first, then use a bicycle chain lube suited to the conditions and wipe away excess. Spraying a dirty chain can hold grit against the drivetrain, and spraying a general protectant can contaminate the brakes.
Can road salt damage an aluminum bike?
Salt and moisture can contribute to corrosion on common bicycle metals, including aluminum, according to Tern. The visible result and structural significance depend on the part, finish, exposure, and depth. Ask a qualified mechanic to assess pitting, cracks, seized hardware, or corrosion at a frame or steering joint.
How should I protect a bike stored outside in winter?
Indoor storage is preferable. If outdoor storage is unavoidable, choose the driest sheltered location, rinse and dry the bike before covering it, use a cover that does not trap wetness, and inspect it regularly. A rack or cover must not interfere with wheels, brakes, tires, or frame parts.
Bottom line
Road-salt protection is mostly prompt removal and careful drying. Rinse with fresh water, wash without spreading grit, dry every accessible surface, relube the chain, protect only approved non-friction areas, and inspect before riding. When the bike is going away for the season, follow the winter storage guide. Stop for brake contamination, battery damage, deep corrosion, loose hardware, or any part that affects steering, braking, or wheel retention.
Sources
- Tern Bicycles, “How to Prevent Salt Corrosion on Your Bike,” retrieved September 1, 2026, https://www.ternbicycles.com/pl/support/kb/348683/how-prevent-salt-corrosion-your-bike
- Trek Bikes, “Winter wrenching: maintain your ride for happy trail days ahead,” retrieved September 1, 2026, https://blog.trekbikes.com/en/2021/09/17/winter-wrenching-maintain-your-ride-for-happy-trail-days-ahead/
- Park Tool, “The Park Tool Guide to Bicycle Lubricants and Compounds,” retrieved September 1, 2026, https://www.parktool.com/en-int/blog/repair-help/the-park-tool-guide-to-bicycle-lubricants-and-compounds
- REI, “Intro to Electric Bike Maintenance,” retrieved September 1, 2026, https://www.rei.com/learn/expert-advice/intro-to-electric-bike-maintenance.html
- REI, “Biking in Winter: Gearing Up,” retrieved September 1, 2026, https://www.rei.com/learn/expert-advice/winter-bicycling.html
