
Winter Bike Maintenance: Salt, Wet Lube, Brakes, and Tires
Keep a bike ready through wet, cold weather with a practical winter maintenance routine for cleaning, chain lube, brakes, tires, salt, and storage.

Table of Contents
- Decide whether you are riding or storing
- Build a simple winter maintenance kit
- Before every winter ride
- Clean the bike after a wet or salty ride
- Clean and lubricate the chain
- Protect the frame and hardware from salt
- Winter drivetrain, brake, and bearing service
- Tires and pressure in cold weather
- E-bike winter maintenance
- A practical winter schedule
- Product selection
- Frequently asked questions
- Bottom line
- Sources
Winter bike maintenance is a loop: check the bike before a ride, remove wet grit and salt afterward, dry it, lubricate the drivetrain with a product suited to the conditions, and inspect brakes, tires, fasteners, cables, and lights. If you are storing the bike instead of riding, clean and dry it first, then follow the separate storage and battery instructions.
Winter does not require a special bicycle, but it does shorten the time between cleanups when roads are wet, muddy, or salted. REI recommends cleaning and lubricating after especially grimy rides, cleaning at least weekly for regular winter riders, and doing a more thorough clean and lube every few weeks (REI, “Biking in Winter: Gearing Up”, retrieved September 1, 2026). Use those intervals as a starting point and shorten them when the bike comes home visibly dirty.
Key Takeaways
- Inspect tires, brakes, wheels, controls, and lights before every winter ride.
- Use gentle water pressure, bicycle-safe cleaner, clean rags, and a drying step after wet or salty rides.
- Wet lube generally suits wet conditions, but excess lube attracts grit and should be wiped away.
- Keep spray, grease, and cleaner away from brake pads, rotors, rims, and other friction surfaces.
- Store the bicycle indoors or in a covered dry place when possible, and handle a removable e-bike battery according to its manual.
Decide whether you are riding or storing
The first maintenance decision is whether the bicycle will face winter weather or wait indoors until spring. A bike ridden through rain and road spray needs frequent cleaning, chain care, brake checks, and tire checks. A stored bike needs a complete clean and dry, a protected drivetrain, a stable storage position, and an occasional inspection so a small issue does not sit unnoticed.
Do not use the storage routine as a substitute for post-ride cleaning. Salt and wet grit can remain in the chain, cable stops, brake hardware, axles, and frame joints after the ride. Conversely, do not apply a thick layer of oil to a bike that will sit dirty. Clean surfaces first, then use only the preparation the component maker allows.
The separate winter bike storage guide covers the long-term path. The road-salt protection guide focuses on bikes that keep going through treated roads.
Build a simple winter maintenance kit
You do not need every workshop tool to maintain a winter commuter or trail bike. Start with clean rags, a soft brush set, a bucket, mild bicycle cleaner or soap, a chain-cleaning method, a bicycle-specific degreaser when needed, chain lubricant, a tire pump, tire levers, gloves, and the tools required by the bike’s fasteners. Keep a dry towel separate from the dirty cleaning rags.
Park Tool’s general tool list includes hex and Torx tools, a torque wrench, a chain tool, a floor pump, a repair stand, grease, chain lubricant, rags, and nitrile gloves (Park Tool, “What Tools Do I Need?”, retrieved September 1, 2026). Choose the tool size and service level that match your bike. A torque wrench is useful only when you use the maker’s specified value, not when you guess one.
If you use a repair stand, protect the frame finish and avoid clamping a thin, unsupported, or vulnerable section. If the bicycle has a dropper post, suspension, carbon parts, hydraulic brakes, electronic shifting, or an e-bike battery, read the maker’s maintenance instructions before adding cleaner or lubricant.
Before every winter ride
The pre-ride check should be short enough to happen every time. CPSC’s micromobility guidance also recommends checking parts such as the handlebars, brakes, lights, tires, cables, and frame before riding (CPSC, “Micromobility Information Center”, retrieved September 1, 2026). The guidance covers several device types, so apply the bicycle-specific parts and follow your bike maker’s manual.
Check tires and wheels
Look for cuts, cracking, embedded glass, exposed casing, and a tire that is not seated evenly. Inflate within the range printed on the tire or specified by the bicycle or wheel maker. Cold weather and a wet surface can change how a bike feels, but do not choose a pressure outside the maker’s range because a chart or another rider uses it.
Spin each wheel and look for rubbing, wobble, a loose axle, or a damaged spoke. Check fenders and racks for movement and clearance. A fender that shifts into the tire is a stop condition, not a winter annoyance.
For tubeless tires, check the tire’s seated edge, valve, sealant condition, and pressure according to the tire and sealant makers. The tubeless tire inflation guide explains why a pump or seating method should match the rim and tire system.
Check brakes and controls
Squeeze the front and rear brakes while the bicycle is stationary. The levers should feel consistent, the pads should contact the intended surface, and the wheels should stop without a new scrape or vibration. Look for contamination, unusual wear, a damaged hose or cable, and a rotor or rim that is not secure.
If a disc rotor or pad has been touched by chain lube, protective spray, or a greasy cleaner, do not ride until the contamination has been evaluated and corrected. The brake-pad wear guide can help identify when a pad needs inspection, but a damaged or contaminated brake may require a qualified mechanic.
Check lights, reflectors, and clothing
Short days make visibility part of maintenance. Test front and rear lights, check their mounts, and confirm that the charging or battery indicator works before leaving. REI recommends stronger headlights, safety lights, and reflective gear for winter riders (REI, “Biking in Winter: Gearing Up”, retrieved September 1, 2026).
Keep a light from pointing into oncoming traffic or moving into a tire, brake, cable, or suspension path. Replace or recharge the light according to its instructions. Reflective accessories are helpful, but they do not compensate for a failed headlight or rear light when those are required for the route.
Clean the bike after a wet or salty ride
Clean before the grime dries or freezes when practical. Trek’s winter maintenance guidance recommends a rinse after winter rides, gentle water pressure, care around seals and bearings, a clean cloth, and attention to suspension seals (Trek, “Winter wrenching: maintain your ride for happy trail days ahead”, retrieved September 1, 2026). The aim is to remove contamination, not force it deeper into a bearing.
Step 1: Prepare the work area
Move the bicycle somewhere that can get wet and dirty. Remove bags and loose accessories, take out a removable e-bike battery if the manual says to do so, and keep a clean rag for the chain and brake areas. If the bike is frozen, allow ice on moving parts to thaw before you force a lever, shifter, or wheel.
Step 2: Rinse gently
Use fresh water and low pressure to loosen road spray, salt, mud, and grit. Work from the top of the frame downward. Do not use a pressure washer near hubs, headsets, bottom brackets, suspension seals, electronic connectors, or other bearings and seals. A soft brush can remove stubborn material after it has been softened.
Tern’s salt-corrosion guidance recommends regular fresh-water cleaning followed by thorough drying, and it advises indoor storage when possible (Tern Bicycles, “How to Prevent Salt Corrosion on Your Bike”, retrieved September 1, 2026). The advice applies to salt and moisture exposure generally, not only to Tern bicycles.
Step 3: Wash frame and components
Use a bicycle-safe cleaner or mild soap solution on the frame and non-friction surfaces. Brush around the cassette, derailleur, chainrings, chain, fender mounts, rack bolts, and cable stops without grinding grit into the parts. Use a separate clean cloth or brush for brake areas. Keep oily products away from pads, rotors, rims, and tires.
For a very dirty drivetrain, use a purpose-made degreaser according to its instructions. Park Tool says highly flammable liquids such as gasoline, kerosene, and diesel should not be used as cleaning solvents and recommends purpose-made bicycle degreasing solvent (Park Tool, “The Park Tool Guide to Bicycle Lubricants and Compounds”, retrieved September 1, 2026).
Step 4: Dry completely
Wipe the frame, fork, wheels, drivetrain, bolts, cable stops, and accessible crevices with clean rags. Turn the cranks slowly while holding a dry cloth around the chain, then allow the bicycle to air-dry in a warm, ventilated area. Do not put a wet, salty bicycle straight into a closed cover or damp storage room.
Do not use compressed air to blast water into bearings, seals, or electrical connectors. If water remains trapped around a connector or inside a component, follow the maker’s drying and service instructions instead of applying heat or forcing the part open.
Clean and lubricate the chain
The chain needs a clean surface and a lubricant chosen for the riding conditions. Park Tool describes wet lubes as higher-viscosity products that suit humid or rainy climates and dry lubes as products that attract less dirt in dry, dusty climates (Park Tool, “The Park Tool Guide to Bicycle Lubricants and Compounds”, retrieved September 1, 2026). That distinction is more useful than choosing by a label such as “all season.”
- Wipe or clean the chain until the rag no longer picks up heavy grit.
- Let the chain dry enough that lubricant is not immediately diluted by rinse water.
- Apply a small amount of bicycle chain lube to the rollers or according to the product instructions.
- Turn the cranks to distribute it through the links.
- Give the lube time to penetrate. Trek’s winter guidance suggests allowing 5 to 10 minutes before wiping excess lube (Trek, “Winter wrenching”, retrieved September 1, 2026).
- Hold a clean, dry rag against the chain while turning the cranks to remove surface excess.
SRAM’s chain guidance says to clean the chain frequently and apply wet lube afterward, while warning that aggressive cleaners can wash out factory lubrication (SRAM Support, “How often should I lube my SRAM Eagle chain?”, retrieved September 1, 2026). Follow the drivetrain maker’s instructions when your chain or shifting system has special requirements.
The mountain-bike chain lube guide can help compare wet-trail use. The chain-cleaning guide explains the limits of household substitutes. Never spray a general protectant onto the whole drivetrain and assume it has replaced chain lube.
Protect the frame and hardware from salt
Salt corrosion needs salt, moisture, and a surface that can react. Tern explains that salt and moisture speed oxidation and recommends fresh-water cleaning, thorough drying, approved protective sprays, touch-up paint for chipped paint, indoor storage, and regular service (Tern, “How to Prevent Salt Corrosion on Your Bike”, retrieved September 1, 2026).
Use a protective product only where the frame or component maker permits it. Apply it to a rag and wipe the intended surface rather than spraying around brake pads, rotors, rims, tires, grips, or electrical connectors. If paint is chipped, use a touch-up product compatible with the finish and let it cure according to its instructions. A small surface mark is not proof that the frame is structurally sound, so ask a qualified mechanic to inspect cracks, deep corrosion, or damage around a joint.
The road salt guide above gives a focused inspection sequence. Do not use it to justify putting a wax, grease, or oil on a braking surface. Brake performance takes priority over cosmetic protection.
Winter drivetrain, brake, and bearing service
Home cleaning can handle routine dirt, but winter grit can expose service needs that are not easy to evaluate from the outside. Watch for a chain that skips, a derailleur that will not shift, a brake that rubs, a headset that feels rough, a wheel bearing with play, a cable that binds, or a suspension seal that leaks. Stop riding when the bike cannot brake, steer, or hold a wheel securely.
REI recommends regular service for parts such as spokes, bearing surfaces, derailleurs, and cables, and says to use an experienced mechanic for complex adjustments (REI, “Bike Maintenance: 101 Basics Guide”, retrieved September 1, 2026). The service interval depends on riding conditions, mileage, component design, and the maker’s schedule.
Do not disassemble cartridge bearings, hydraulic brakes, suspension dampers, or e-bike electronics merely because winter maintenance feels urgent. A shop can clean, measure, bleed, replace, or inspect the component with the correct tools and parts. Bring the bike in before a seasonal rush when possible, but do not postpone a safety repair to meet a calendar date.
Tires and pressure in cold weather
Cold air can make a tire feel different, and wet or icy pavement changes available grip. Set pressure using the tire, rim, wheel, and bicycle maker’s ranges, then check it more often when the bicycle moves between temperatures. Do not copy a pressure from another tire size, rider weight, or surface without verifying the setup.
Inspect tread, casing, bead, valve, and sidewall after cleaning. Replace a tire with a cut, bulge, exposed casing, severe cracking, or damage that the maker says is unsafe. If a tubeless tire loses air repeatedly, find the leak and inspect the rim tape, valve, bead, and sealant according to the component instructions. The when-to-replace-bike-tires guide and tire sidewall damage guide cover those stop conditions.
E-bike winter maintenance
An e-bike adds a battery, charger, connectors, display, motor, and control wiring to the maintenance decision. Keep the battery and charging area dry, remove the battery for cleaning when the maker says to do so, and do not pressure-wash electrical parts. Inspect cables and connectors for damage, but do not open a battery case or bypass a protective circuit.
For long-term storage, REI says a removable e-bike battery is better stored indoors at roughly 30% to 60% charge, while noting that the exact manual should control (REI, “Intro to Electric Bike Maintenance”, retrieved September 1, 2026). Cold temperatures can drain batteries more quickly, so remove a removable battery after a ride and store it in the location and temperature specified by the maker.
If a battery is swollen, cracked, punctured, hot, wet beyond its rating, or producing an unusual odor, stop using it and follow the maker’s service or disposal instructions. Do not charge a damaged battery to test it.
A practical winter schedule
Use conditions to choose the interval:
| Situation | Maintenance response |
|---|---|
| Dry, clean ride | Quick pre-ride check and wipe if dust accumulates |
| Wet ride with little visible grit | Dry the frame and drivetrain, then check the chain and brakes |
| Muddy or salty ride | Rinse, wash, dry, inspect, and relubricate as needed soon after the ride |
| Regular winter riding | At least weekly cleaning as a starting point, with deeper cleaning every few weeks |
| Bike put away for the season | Complete clean and dry, protected drivetrain, stable indoor storage, and battery care |
| New noise, drag, play, or brake change | Stop and diagnose before the next ride |
These are condition-based reminders, not a replacement for the bicycle, brake, drivetrain, suspension, tire, or battery maker’s service schedule. A bike that rides through road spray may need attention after every ride, while a sheltered bike may need less.
This is research-based product selection, not hands-on testing.
Product selection
These examples are research aids for the maintenance steps above. Bright Data verified each exact Amazon listing title, ASIN, brand, and selected listed features on September 2, 2026. The cards reflect listing and specification research, not hands-on testing or a performance guarantee. Confirm the maker’s directions and the exact bike before using a cleaner or lubricant.
Best complete chain-cleaning kit
Park Tool CG-2.4 - Chaingang Cleaning System,Blue
A focused option for repeating the clean-and-dry part of a winter routine.
Bright Data verified the Park Tool title, ASIN, included scrubber, brush, degreaser, and listed cleaning targets.
Best for: Riders who want a dedicated chain scrubber, brush, and cleaner
- Contents
- Chain scrubber, gear brush, and degreaser listed
- Target
- Chain, rear cogs, and chainrings
- Cleaner
- Plant-based ChainBrite fluid listed
Trade-off: Use the maker's procedure and keep cleaner away from brake friction surfaces.
Check price on Amazon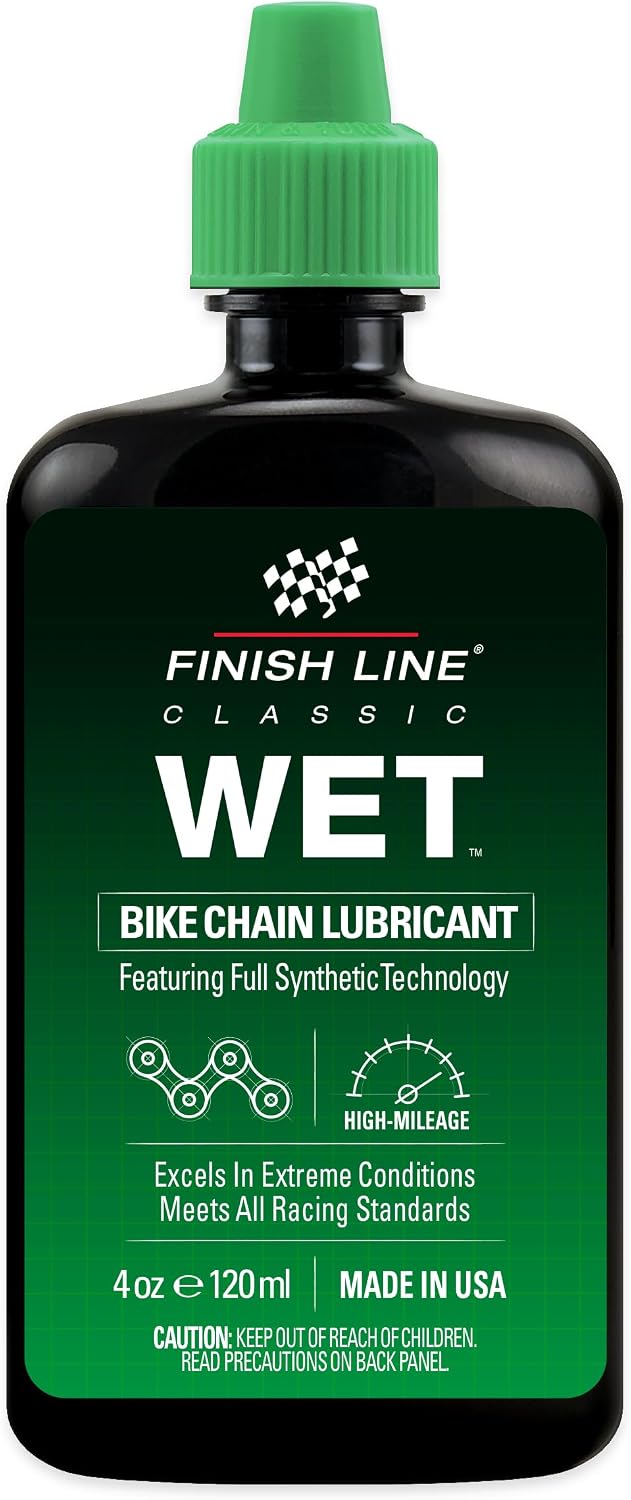
Best wet-condition lube example
Finish Line Wet Bike Chain Lubricant 4 fl oz
A useful category example when the riding conditions call for wet-style lubrication.
Bright Data verified the Finish Line title, ASIN, wet-style description, bottle volume, and viscosity detail.
Best for: Bikes that regularly see rain, road spray, or mud
- Type
- Wet-style chain lubricant
- Volume
- 4 fluid ounces listed
- Viscosity
- High viscosity listed
Trade-off: A wet lube needs a clean chain and an excess-wiping step so grit is not retained.
Check price on AmazonFrequently asked questions
Is wet lube better for winter riding?
Wet lube generally adheres better in humid or rainy conditions, while dry lube is intended for dry environments. Wet lube can hold dirt, so clean the chain and wipe away excess. Follow the lube and drivetrain maker’s instructions.
How often should I clean a bike in winter?
Clean it after especially grimy rides and use at least weekly cleaning as a starting point when riding regularly, as REI suggests. Shorten the interval when salt or mud remains visible. A stored bike should be cleaned and dried before storage rather than left dirty for the season.
Can I use a pressure washer on a bike?
Avoid pressure washing around bearings, seals, hubs, bottom brackets, headsets, suspension parts, brake interfaces, and electrical connectors. Use fresh water, low pressure, a soft brush, and careful drying instead.
Should I spray a protectant on my brake rotor?
No. Keep protectants, grease, oil, and wax off brake pads, rotors, rims, tires, and other friction surfaces. Apply any approved frame protectant to a rag and the intended non-friction surface, then inspect the brakes before riding.
Should I remove an e-bike battery in winter?
Follow the exact bike and battery manual. A removable battery is commonly stored indoors in cold conditions, and REI recommends roughly 30% to 60% charge for long-term storage while noting that the manual controls. Do not charge a damaged or wet battery.
Bottom line
Winter maintenance is a repeatable clean, dry, inspect, and lubricate routine. Check the bike before each ride, clean salt and grit soon after wet exposure, use wet-weather chain lube without leaving a gritty film, and treat brake contamination or structural damage as a stop condition. When riding stops, switch to the storage sequence and follow the e-bike battery manual separately.
Sources
- REI, “Biking in Winter: Gearing Up,” retrieved September 1, 2026, https://www.rei.com/learn/expert-advice/winter-bicycling.html
- REI, “Bike Maintenance: 101 Basics Guide,” retrieved September 1, 2026, https://www.rei.com/learn/expert-advice/bike-maintenance
- REI, “Intro to Electric Bike Maintenance,” retrieved September 1, 2026, https://www.rei.com/learn/expert-advice/intro-to-electric-bike-maintenance.html
- CPSC, “Micromobility Information Center,” retrieved September 1, 2026, https://www.cpsc.gov/Safety-Education/Safety-Education-Centers/Micromobility-Information-Center
- Tern Bicycles, “How to Prevent Salt Corrosion on Your Bike,” retrieved September 1, 2026, https://www.ternbicycles.com/pl/support/kb/348683/how-prevent-salt-corrosion-your-bike
- Park Tool, “What Tools Do I Need?,” retrieved September 1, 2026, https://www.parktool.com/en-us/blog/repair-help/what-tools-do-i-need
- Park Tool, “The Park Tool Guide to Bicycle Lubricants and Compounds,” retrieved September 1, 2026, https://www.parktool.com/en-int/blog/repair-help/the-park-tool-guide-to-bicycle-lubricants-and-compounds
- SRAM Support, “How often should I lube my SRAM Eagle chain?,” retrieved September 1, 2026, https://support.sram.com/hc/en-us/articles/5928734397595-How-often-should-I-lube-my-SRAM-Eagle-chain
- Trek Bikes, “Winter wrenching: maintain your ride for happy trail days ahead,” retrieved September 1, 2026, https://blog.trekbikes.com/en/2021/09/17/winter-wrenching-maintain-your-ride-for-happy-trail-days-ahead/
