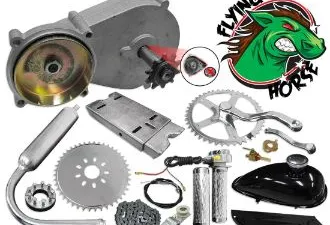
Is a Motorized Bicycle Jackshaft Kit Worth It?
A motorized-bicycle jackshaft kit can add geared drive, but alignment, frame approval, loads, parts support, and legality make it a specialist project.

Table of Contents
- How we evaluated the current kit
- What a jackshaft changes
- The decision in one table
- Compatibility must be exact
- Chainline is two separate problems
- The rear bicycle drivetrain becomes a load path
- Guarding is a purchase condition
- Frame, brakes, wheels, and tires still set limits
- Legal classification does not follow the pedals
- Parts and instructions decide long-term value
- A safer evaluation sequence
- Who may benefit
- Bottom line
A motorized-bicycle jackshaft kit is worth considering only for an experienced builder who has exact written compatibility, installation, guarding, drivetrain-load, legal, and parts-support evidence. For most riders, routing engine power through added chains, bearings, a crank-area freewheel, and the bicycle’s rear gears creates more failure points and service work than the ratio choice is worth.
How we evaluated the current kit
This is a research-based decision guide, not an installation or ride test. It does not recommend an available kit. On August 19, 2026, the exact BBR Tuning listing for SKU BBR-JKSHAFT remained sold out, described the product as advanced-user equipment, and said specific instructions were not included. A merchant page is not a complete-system approval or service manual.
What a jackshaft changes
A conventional gasoline bicycle kit often sends engine power through its own chain to a dedicated rear sprocket. A jackshaft or “shift kit” redirects that power through an intermediate shaft and crank-area components so the rear cassette or freewheel can provide several ratios.
That layout adds interfaces:
- engine output sprocket and primary chain;
- jackshaft plates, shaft, bearings, and fasteners;
- primary and secondary sprockets and chainlines;
- crank-area freewheel, chainrings, and spindle;
- bicycle chain, rear cogs, derailleur, hub, and axle;
- guards, clearances, controls, and adjustment points.
Each interface needs a compatible specification and inspection method. Adding ratios does not remove load. It changes where load travels and how many parts must remain aligned.
The decision in one table
| Question | Continue only when | Skip when |
|---|---|---|
| Exact kit | Revision, parts list, instructions, limits, and support are current | Listing is generic, instructions missing, or revision unknown |
| Frame and engine | Both makers approve mounts, loads, and clearances | Fit depends on drilling, welding, spreading, or crush-clamping |
| Crank interface | Bottom bracket, spindle, crank, freewheel, and chainrings match | Threads, widths, offsets, or retention cannot be verified |
| Rear drivetrain | Hub, cogs, chain, derailleur, axle, and wheel have documented suitability | Human-power parts are assumed to accept engine load |
| Guarding | Every moving chain and sprocket has specified protection and clearance | Clothing or the rider can contact the drive |
| Service | Replacement bearings, chains, sprockets, freewheel, plates, and fasteners are available | The build depends on an unsupported proprietary part |
| Legal use | Finished vehicle meets current agency requirements | Bicycle status is assumed from the presence of pedals |
Compatibility must be exact
Require the kit maker to identify the approved engine models, frame geometry, bottom-bracket shell and spindle interfaces, crank parts, freewheel, chainrings, shaft, bearings, plates, sprockets, chains, fasteners, and rear drivetrain. Record model and revision numbers, not just category names such as “80cc kit” or “seven-speed bike.”
The frame maker also needs to approve the mount locations and finished loads. Do not drill, weld, spread, grind, or crush-clamp a bicycle frame without an exact published procedure. Our engine-frame safety guide explains why open triangle space is not structural approval.
The natural sentinel for this decision is blunt: another ratio is useful only when every added interface is supportable.
Chainline is two separate problems
A jackshaft build can have an engine-side chainline and a bicycle-side chainline, plus shaft alignment between them. Both chains must clear the frame, engine, crank, pedals, tire, cables, fuel line, exhaust, and rider through their full motion.
Misalignment can increase noise and wear, pull chains toward a sprocket edge, overload bearings, and contribute to derailment. A plate that flexes or a shaft that moves under load changes alignment after a static check. Use only the measurement, spacer, and retention method documented for the exact kit.
Do not stack improvised washers behind sprockets or partly engage a fastener to gain clearance. Do not use a tensioner to conceal a chainline error. Chain tension and chainline are different checks.
The rear bicycle drivetrain becomes a load path
The bicycle chain, cassette or freewheel, rear hub, axle, derailleur, hanger, and wheel were selected as parts of a bicycle system. Do not assume they accept engine torque, shifting shock, or sustained motorized operation.
Obtain written limits from the applicable makers. Inspect teeth, chain wear, hub play, axle retention, wheel condition, and derailleur alignment before assembly. Replace damaged parts; do not use a new engine path to “test” a questionable drivetrain.
Shift only as the kit instructions specify. Shifting under power can load the chain and teeth abruptly. If the documentation does not explain starting, clutch use, shift timing, downshifting, and fault response, the system is not ready for operation.
Guarding is a purchase condition
Every exposed chain and sprocket can catch clothing, fingers, hair, luggage, or a loose cable. A complete guard must protect the rider while still allowing the inspection and service specified by the maker.
Keep hands and tools away from a running drivetrain. Shut down the engine, isolate ignition, and confirm all parts have stopped before inspection. Stop the project when a required guard is missing, incompatible, or cannot be installed without reducing clearance elsewhere.
Frame, brakes, wheels, and tires still set limits
A geared drive does not make an ordinary bicycle frame, brake, fork, wheel, or tire suitable for motorized use. It also does not make a merchant speed claim safe. Match every component to the completed vehicle’s mass, loads, intended speed, surface, and legal class using current documentation.
Inspect frame joints, fork, headset, brakes, rims, spokes, hubs, axles, tires, and controls before any powered test. Stop for cracks, dents, damaged welds, corrosion loss, steering play, wheel play, brake weakness, tire damage, or an axle that moves.
Legal classification does not follow the pedals
NHTSA determined on the supplied facts that the gasoline-powered Crow beach cruiser, which could run solely under engine power, was a motor vehicle and motor-driven cycle (NHTSA interpretation 07-007541as). The exact federal, state, and local treatment depends on the finished vehicle and its use.
Confirm registration, equipment, licensing, insurance, helmet, lighting, mirror, brake, noise, and access requirements with the responsible agencies before buying parts. Trail and private-property rules are separate. A multi-speed bicycle drivetrain does not guarantee bicycle classification.
Parts and instructions decide long-term value
Before buying, locate the exact current instructions and every expected service part. At minimum, identify replacement bearings, chains, sprockets, freewheel, chainrings, plates, shaft, guards, fasteners, and any proprietary spacer.
Record tool requirements, lubrication points, torque values, locking methods, chain adjustment ranges, bearing inspection, freewheel inspection, and replacement intervals. A kit that works only while every original part remains perfect is not a dependable transport system.
The current BBR Tuning page does not clear that bar. It identifies a sold-out product, calls the installation advanced, and states that specific instructions are not included. Those facts support a defer decision, not a recommendation or availability inference.
A safer evaluation sequence
- Classify the finished vehicle for its intended roads and trails.
- Identify the exact engine, frame, kit revision, and rear drivetrain.
- Obtain written approval for mounts, loads, crank interfaces, and clearances.
- Verify both chainlines, shaft alignment, sprocket retention, and guards.
- Confirm brake, fork, wheel, axle, rim, and tire suitability.
- Confirm throttle, clutch, kill-switch, fuel, exhaust, cable, and rider clearance.
- Obtain complete instructions, tools, torque values, and spare parts.
- Use a qualified installer familiar with the exact system.
- Perform static and low-speed closed-area checks before road use.
- Follow the documented reinspection schedule.
Blank answers are stop conditions. Do not let money already spent turn missing evidence into assumed compatibility.
Who may benefit
A jackshaft may suit a specialist builder working with a fully documented matched system who values ratio choice, understands the extra service load, and has access to replacement parts. That is a narrow case. It is not a general upgrade for a commuter or a shortcut around poor base gearing.
Skip it when dependable daily transport matters, the donor bicycle lacks exact approval, the kit lacks instructions, guards are incomplete, rear-drivetrain limits are unknown, or local operation is unclear. Start with the motorized bicycle guide and chain-tensioner guide to assess the simpler system first.
Bottom line
A motorized-bicycle jackshaft kit is worth it only when exact compatibility, guarding, drivetrain-load, legal, instruction, and parts-support evidence is complete. The currently observed sold-out listing does not establish those conditions. For most riders, a documented simpler drive or purpose-built legal vehicle is the safer and more serviceable choice.