Mountain Bike Tire Pressure Guide: PSI by Weight, Tire Width, and Terrain
Most mountain bike tires run somewhere in the high teens to upper 20s PSI, but weight, tire volume, casing, terrain, and tubes change the right starting point.
Most modern mountain-bike setups land somewhere in the high teens to upper 20s PSI, but there is no safe universal number. A heavier system, narrower tire, lighter casing, inner tube, harder impacts, or rougher terrain usually needs more pressure. A wider tubeless tire and smoother riding may need less.
Use the tire and rim limits first, then treat any chart or calculator result as a starting point. Schwalbe explains that the correct pressure depends largely on load and tire width, and says never to exceed or fall below the stated tire pressure limits.
A practical starting range
For a typical trail bike with 2.3 to 2.5-inch tires, use this table only to choose a first test. It assumes sound, compatible wheels and tires. The ranges are intentionally broad because casing, rim width, tubes, inserts, cargo, and riding style can move the answer.
| Setup and rider | Front starting range | Rear starting range |
|---|---|---|
| Lighter rider, tubeless, moderate trails | 18 to 22 PSI | 20 to 24 PSI |
| Midweight rider, tubeless, mixed trail riding | 20 to 24 PSI | 22 to 27 PSI |
| Heavier or aggressive rider, tubeless | 23 to 28 PSI | 25 to 30 PSI |
| Comparable setup with inner tubes | Start near the upper part of the relevant range | Start near the upper part of the relevant range |
“Lighter,” “midweight,” and “heavier” are relative to the tire volume and casing, not fixed body-weight categories. Add the bike, rider, water, tools, battery, and cargo when thinking about total load.
If the tire or rim maker gives a narrower range, that guidance wins. Hookless rims can have system-specific compatibility and pressure caps.
Why the rear tire usually needs more pressure
Most mountain bikes carry more weight over the rear wheel during seated riding. The rear also takes drive load and many square-edge impacts. That is why a rear starting point is commonly a few PSI higher than the front.
The front tire still needs enough support to avoid folding in corners or striking the rim. Do not lower it simply to chase grip. A front washout or damaged rim can have serious consequences.
SRAM’s pressure guidance uses bike and rider weight, tire width, casing, rim width, ride type, and conditions. Its tire-pressure overview also treats calculator results as a starting point that should be refined.
How rider weight changes pressure
More load deforms a tire farther at the same PSI. A loaded bikepacking setup, e-MTB, or heavier rider therefore tends to need more pressure than a light rider on the same tire and rim.
Avoid a fixed rule such as adding one PSI for every set number of pounds. The relationship changes with tire volume, front-to-rear weight distribution, rim width, and casing construction. Instead:
- Start from a manufacturer calculator or a conservative point in the table.
- Measure with the same gauge before each test.
- Ride the same short section at normal speed.
- Change only one tire by 1 PSI.
- Record pressure, weather, terrain, and the result.
Increase pressure when the tire folds in corners, strikes the rim, feels vague, or suffers pinch damage. Lower it in small steps when the tire skips across rough ground or transmits excessive chatter, provided it remains stable and inside all limits.
How tire width and casing change PSI
A wider tire holds more air volume and can usually support the same load at a lower pressure than a narrower tire. The printed width is not always the measured width, because rim width and casing construction affect the installed shape.
A reinforced enduro or downhill casing can feel more supported than a light cross-country casing at the same pressure. Inserts can add rim protection and support, but they do not eliminate minimum-pressure or compatibility requirements.
Do not copy a friend’s number unless the rider load, measured tire width, rim, casing, tube or tubeless setup, and terrain are comparable.
How terrain and conditions change the target
Smooth hardpack often permits a lower-risk test than sharp rock at speed. Square edges, jumps, and compressions increase rim-strike and casing-load risk. Wet roots and loose corners may reward more compliance, but pressure cannot make the wrong tread or damaged tire safe.
Make small changes:
- Add 1 to 2 PSI for repeated rim strikes, hard compressions, or extra cargo.
- Test 1 PSI lower for excess chatter on a sound tubeless setup.
- Recheck after a large temperature or elevation change.
- Return to the higher known-safe setting before unfamiliar rough terrain.
For a tire that alternates between pavement and trail, our street-and-trail tire guide explains why tread and casing also matter.
Tubeless versus tubes
Tubeless removes the inner tube that can be pinched against the rim, so it often allows lower pressure. It does not prevent casing cuts, burping, rim strikes, bead problems, or impact damage.
With tubes, paired “snake-bite” cuts are evidence that pressure, tire volume, load, or impact needs attention. Our guide to repeated flats explains how to map a puncture back to its cause.
For a tubeless setup, confirm that the system is compatible and maintained. See how to install tubeless bike tires and how often to add tubeless sealant.
Check pressure consistently
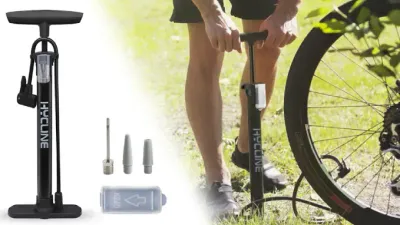
Use one reliable gauge, check cold pressure before the ride, and record the front and rear separately. Small gauges can disagree, so consistency matters more than matching a friend’s display exactly.
Stop and inspect the wheel if pressure falls quickly, the bead line is uneven, sealant leaks at the rim, the tire bulges, or the rim is damaged. Air pressure cannot repair a cut casing, bad tape, loose valve, or incompatible tire.
Bottom line
Start conservatively inside the tire and rim limits, with the rear a few PSI higher than the front. Adjust by 1 PSI based on support, grip, impacts, and measured results. The best mountain-bike tire pressure is the lowest setting that still gives the exact rider and setup adequate stability and rim protection on that terrain.