Why Does My Bike Tire Keep Popping? (5 Possible Reasons)
If your bike tire keeps popping, map the old tube's hole to the tire and rim. Use the puncture pattern to find debris, rim tape, pressure, or fit problems.
Table of Contents
- Diagnose the pattern before replacing parts
- 1. Debris is still in the tire
- 2. Rim tape or the rim bed is damaging the tube
- 3. Pinch flats are occurring
- 4. The tire, tube, valve, or rim is damaged
- 5. Installation or compatibility is wrong
- What the hole location can tell you
- A safe recurring-flat workflow
- FAQ
- Bottom line
A bike tire that keeps going flat usually has an unresolved cause: debris still in the casing, exposed rim hardware, a pinch flat, damaged tire or rim, or an installation and compatibility error. Replacing or patching the tube without locating the failure often puts the next tube against the same hazard.
Do not ride on a tire that loses pressure, will not keep its bead seated, shows exposed casing cords, has a bulge or cut, or sits on a cracked or badly damaged rim. Remove the wheel or take the bicycle to a qualified mechanic before damage causes loss of control.
Diagnose the pattern before replacing parts
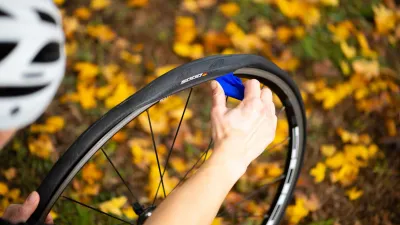
Inflate a leaking tube only enough to find the hole away from your face and eyes. Mark the valve location on the tire before removing the tube, then keep the tire, tube, and rim orientation aligned. The hole’s position can point to the area that needs inspection, but its shape alone is not proof.
Check four surfaces carefully:
- the outside tread and sidewalls;
- the inside of the tire casing;
- both sides of the tube;
- the rim bed, tape, valve hole, and bead seats.
Use sight and a cotton ball or cloth to find a fine thorn or wire rather than dragging bare fingers across a sharp object. If the cause remains uncertain, stop replacing tubes and have the wheel inspected.
1. Debris is still in the tire
A thorn, wire strand, glass chip, staple, or sharp stone can stay embedded after the first flat. Its point may retract when the tire is unloaded and return only as the casing flexes. That produces repeated holes in nearly the same tread-side location.
Remove the object fully and inspect the surrounding casing. A tire with a large cut, exposed threads, broken bead, bulge, or structural damage needs replacement, not an improvised internal patch. A tire boot may be an emergency measure when its maker permits it, but it does not restore a severely damaged casing for normal continued use.
2. Rim tape or the rim bed is damaging the tube
The tube’s rim-facing surface can be cut by an uncovered spoke hole, displaced or narrow rim tape, a sharp burr, corrosion, or a rough valve hole. The new tube may fail quickly because nothing changed underneath it.
Remove the tire and tube and inspect the entire rim bed. Rim tape must be the correct type and width for the rim and intended tire system, remain centered, and cover the required openings without interfering with bead seating. Do not use improvised household tape as a universal substitute. Adhesive, thickness, stretch, heat resistance, pressure, and compatibility vary.
A cracked rim, sharp structural damage, badly deformed bead seat, or uncertain tubeless rim condition is a stop condition for professional inspection or replacement.
3. Pinch flats are occurring
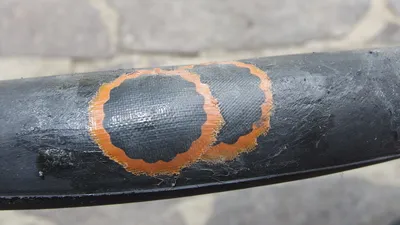
An inner tube can be trapped and compressed between tire and rim during an impact. Two nearby slits may suggest a pinch flat, sometimes called a snakebite, but do not diagnose from shape alone. The same event may also dent the rim, damage the casing, or disturb the bead.
Common contributors include pressure too low for the combined rider and cargo load, hard square-edge impacts, insufficient tire volume, or a setup outside the tire or rim maker’s limits. The solution is not simply “use maximum pressure.” Choose pressure within the tire and rim limits, account for load and surface, and verify that tire size is compatible with the rim and frame.
If the rim has a dent, crack, sharp edge, or bead-seat damage, stop riding and have it assessed.
4. The tire, tube, valve, or rim is damaged
Age, abrasion, cuts, heat, chemical exposure, and repeated underinflation can damage a tire. A tube can chafe against a rough casing or fail near the valve if it is pulled sideways. A damaged valve core may leak slowly; a torn valve base generally requires a replacement tube.
Inspect the casing inside and out under good light. Replace a tire with exposed cords, a bulge, a broken bead, a deep cut, or deterioration that compromises its structure. Confirm the replacement tube covers the printed tire size and uses a valve type and length compatible with the rim.
For a tubeless system, air loss may come from a loose or damaged valve, contaminated or inadequate sealant, tape failure, bead damage, incompatible parts, or a casing puncture beyond the system’s repair limits. Follow the rim, tire, tape, valve, sealant, and repair manufacturers’ instructions as one system.
5. Installation or compatibility is wrong
A tube caught beneath the bead can rupture during inflation. Tire levers can pinch a tube. A twisted tube, sharply angled valve, wrong-size tube, incompatible tire and rim, or uneven bead can also produce an early failure.
Before inflation, check that the tube is not trapped, the valve stands naturally, and the bead is even on both sides. Inflate gradually while watching the molded witness line near the rim. If the bead climbs off, dips sharply, or will not remain even, deflate immediately. Never continue inflating to force an uncertain bead into place.
Use the pressure ceiling set by the most restrictive compatible component. A number on the tire is not permission to exceed a rim or tubeless-system limit.
What the hole location can tell you
| Tube location | Likely inspection area | Do not assume |
|---|---|---|
| Tread-facing | Embedded debris or casing cut | Every small hole came from road debris |
| Rim-facing | Tape, spoke hole, burr, or valve hole | A new tube will solve it |
| Two nearby cuts | Pinch event and possible rim impact | Shape proves pressure was too low |
| Near valve base | Tube movement, valve angle, installation, or damage | Tightening the valve nut fixes a torn tube |
| No obvious hole | Valve/core leak, very slow puncture, or test limitation | The tire is safe because loss is slow |
Map the tube to the wheel before drawing a conclusion. A flipped or rotated tube can point you to the wrong side.
A safe recurring-flat workflow
- Stop riding and move away from traffic.
- Note which wheel failed and how quickly pressure was lost.
- Mark valve-to-tire orientation before disassembly.
- Inspect tread, sidewalls, bead, casing interior, tube, valve, rim tape, and rim.
- Remove debris safely and correct the verified cause.
- Replace any structurally damaged or incompatible part.
- Reinstall without trapping the tube and seat the bead evenly.
- Inflate gradually within all component limits.
- Spin the wheel and check bead line, clearance, braking, and wheel retention.
- Recheck pressure before the next ride.
If the same area fails twice, the bead will not seat, or you cannot identify the cause, stop and get qualified help. Repeatedly installing tubes is not a diagnostic method.
FAQ
Can I keep riding a tire that only loses air slowly?
No general rate makes an unidentified leak safe. Air loss can worsen, and the cause may involve a casing, bead, valve, tape, or rim problem. Diagnose it before relying on the bicycle.
Should I inflate to the maximum printed pressure?
Not automatically. Stay within both tire and rim limits and choose pressure for the compatible setup, load, and surface. Maximum pressure is a ceiling, not a default target.
Will sealant fix every recurring puncture?
No. Sealant cannot make incompatible parts, a damaged bead, displaced tape, a large casing cut, or a cracked rim safe. Use only products approved for the exact system and follow their repair limits.
Why does the replacement tube pop immediately?
The original sharp object may remain, the rim tape may expose hardware, the tube may be trapped under the bead, or the tire and rim may be damaged or incompatible. Deflate and inspect the entire system before trying again.
Bottom line
Recurring flats stop when the cause is corrected, not when tubes are replaced faster. Preserve orientation, inspect all four contact surfaces, respect tire and rim limits, and stop for structural damage or uncertain bead seating. A careful diagnosis protects both the next tube and the rider.