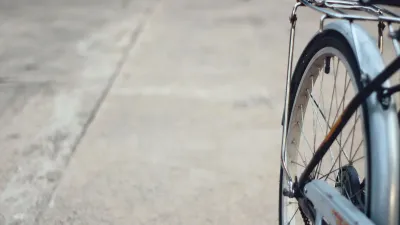
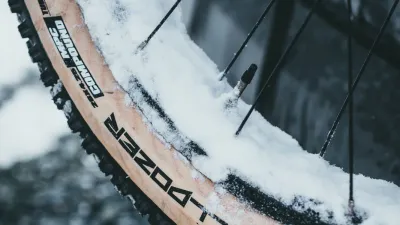
Winter Bike Fender Setup: Coverage, Clearance, and Fit
Set up winter bike fenders by matching tire width, mounts, stays, brakes, coverage, and maker-specified clearance before riding in wet or salty weather.

Table of Contents
- Why full coverage helps in winter
- Step 1: Read the fender and bicycle instructions
- Step 2: Prepare the bicycle and tools
- Step 3: Fit the front fender
- Step 4: Fit the rear fender
- Step 5: Use the maker’s clearance rule
- Step 6: Test the finished setup
- Make fenders work with tires and tubes
- Maintain fenders through winter
- Frequently asked questions
- Sources
The best winter bike fender setup is the widest compatible coverage that clears the tire, frame, fork, brakes, drivetrain, and steering throughout the wheel’s rotation. Match the fender to your tire and mounting points, follow its installation manual, keep every stay and fastener secure, then test for rubbing before the first wet ride. There is no universal clearance number: different makers and models specify different dimensions, and the product manual controls.
Planet Bike’s general fender guidance says to verify tire-width compatibility and adjust the fender to follow the tire while maintaining at least 10 mm of clearance (Planet Bike, “Bike Fenders for Everyday Riding Comfort and Protection”, retrieved September 1, 2026). A separate Planet Bike model manual specifies a 5 mm minimum, while an SKS model manual specifies 15 mm. Those examples are model instructions, not a reason to measure every fender to the same number.
Setup checklist
- Tire width, wheel size, frame, fork, brake, and mounting points match the fender manual.
- The front and rear fenders follow the tire without touching it at any point.
- Stays, bolts, clips, spacers, and safety releases are installed as supplied.
- The wheel, crank, brakes, cables, and steering move freely after installation.
- Bags, lights, and fenders do not hide required visibility equipment.
- A final hand check and slow test happen before a wet or salty commute.
Why full coverage helps in winter
Fenders intercept water, snow, mud, and salty road spray thrown upward by the tire. That can keep a rider’s back and feet cleaner and reduce contamination reaching the frame, brakes, cables, and drivetrain. REI lists fenders among the useful winter-bike additions for shielding against tire-sprayed snow, water, and muck (REI, “Biking in Winter: Gearing Up”, retrieved September 1, 2026).
Coverage is not the same as compatibility. A long fender that rubs the tire is more dangerous than a shorter one that clears the bike. A fender that does not fit the tire width, fork crown, brake bridge, rack, or frame eyelets may flex into a wheel or require an unsafe improvised mount.
Fenders also do not make an icy route safe. Check the winter bike maintenance guide for the tire, brake, cable, light, and post-ride checks that should surround a fender installation.
Step 1: Read the fender and bicycle instructions
Before removing a wheel, identify the exact fender model and inspect the bicycle. Record:
- Tire size and measured or labeled width.
- Wheel diameter and rim or tire combination.
- Front fork crown, dropout, eyelets, brake bridge, and available threads.
- Rear seat-stay and chain-stay bridges, eyelets, rack mounts, and drivetrain clearance.
- Brake type, caliper or rotor position, and any supplied spacers.
- Cable, hose, light, rack, kickstand, and bag locations.
Do not rely on a tire’s sidewall width alone if the frame has tight clearances. Actual inflated width can vary with rim width and tire construction. Consult the tire, wheel, frame, and fender makers when the clearance is close. A fender manual may require a narrower tire or prohibit a particular frame or brake arrangement.
Planet Bike’s installation materials illustrate why model-specific instructions matter. Its Hardcore recumbent manual requires at least 5 mm between the tire and fender and calls for checks around brakes and the drivetrain (Planet Bike, “Hardcore Recumbent Fender Install Instructions”, retrieved September 1, 2026). Use the exact manual for your model rather than combining dimensions from unrelated products.
Step 2: Prepare the bicycle and tools
Work on a stable bicycle with the wheels supported. Gather the supplied hardware, the tool sizes listed by the fender maker, a tire-pressure gauge or pump, a ruler if the manual gives a clearance dimension, clean rags, and a way to hold small spacers or washers in order. A repair stand can help, but do not clamp a vulnerable frame section.
If the manual says to remove a wheel, release the brake or remove the wheel using the bicycle and brake maker’s procedure. Do not squeeze a hydraulic brake lever with a wheel removed unless the brake instructions explicitly allow it. Keep the rotor and brake pads clean. On an e-bike, power the system off before working around wheels, wires, or a motor cable.
Clean dirt from mounting points and the tire. A fender positioned against grit may shift after the first wet ride. If a mounting point is stripped, cracked, or missing, stop and get the correct hardware or professional help. Do not force a bolt into a damaged thread.
Step 3: Fit the front fender
Start with the mounting point specified by the product manual, often the fork crown or a dedicated fork mount. Use the supplied washers, spacers, and lock nuts in the order shown. For disc brakes, a spacer may be required to keep a stay or fastener away from the caliper and rotor. Do not substitute a random washer if it changes the thread engagement or alignment.
Loosely attach the stays so the fender can be centered over the tire. Position the blade so its curve follows the tire without touching the tread, sidewall, brake, fork, or steering hardware. Tighten only after checking clearance at the full wheel rotation and with the handlebar turned through its safe range.
Spin the wheel by hand. Listen and feel for a rub. Look at the space near the fork crown, brake, axle, and lower stays. Turn the handlebar left and right while watching the front fender, brake hose, light cable, and tire. If anything contacts or can be pulled into the tire, stop and correct the setup.
Step 4: Fit the rear fender
Install the rear blade at the bridge or mount identified by the manual, then loosely attach the stays to the frame eyelets. Make sure the blade does not contact the tire, chain, derailleur, rack, rear light, or brake hardware. A rack may require a fender bracket or a maker-approved spacer to keep the two accessories independent.
Center the fender along the tire’s path. Tighten the mounts gradually, alternating sides when there are two stays, so the blade does not twist as the hardware seats. Check that the stay ends do not point toward the tire or your legs. If the product includes a safety release, install and test it according to the instructions. Do not defeat or glue a release mechanism to stop rattling.
Reinstall the wheel and confirm that the axle or quick release is secure using the bicycle maker’s process. Spin the wheel, shift through the gears, rotate the cranks, and squeeze and release the brakes. A rear fender that clears while the bike is on a stand can move when the frame flexes or a bag is loaded, so perform a second check with normal bags attached.
Step 5: Use the maker’s clearance rule
Clearance protects against tire growth from pressure changes, flex, loose hardware, mud, snow, and a wheel that is not perfectly true. The exact dimension belongs to the fender maker. For example, an SKS Edge AL manual says to keep a 15 mm minimum distance between the fender and tire for that product (SKS, “Edge AL mounting instructions”, retrieved September 1, 2026). That number should not be copied to a different SKS model, tire, or frame without checking its manual.
If your manual gives a minimum, measure at the tightest section with the tire inflated within its allowed range. Check along the full fender, not only at the crown. If the manual does not give a dimension, use the maker’s illustrated fit rules and leave enough room that the tire cannot touch after a bump or a small amount of debris. Ask the maker or a qualified mechanic when the available space is uncertain.
Never solve a clearance problem by cutting a stay, drilling a fork, bending a brake part, grinding a frame, or moving a safety-critical fastener without an approved procedure. Choose a compatible fender or tire, or use a professional installation.
Step 6: Test the finished setup
Run this test before the first commute:
- Check each bolt, clip, spacer, and stay for full seating.
- Spin both wheels slowly and then by hand at normal speed.
- Check the tire-to-fender gap at several points around each wheel.
- Turn the handlebar fully left and right while watching the front tire and fender.
- Apply and release both brakes.
- Shift through the gears and turn the cranks.
- Check lights, bags, rack straps, cables, and hoses for interference.
- Push the bike a short distance and listen for movement or contact.
If a fender rubs, moves, cracks, or rattles toward a wheel, do not ride it. Recheck the manual, hardware order, stay length, tire fit, and mounting point. A loose fender is a mechanical fault, not a sound to ignore.
The winter commuting visibility checklist adds lights, reflectors, clothing, bags, and route checks. A fender can keep a rear light or reflective panel cleaner, but it must never block that equipment.
Make fenders work with tires and tubes
Fenders do not change the tire maker’s inflation range. Inflate within the range printed on the tire or specified by the bicycle, wheel, and tire makers, then recheck the fender gap. The mountain bike tire pressure guide explains why pressure decisions must start with the tire and wheel rather than a generic number.
If a tubeless tire loses pressure or unseats, solve that tire problem before judging the fender fit. The tubeless tire inflation guide covers safe seating approaches, and the floor pump guide for tubeless tires covers pump features without changing the tire maker’s limits.
Do not add a wider tire after fitting fenders without rechecking the actual space. A new rim can also change the tire’s measured width. When a tire, wheel, frame, and fender combination is close, ask a bike shop to verify it.
Maintain fenders through winter
After a wet or salty ride, rinse road spray with fresh water and dry the fender, stays, bolts, frame, and nearby brake or drivetrain parts. Look for grit packed between the tire and blade. Do not pressure-wash bearings, seals, brakes, or e-bike electrical parts. Check for a stay that has rotated, a clip that has released, a cracked blade, and a fastener that has loosened.
The road-salt protection guide covers cleaning and drying after treated roads. If cable or brake controls become stiff after a freeze, use the frozen bike cable guide and stop riding until the control works normally.
Store the bike where the fender cannot be crushed or loaded sideways. The winter bike storage guide covers a dry storage routine and the battery considerations for an e-bike.
Frequently asked questions
Are full-coverage fenders best for winter?
They can provide more splash protection when they fit the bike, tire, brakes, and frame. Coverage does not outweigh rubbing, poor mounting, or a damaged safety release. Choose the widest compatible model the maker approves.
How much clearance should a bike fender have?
Use the exact fender manual. Planet Bike and SKS manuals show that model instructions can differ, so there is no honest universal number for every bike and tire.
Can fenders fit a bike with disc brakes?
Many models are designed for disc-brake bikes, but the stay path and supplied spacers must match the frame and caliper. Confirm the manual and inspect the rotor, caliper, hose, and wheel through their full movement.
Can I use zip ties instead of fender hardware?
Only when the fender maker explicitly provides or permits that method and the result remains secure and clear of the wheel. A zip tie is not a substitute for a missing structural mount, safe release, or required spacer.
Do fenders stop road salt from reaching the bike?
They can reduce spray, but they do not eliminate salt exposure. Rinse, dry, inspect, and lubricate according to the component instructions after salty rides.
A winter fender setup succeeds when it stays centered, clear, secure, and compatible after the bicycle is packed and ridden. Follow the model manual, test every moving part, and treat any rubbing or movement as a reason to stop and correct the installation.
Sources
- Planet Bike, “Bike Fenders for Everyday Riding Comfort and Protection”, retrieved September 1, 2026.
- Planet Bike, “Hardcore Recumbent Fender Install Instructions”, retrieved September 1, 2026.
- SKS, “Edge AL mounting instructions”, retrieved September 1, 2026.
- REI, “Biking in Winter: Gearing Up”, retrieved September 1, 2026.