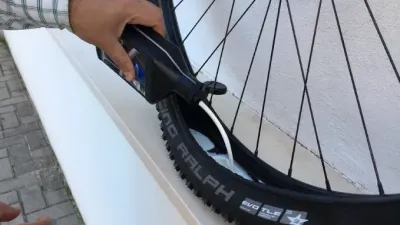
How to Find a Slow Leak in a Bike Tire
Confirm pressure loss with a gauge, then isolate the tire, valve, tube, bead, tape, or rim leak using the correct tube or tubeless diagnostic branch.
Inflate the tire within its approved range, record the pressure with the same gauge, and check again after a known period at a similar temperature. If the loss is abnormal for that tire system, inspect the valve first, then follow the separate inner-tube or tubeless steps below.
Do not test-ride a tire that cannot hold safe pressure
Stop riding for a cut or exposed casing, damaged bead, cracked or dented rim, bulge, loose valve, repeated rapid loss, or sealant spraying from structural damage. Fit a safe replacement or have a mechanic inspect the wheel.
Confirm that it is really leaking
All bicycle tires gradually lose air, and temperature changes pressure. Use one reliable gauge, note room or outdoor temperature, and compare readings over several hours or overnight. Park Tool’s pre-ride guidance recommends checking pressure rather than relying only on a squeeze test.
If the pressure drops quickly, avoid repeatedly inflating and riding. Find the source while the wheel is stationary.
Check the valve before removing the tire
Apply the system maker’s approved leak-detection fluid or a light soap-and-water film around the valve opening and core. Growing bubbles indicate escaping air.
- On a removable valve core, use the correct core tool and maker’s instructions; overtightening can cause damage.
- On a Presta valve, confirm the small head is closed after inflation and the stem is straight.
- On a tubed Schrader system, a loose or stuck core can create a slow leak. Park Tool’s tire-and-tube guide identifies this as a possible cause.
- On tubeless, bubbles at the valve do not prove the valve is the original leak. Air can enter the rim cavity through failed tape and exit at the valve or spoke holes.
Do not use pliers to crush a rim nut tighter. Correct seating and compatible parts matter more than excessive force.
Inner-tube diagnostic branch
- Remove the wheel, tire, and tube using the bicycle and wheel instructions.
- Keep the tube oriented relative to the tire so a found hole can be matched to the cause.
- Inflate the tube only enough to make leakage detectable. Park Tool suggests up to about twice its normal width for inspection.
- Listen and feel around the full tube. If needed, submerge the removed tube only in water and watch for bubbles.
- Mark the hole, then inspect the matching tire and rim location before patching or replacing the tube.
A hole on the tread side often points to embedded debris. Two nearby cuts can indicate a pinch impact. A rim-side hole can indicate bad rim tape, a spoke hole, or a sharp rim edge. A torn valve base can indicate tube or tire movement and normally requires tube replacement.
Never run a bare hand quickly through a tire that may contain glass or wire. Inspect visually and use a cloth or another protective method.
Tubeless diagnostic branch
Keep the complete wheel away from water if immersion could affect the hub, brake, e-bike electronics, or other components. Instead, coat one area at a time with the tire or wheel maker’s approved leak-check fluid and look for growing bubbles at:
- the tread and sidewalls;
- both bead lines;
- the valve core and valve base;
- spoke nipples and the rim joint.
Schwalbe’s current tubeless troubleshooting links valve- or nipple-area leakage to the valve, tape, rim contact area, rim joint, or even a cracked rim bed. It also notes that inadequately mixed or depleted sealant can prevent the system from staying airtight.
Use the sealant maker’s current inspection, mixing, refill, and compatibility instructions. Do not combine sealants unless both makers approve it. Our guide to adding tubeless sealant covers safe access methods.
What the bubble location means
| Bubble location | Likely branch to inspect next |
|---|---|
| Tread puncture | Embedded object, tube hole, or tubeless puncture |
| Sidewall | Casing damage or porous tubeless casing |
| One section of bead | Bead contamination, damage, or seating problem |
| Valve core | Loose, dirty, damaged, or incompatible core |
| Valve base | Tube tear, incompatible tubeless valve, damaged tape opening |
| Spoke nipples | Tubeless tape leak somewhere in the rim bed |
| Rim joint | Tape path, joint sealing, or structural rim defect |
The location narrows the diagnosis; it does not automatically authorize a repair. Tire plugs, internal patches, boots, tubes, and replacements have different maker limits.
Recheck after repair
Inspect both bead lines, inflate below the lower tire/rim limit, record pressure, and repeat the timed gauge check. Reinstall the wheel and brake correctly before a short low-speed test.
If a tubeless setup still loses air after the settling period, work through why a tubeless tire will not inflate or hold air instead of exceeding pressure to force a seal.
Bottom line
Measure first, isolate the valve, then diagnose either the removed tube or the complete tubeless system. Always find and remove the cause—not just the hole—and replace any structurally damaged tire, rim, tape, valve, or tube before riding.