Winter Bike Commuting Visibility Checklist
Use this winter bike commuting visibility checklist to inspect lights, reflectors, clothing, mounts, cables, route choices, and low-light riding habits.

Table of Contents
- 1. Test the front light
- 2. Test the rear light
- 3. Add reflectivity in a complete circle
- 4. Inspect the mount and the surrounding bike
- 5. Make clothing and bags visible without creating hazards
- 6. Choose a route and ride predictably
- 7. Recheck at the destination
- When should you skip the commute?
- Printable pre-ride checklist
- Product selection
- Sources
The safest winter bike commuting visibility setup combines working front and rear lights, reflectors, reflective details that can be seen from the side, clean and secure mounts, and a route that gives other road users time to see you. Check the system before every low-light ride. Do not treat a bright jacket as a replacement for required lights, and do not treat a light as a reason to ride faster than the surface or traffic allows.
The National Highway Traffic Safety Administration recommends bright clothing during the day, reflective gear, and a white front light, red rear light, and reflectors at night or when visibility is poor (NHTSA, “Bicycle Safety”, retrieved September 1, 2026). Local lighting requirements vary, so check the rules for every jurisdiction on your commute.
Quick checklist
- Front light works, is charged, and points at the road rather than into approaching eyes.
- Rear light works, is visible around bags or panniers, and has a secure mount.
- Reflectors and reflective details are clean and visible from more than one direction.
- Helmet, jacket, gloves, bags, and shoe or ankle areas do not hide the lights.
- Cables, brakes, tires, fenders, and light mounts pass a short pre-ride inspection.
- The route, speed, clothing, phone, and backup light match the weather and daylight.
1. Test the front light
Turn the front light on before you put on gloves. Confirm that the housing, battery indicator, mode button, and mount all behave normally. A light that switches modes when the bike hits a bump is not ready for a commute. Recharge it according to the maker’s instructions, and carry a backup if the trip is long enough that a failure would leave you in unsafe darkness.
The front light has two jobs: helping you see the surface and helping approaching road users recognize your position. Aim it low enough to illuminate the route without creating unnecessary glare. REI recommends two front light sources for winter rides, with the primary light on the handlebar and a secondary one on a helmet or clothing, so the two sources can provide backup and a different point of movement (REI, “Biking in Winter: Gearing Up”, retrieved September 1, 2026). The route, lamp design, local law, and manufacturer’s instructions still control your setup.
For a dark route, REI uses 500 lumens for a handlebar-mounted front light and 100 lumens for a rear light as planning examples, not as universal legal requirements. A lamp’s beam pattern, mounting height, weather, ambient lighting, and battery condition also affect what you can see. Never copy a number while ignoring the beam or the road.
2. Test the rear light
Stand behind the bike and look for the rear light from a driver’s likely approach. Check whether a rack bag, pannier, rain cover, coat, or saddle bag blocks it. Wipe away road spray and frost, then tighten or replace a loose mount. If the light has a steady and flashing mode, select the mode allowed by the route and local rules. Some locations regulate flashing patterns, so consult the applicable law.
REI suggests placing the brightest rear safety light on the bicycle and a second light on a helmet, pack, or clothing. That arrangement can create two visible points, but only if both remain secure and do not interfere with a helmet, strap, wheel, or clothing. Do not hang a light where it can swing into the spokes.
If the rear light is rechargeable, check its charge before leaving and again before the return trip. Cold can reduce battery run time. Keep a separate backup light in the commuting bag so one dead battery does not determine your ride home.
3. Add reflectivity in a complete circle
Reflective material works when light reaches it, so place it where a vehicle approaching from the front, rear, or side can catch at least one reflective element. Good locations include a vest or jacket panel, ankle or lower-leg movement, helmet trim, bag panels, pannier covers, and sidewall or wheel reflectors. Keep the material clean enough to reflect and do not cover it with a dark rain shell.
NHTSA’s bicycle safety guidance includes reflective gear and reflectors as part of being visible when visibility is poor. CPSC likewise advises riders of micromobility devices, including e-bikes, to use reflectors, headlamps, bells or horns, and other visibility accessories (CPSC, “Micromobility Information Center”, retrieved September 1, 2026). The CPSC guidance covers several device types, so apply the bicycle-specific advice and follow the bicycle and light manuals.
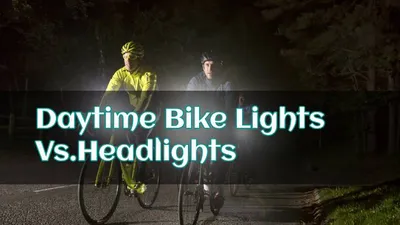
Reflection is not a substitute for active lighting. A reflector may be hard to see when a vehicle is not pointing its headlights at you, and a reflective strip cannot illuminate a pothole. Use the daytime bike light guide for a separate light-selection discussion, and compare the night-riding mountain bike light guide when the commute includes an unlit path.
4. Inspect the mount and the surrounding bike
Push each light gently from several directions. The beam should stay pointed where you set it, and the rear lamp should not twist behind a bag. Look for cracked brackets, stretched straps, loose bolts, and battery covers that do not close. Route straps and wires away from the tire, spokes, brake rotor, chain, and steering movement.
Visibility begins with a bike that can stop and steer. CPSC recommends checking handlebars, brakes, throttle, bell, lights, tires, cables, and frame before riding. NHTSA also recommends riding a bike that works and planning a route with less traffic and slower speeds when possible. Use the winter bike maintenance guide to turn those checks into a repeatable post-ride routine.
Check the fenders too. A fender that shifts into a tire can turn a visibility check into a fall. The winter fender setup guide covers coverage, clearance, and fit.
5. Make clothing and bags visible without creating hazards
Choose a visible outer layer for daylight and reflective details for darkness. Wear the reflective area on the outside of the clothing you will actually use. If a rain shell covers the reflective panel, add a reflective vest or bands over it. Check cuffs, drawstrings, scarf ends, and loose straps so they cannot enter the wheel or chain.
Place a small light on a helmet or pack only if its mount is made for that use and it cannot change the helmet’s fit or block your view. Do not drill a helmet or attach a rigid object in a way the helmet maker does not allow. The bike helmet measurement guide can help with fit, but it is not a substitute for the helmet instructions or required safety label.
Keep the rear light visible when the bag is full. A reflective rain cover can add useful surface area, but it does not make an obstructed lamp visible. Recheck the setup after packing because straps can move when a bag is loaded.
6. Choose a route and ride predictably
Visibility is a shared traffic problem, not only an equipment problem. NHTSA recommends following the same traffic rules as motorists, riding with traffic, anticipating what others may do, and choosing routes with less traffic and slower speeds where possible. CPSC advises riders to expect that drivers and pedestrians may not see them, slow down, stay aware, and avoid abrupt unpredictable movements.
Before leaving, look at the route’s surface, lighting, snow or ice, construction, and likely traffic. A light lets you see and be seen, but it does not create traction or guarantee that a driver will yield. Reduce speed until the distance you can see and the grip you have are compatible with stopping. If glare, blowing snow, fog, or ice removes a safe margin, choose a different route or do not ride.
Use hand signals only when you can keep control of the bicycle. Keep both hands on the bars whenever you need maximum braking or steering control. NHTSA says to carry items in a backpack or secure them to the back of the bike and to keep clothing from the chain.
7. Recheck at the destination
At work or a mid-route stop, look at the lenses, mounts, and battery indicators again. Wet grit can cover a rear light in minutes. Wipe lights with a soft cloth rather than a harsh solvent, and do not put a wet light or battery into an airtight bag until it has dried according to the maker’s instructions.
If the bike will wait outside, choose a sheltered location and keep the battery and lights within their permitted storage conditions. A removable e-bike battery may need to come indoors. The cold-weather e-bike battery guide explains why charging and storage instructions matter when the commute starts and ends in different temperatures.
When should you skip the commute?
Skip or change the ride when you cannot keep the equipment working, see the route, control the bike, or stay warm enough to manage a stop or mechanical problem. Darkness alone does not set a universal decision, but darkness combined with a failed light, ice, high traffic, or blocked sight lines should end the ride. The too-cold-to-ride decision guide covers cold, wind, ice, clothing, daylight, and backup plans.
If you are storing the bicycle between commutes, dry it before covering it. The winter bike storage guide covers a longer storage routine, including what to do with a removable battery.
Printable pre-ride checklist
Use this short version at the door:
- Turn on and aim the front light.
- Turn on and uncover the rear light.
- Check reflectors and reflective panels from multiple directions.
- Confirm mounts, straps, bags, cables, brakes, tires, and fenders are clear.
- Check the weather, route surface, daylight, battery, and backup light.
- Ride at a speed that matches the visible road and available traction.
- Stop and reassess if visibility, control, warmth, or equipment changes.
Product selection
These products are examples of the front and rear light categories in the checklist. Bright Data verified each exact Amazon listing title, ASIN, brand, and selected listed fields on September 2, 2026. This is research-based product selection, not hands-on testing. The cards are not illumination, battery-life, weather, or road-visibility tests. Check the current local lighting rules and aim every light so it helps other road users see you without dazzling them.

Rear-light example
Cygolite Hypershot 350 Lumen Bike Tail Light, 7 Night and Daytime Modes, User Adjustable Flash Speeds, Compact and Durable, IP64 Water Resistant, Saddle Rail Mount Version, USB Rechargeable
A research example for a rechargeable rear light that fits the bicycle and route.
Bright Data verified the Cygolite title, ASIN, output, modes, mounts, and IP64 water-resistance detail.
Best for: Commuters with a compatible saddle-rail or seat-stay mounting point
- Output
- 350-lumen maximum listed
- Modes
- Seven night and daytime modes listed
- Mount
- Saddle rail and seat-stay mounts listed
Trade-off: A rear light is only one part of visibility and does not replace a required front light or reflector.
Check price on AmazonFront and rear set example
USB Rechargeable Bike Lights Set with Bell, LED Bicycle Front Rear Light
A practical set example when one purchase needs to cover basic front and rear visibility.
Bright Data verified the BLITZU title, ASIN, included front and rear lights, bell, output, and handlebar mount.
Best for: Commuters comparing a combined light and bell set for everyday riding
- Set
- Front headlight, rear taillight, and bell listed
- Output
- 550-lumen maximum listed
- Mount
- Handlebar mount listed
Trade-off: Confirm the rear mount, charge status, beam aim, local requirements, and route conditions.
Check price on AmazonSources
- NHTSA, “Bicycle Safety”, retrieved September 1, 2026.
- REI, “Biking in Winter: Gearing Up”, retrieved September 1, 2026.
- CPSC, “Micromobility Information Center”, retrieved September 1, 2026.