Why a Motorized Bicycle Engine Dies Under Throttle
If a motorized bicycle dies under throttle, stop riding and check fuel flow, air restriction, intake sealing, controls, and the exact carburetor procedure.
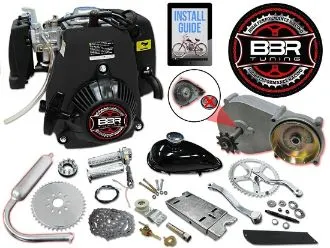
Table of Contents
- Stop immediately for these conditions
- What the symptom can tell you
- 1. Verify controls and the starting configuration
- 2. Inspect the fuel path
- 3. Check the air filter and intake
- 4. Return to the documented carburetor baseline
- 5. Inspect ignition and mechanical condition
- 6. Check the bicycle drive system
- Controlled verification
- Frequently asked questions
- Bottom line
If a motorized bicycle engine idles but dies when you open the throttle, stop riding. The common diagnostic groups are restricted fuel flow, restricted intake air, an intake leak or loose connection, incorrect carburetor setup, a control problem, or an ignition and mechanical fault that appears under load.
Do not keep riding to “test” a fault. Diagnose with the engine off and cool unless the exact service manual requires a controlled running check by a qualified person.
Stop immediately for these conditions
Shut off the fuel and keep the engine off when you find:
- leaking or strongly smelled fuel;
- a throttle that does not snap closed;
- a kill switch that does not stop the engine;
- damaged fuel hose, filter, tank, valve, carburetor, or intake parts;
- loose engine or exhaust hardware;
- chain, sprocket, tire, or frame interference;
- abnormal metallic noise, overheating, smoke, or vibration;
- weak brakes, wheel play, or structural damage.
Move the bicycle away from flames, sparks, hot work, and enclosed spaces. Let the engine cool before touching the exhaust, cylinder, spark plug, carburetor, or fuel system.
What the symptom can tell you
An engine that idles but stops as the throttle opens needs more fuel and air just as demand rises. That makes a restricted fuel path, obstructed air filter, intake sealing issue, or incorrect metering setup plausible.
The timing of the failure matters:
| Symptom | Diagnostic group to inspect |
|---|---|
| Dies immediately as throttle opens | Throttle or choke position, fuel delivery, intake leak, carburetor circuit |
| Runs partly open but dies near full throttle | Fuel-flow restriction, main metering, air restriction, exhaust restriction |
| Dies only while riding under load | Fuel delivery, ignition under load, clutch or drivetrain drag, compression or mechanical condition |
| Surges before dying | Intermittent fuel flow, air leak, loose connection, or ignition fault |
| Restarts after waiting | Tank vent, fuel flow, overheating, or intermittent ignition |
These patterns narrow the inspection. They do not prove a specific part is bad.
1. Verify controls and the starting configuration
With the engine off, confirm that the throttle cable moves smoothly and returns fully at every handlebar angle. Make sure the choke or enrichment control is in the position specified for a warmed engine. Check that cables are not pinched, sharply bent, frayed, or pulled by steering.
Verify the clutch or centrifugal-drive system is not binding. A dragging drivetrain can make an engine stall as load is applied. Do not run the engine with exposed moving parts.
2. Inspect the fuel path
Close the fuel valve and let the engine cool. Examine the tank, cap and vent, valve, hose, filter, fittings, and carburetor for damage, kinks, contamination, loose connections, or leakage.
A blocked tank vent or restricted filter can allow enough flow to idle but not enough for higher demand. Use only the exact maker-approved test and replacement procedure. Catch and dispose of fuel as required, work outdoors away from ignition sources, and replace damaged hose or fittings rather than improvising a repair.
BikeBerry’s current full-throttle troubleshooting guide also identifies the fuel line, filter, and delivery path as early checks.
3. Check the air filter and intake
Inspect the air filter using the engine or kit instructions. A dirty, saturated, damaged, or incorrectly installed element can disrupt airflow. Do not run the engine without the required filter as a riding test.
With the engine off and cool, visually and manually inspect the carburetor attachment, intake tube or manifold, gaskets, clamps, and fasteners according to the manual. Replace damaged sealing parts. Do not spray flammable cleaner around a running or hot engine to search for leaks.
Our motorized-bicycle carburetor guide explains the carburetor’s basic circuits and why random adjustment can hide the original fault.
4. Return to the documented carburetor baseline
Confirm the exact carburetor model and current engine configuration before changing a needle clip, jet, air screw, idle stop, float setting, or fuel mixture. Photograph and record the original positions.
Return to the kit maker’s documented baseline when the carburetor has been altered. Change one approved setting at a time and stay within the stated range. Elevation, temperature, fuel formulation, intake, exhaust, and engine condition can affect metering, but they do not justify guessing.
If no model-specific setting is available, stop and obtain it from the seller, engine maker, or qualified mechanic.
5. Inspect ignition and mechanical condition
If fuel, air, controls, and baseline setup check out, inspect the spark plug, cap, lead, electrical connections, kill-switch wiring, and ignition parts using the exact manual. Replace only with specified parts and torque.
Compression loss, a damaged top end, blocked exhaust, incorrect assembly, or internal wear can also appear when load rises. Those checks may require special tools and controlled procedures. Stop before disassembly if torque values, clearances, gasket requirements, or diagnostic limits are unknown.
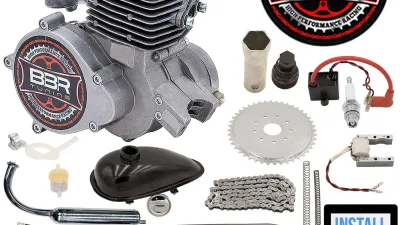
The BBR Tuning engine-kit review lists the assembly and evidence questions that should be resolved before troubleshooting a current kit.
6. Check the bicycle drive system
An engine may appear to die under throttle when the chain, clutch, transmission, wheel, or brake creates abnormal drag. With the engine off:
- rotate the rear wheel and cranks as applicable;
- inspect chain alignment and the tightest tension point;
- confirm the tire does not rub;
- check wheel and axle security;
- verify that brakes release correctly;
- inspect the clutch or transmission using the exact instructions.
Do not bypass a chain guard or run the drive with the bicycle unsupported near people.
Controlled verification
After a qualified repair, reassemble every guard and confirm that fuel is contained, the throttle returns, the kill switch works, and both brakes operate. Begin with a stationary check only if the manual permits it, then use a low-load test in a legal, traffic-free closed-course area.
Stop at the first recurrence. Do not compensate with speed, choke position, unsafe carburetor settings, or continued riding.
Frequently asked questions
Why does the engine idle but die at full throttle?
Higher throttle increases fuel-and-air demand. A restricted fuel path, blocked air filter, intake leak, or incorrect main metering can show up then. Ignition, exhaust, compression, and drivetrain faults are also possible.
Should I install a larger jet first?
No. Confirm the exact carburetor, fuel flow, filter, intake sealing, baseline setup, elevation, temperature, and engine configuration before changing jets.
Can I spray cleaner around the intake to find a leak?
Do not spray flammable products around a running or hot engine. Shut it down, let it cool, inspect the parts, and follow the exact service procedure or use a qualified mechanic.
Bottom line
Start with safety and evidence: shut down, check controls, inspect the fuel and air paths, restore the documented carburetor baseline, then examine ignition, mechanical condition, and drivetrain drag. Recheck the complete build before returning the bicycle to service.
If the symptom began after a major elevation or weather change, follow the carburetor jet-sizing and elevation process only after ruling out leaks, blockage, and ignition faults.