Motorized Bicycle Exhaust Guide: Fit, Heat, and Tuning
Match a motorized bicycle exhaust by flange, port, frame clearance, mount, heat shielding, sound, and carburetor setup before installation.

A motorized bicycle exhaust must match the exact engine port and flange, clear the frame and moving parts, use a secure independent mount, and keep heat away from the rider, fuel, tires, cables, and wiring. An expansion chamber is not a universal performance upgrade. It changes packaging, sound, and engine tuning.
Identify the engine before the pipe
Record the exact engine model, cylinder, exhaust-port shape, bolt spacing, fastener size, gasket, and outlet orientation. Labels such as 66cc, 80cc, or 100cc are not enough to prove exhaust compatibility.
Do not enlarge holes, force a mismatched flange, or hang the full exhaust mass from the cylinder studs. A leaking or stressed joint can damage threads, direct hot gas at nearby parts, and allow the pipe to move.
Stock muffler or expansion chamber
A compact stock-style muffler is usually easier to route and support. It may offer better clearance and fewer tuning variables for a basic build.
An expansion chamber uses a larger shaped pipe. On a two-stroke engine, that geometry interacts with gas flow and engine operation. The result depends on the exact cylinder, porting, carburetor setup, ignition, and exhaust design. A larger chamber does not guarantee more useful power.
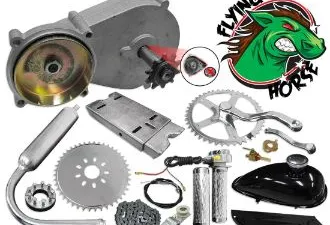
The current BBR Stage 4 package illustrates the integration jump: the exhaust is added to a kit that already changes the head, carburetor, and spark plug.
Map the full clearance envelope
Check the exhaust through all operating positions, not only while the bicycle is stationary. Allow safe clearance from:
- crank arms and pedals through a full rotation;
- rider foot, leg, clothing, and luggage;
- front tire through full steering movement;
- rear tire, spokes, chain, and sprocket;
- brake and shift cables or hydraulic hoses;
- fuel tank, shutoff, line, and carburetor;
- electrical wiring and ignition components;
- frame tubes, paint, fenders, and kickstand;
- suspension movement where applicable.
Heat can damage a part without direct contact. Use only manufacturer-approved shielding and mounts, and preserve access for inspection.
Support the exhaust correctly
The cylinder flange seals the exhaust. It should not be the only structure controlling a long or heavy pipe. Follow the exhaust maker’s bracket location and hardware specification. A bracket must not crush a frame tube or interfere with a brake, cable, wheel, or drivetrain.
Before every ride, check:
- flange fasteners and gasket area;
- mounting bracket and frame interface;
- cracks near welds and bends;
- fresh soot that may indicate leakage;
- contact or polished spots;
- changed sound, vibration, or movement.
Stop the engine if the pipe loosens, cracks, leaks, touches another component, or moves toward the rider.
Carburetor setup can change
An exhaust change can alter how a two-stroke engine breathes. Follow the engine and exhaust maker’s setup procedure for the exact parts. Do not copy a jet size or mixture setting from an unrelated engine.
Watch for signs that require shutdown and diagnosis:
- abnormal heat;
- hesitation or uncontrolled engine response;
- signs of a lean or rich condition;
- plug appearance outside the maker’s guidance;
- fuel leakage;
- persistent detonation-like sound;
- loss of fastener torque or new vibration.
Our motorized bicycle carburetor guide explains why adjustment should follow inspection rather than guesswork.
Sound and legal limits
An exhaust can affect noise as well as emissions and vehicle classification. Public-road, trail, neighborhood, event, and closed-course rules may all differ. A seller’s use of the word muffler does not prove compliance with a local sound limit.
BikeBerry states that its gasoline-operated products are not EPA or CARB compliant for public-road use and are intended for closed-course competition. An aftermarket exhaust cannot cure a noncompliant vehicle or make a prohibited route legal.
NHTSA has treated certain self-propelled gasoline motorized bicycles intended for public roads as motor-driven cycles (NHTSA interpretation). Verify current federal, state, local, and land-manager requirements for the actual machine and location.
Installation sequence
- Confirm the exact exhaust and engine match.
- Remove fuel or isolate the system as the manufacturer instructs.
- Inspect cylinder threads, sealing surface, studs, and old gasket.
- Dry-fit the exhaust without forcing any interface.
- Turn the handlebar and crank through full movement.
- Fit the specified gasket, fasteners, and independent bracket.
- Tighten in the maker’s sequence and to the specified torque.
- Confirm fuel, cable, wire, tire, and rider clearance.
- Run the engine only in a ventilated permitted area and inspect for leaks.
- Recheck the mount after the maker’s initial interval.
Never run a gasoline engine indoors or in an attached garage. Carbon monoxide can accumulate quickly.
Bottom line
Choose an exhaust for documented fit, safe routing, secure support, and maintainable tuning. Do not choose it for appearance or a generic speed promise. Review the motorized bicycle guide, two-stroke kit shortlist, engine-frame guide, and motorized-bicycle tire guide before treating the exhaust as an isolated upgrade.