
How to Replace a Bike Cassette
Replace a bicycle cassette by identifying the freehub and lockring, matching the new sprockets, preserving spacers, and checking chain compatibility.
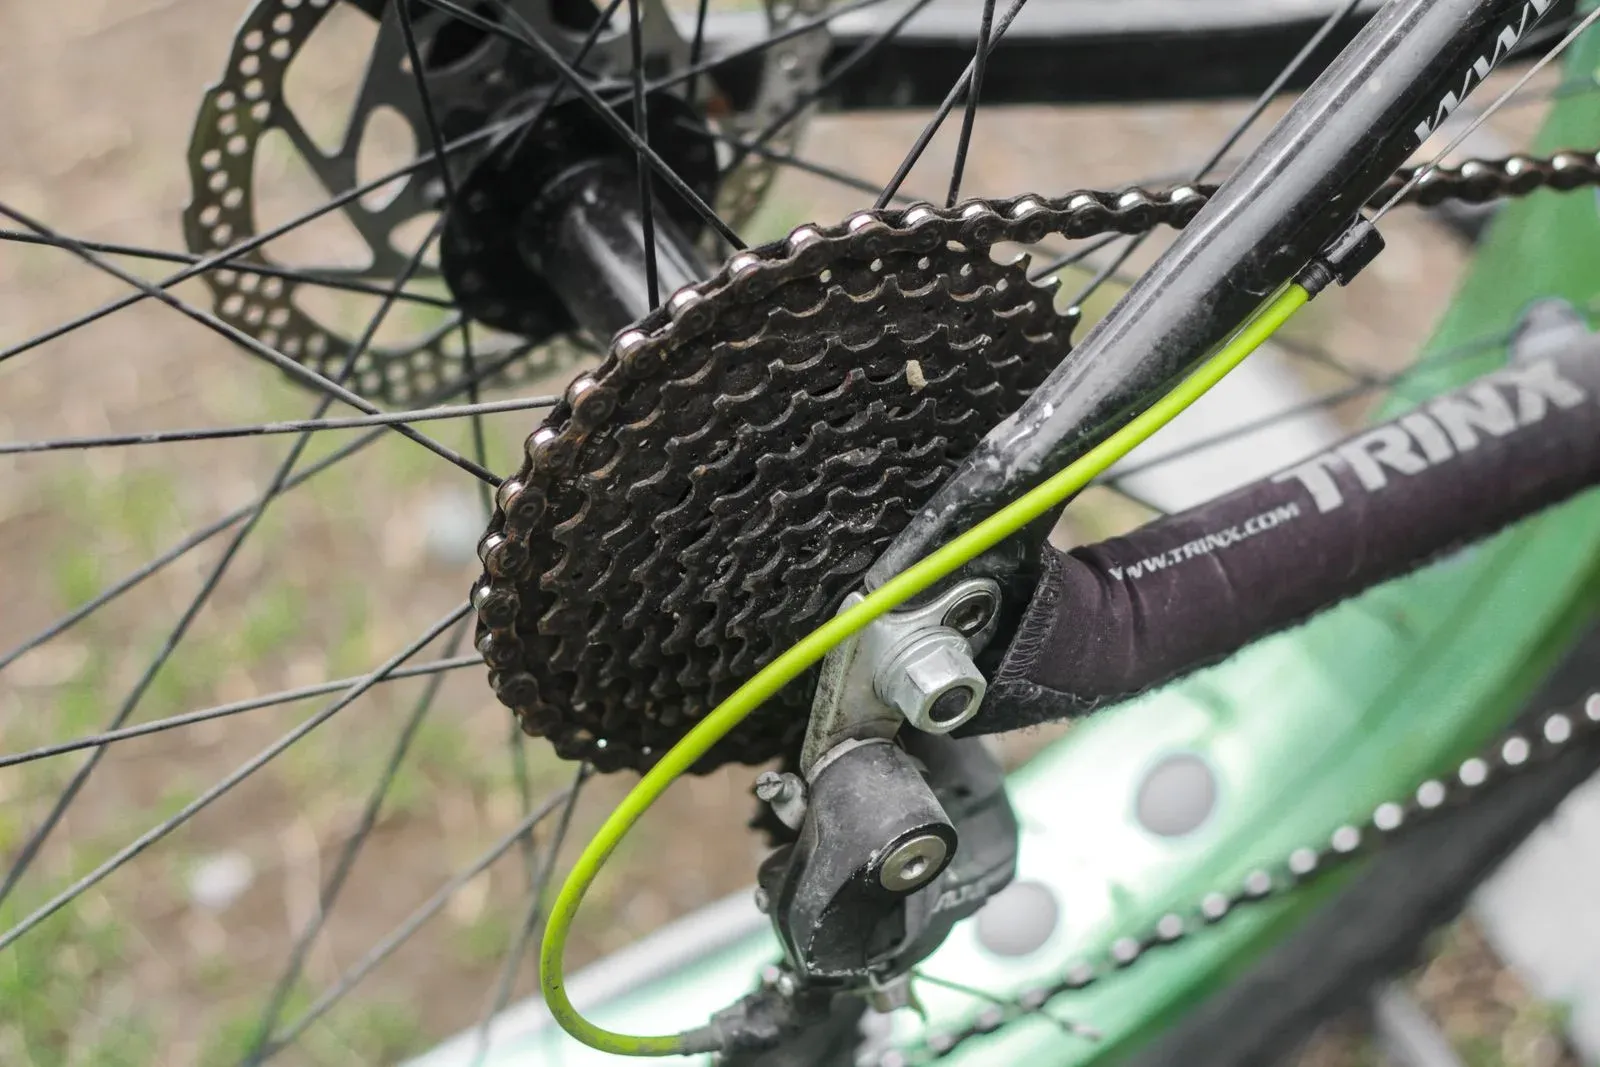
Table of Contents
- Is it a cassette or a freewheel?
- What do you need before replacing a cassette?
- Step 1: Prepare the bicycle and protect the brakes
- Step 2: Remove the rear wheel
- Step 3: Fit the lockring tool and chain whip
- Step 4: Remove the lockring and cassette
- Step 5: Confirm the new cassette and spacers
- Step 6: Install the new sprockets
- Step 7: Tighten the lockring to the maker’s specification
- Step 8: Reinstall the wheel and check retention
- Step 9: Check chain and derailleur compatibility
- Step 10: Verify the repair without rider load
- Frequently asked questions
- Product selection
- How we researched this guide
- Bottom line
- Sources
To replace a bicycle cassette, confirm that the rear cogs are a cassette on a compatible freehub, remove the lockring with the correct tool and chain whip, preserve the spacer order, install the new sprockets in the keyed orientation, and tighten the lockring to the cassette or hub maker’s specification. Then reinstall the wheel, check the chain, and recheck derailleur adjustment. A threaded freewheel uses a different removal method and is not replaced by this cassette procedure.
Park Tool’s Cassette Removal and Installation, retrieved September 2, 2026, lists the lockring tool, chain whip, wrench, and thread preparation, then separates removal from installation. REI’s How to Change a Bike Cassette, retrieved September 2, 2026, also identifies the chain whip and lockring remover as core tools. Use the exact cassette and wheel instructions when the parts are from a different family.
Key Takeaways
- Identify cassette versus freewheel before buying a tool or replacement.
- Match the new cassette to the freehub body, derailleur, shifter, chain, chainring, and required spacers.
- Keep the wheel secure, protect fingers from sharp sprocket teeth, and keep grease or cleaner away from brakes.
- Use the cassette maker’s lockring value and the wheel maker’s axle procedure. Do not borrow a torque number from another system.
- Stop for a damaged freehub, missing spacer, incompatible lockring tool, loose bearing, bent axle, or a cassette that cannot seat fully.
Is it a cassette or a freewheel?
A cassette is a group of rear sprockets that slides onto a splined freehub body and is held by a lockring. A freewheel contains its ratcheting mechanism inside a threaded sprocket assembly that screws onto the hub. The removal tools and replacement parts differ.
Look at the hub and sprocket assembly, not only the number of gears. If the lockring, splines, or freehub type is unclear, use the cassette-wear guide and ask a bicycle shop to identify it. Do not force a cassette tool into a freewheel or clamp a freewheel with a chain whip as if it were a cassette.
What do you need before replacing a cassette?
Gather:
- The bicycle, cassette, wheel, derailleur, shifter, and chain manuals
- A replacement cassette with the exact sprocket count, range, interface, and generation required
- The compatible lockring removal tool
- A chain whip or cassette holding tool for removal
- A suitable wrench or torque wrench for the lockring tool
- The spacers specified by the cassette, freehub, and wheel maker
- Clean rags, bicycle-compatible thread preparation, and gloves
- A stable work stand or a safe way to support the bicycle and wheel
Park Tool’s compatibility table includes different tools for common Shimano, SRAM, SunRace, Campagnolo, and other lockrings. The tool must match the lockring splines and the cassette family. A similar-looking tool can slip, damage the lockring, or injure your hand.
Check the new cassette before removing the old one. Record the model, the smallest and largest sprocket, the number and order of loose cogs, and every spacer. A cassette that uses a different freehub standard may not fit even when the sprocket count matches.
The bike drivetrain maintenance hub gives the broader inspection sequence. For chain and sprocket compatibility, the bike chain speed guide covers why the number of speeds is only one part of the choice.
Step 1: Prepare the bicycle and protect the brakes
Put the bicycle on a stable stand or support. If it is an e-bike, switch assist and throttle controls off and follow the bicycle maker’s battery and wheel-removal instructions. Keep hands, clothing, and tools away from the chain and spokes.
If the bicycle has disc brakes, keep oil, grease, degreaser, and dirty rags away from the rotor and pads. If a braking surface becomes contaminated, stop and follow the brake maker’s cleaning or replacement procedure. Do not spin a wheel quickly while your fingers are near the cassette.
Shift the chain to a position that relaxes the derailleur without forcing the mechanism. Record the wheel axle orientation and any washers or end caps before removal. Follow the wheel maker’s instructions for a quick release or thru-axle.
Step 2: Remove the rear wheel
Release the wheel retention system using its documented procedure. Support the derailleur so it is not caught on the cassette or forced sideways. Place the wheel with the cassette facing up or in the orientation that keeps the lockring tool square.
If the wheel does not release cleanly, stop. A seized axle, damaged dropout, bent derailleur, or incorrectly positioned brake can turn a routine cassette service into a frame or wheel repair. Do not pry against the rotor or use the derailleur as a handle.
Step 3: Fit the lockring tool and chain whip
Engage the lockring tool fully in the lockring splines. If the tool maker specifies a retaining quick-release skewer or pin, use it. Fit the chain whip to a sprocket so it can hold the cassette while the lockring turns. Keep the wrench square to the tool and your hands clear of the sprocket teeth.
Park Tool’s removal sequence turns the lockring tool counterclockwise while the chain whip prevents the cassette from rotating. The required force can be high. Use a longer handle only when it is safe for the tool and your hands. Do not strike a wrench, clamp the wheel in a way that bends it, or continue when the tool is not fully engaged.
Step 4: Remove the lockring and cassette
Turn the lockring tool in the maker’s removal direction. Once the lockring is free, hold the wheel and slide the sprockets and spacers off in order. Lay each loose part on a clean surface and photograph the stack. Some cassettes combine several cogs into a carrier while others have separate sprockets and spacers.
Inspect the lockring, freehub splines, hub, axle, bearings, and sprocket teeth. Look for deep freehub gouges, loose or cracked parts, a damaged lockring thread, contamination in the hub, or a freehub that moves abnormally. A new cassette cannot correct a damaged hub interface.
Clean the freehub body with a suitable method. Do not flood the hub bearings with solvent or water. Keep any thread preparation on the specified threads only and away from the brake rotor. If the cassette body or hub is damaged, stop and ask a qualified wheel technician.
Step 5: Confirm the new cassette and spacers
Compare the new sprocket stack with the old one and the maker’s diagram. Confirm the number, range, direction, carrier position, and spacer thickness. The largest sprocket may be part of a carrier, and loose cogs may require spacers in a specific order.
The freehub body has a keyed spline pattern with one wider or otherwise distinct key. Align the matching feature on each sprocket. Do not file a spline, reverse a cog, omit a specified spacer, or force a stack that stops before the freehub shoulder.
If the new cassette has a different largest sprocket, check derailleur capacity, chain length, pulley clearance, hanger alignment, and the maker’s compatibility chart. The chain-sizing guide explains why a new sprocket range can change the required chain length.
Step 6: Install the new sprockets
Slide the carrier, cogs, and spacers onto the clean freehub in the documented order. Keep each part flat and fully seated. Thread the lockring by hand first. It should engage smoothly without cross-threading.
If the lockring will not start or the cassette rocks, remove it and check the stack. Do not tighten a misaligned lockring to pull a crooked cassette into place. Check the freehub key, spacer order, lockring family, and whether a separate top spacer is required.
The cassette cleaning guide is useful for the inspection habit, but cleaning does not replace the lockring or wheel maker’s assembly procedure.
Step 7: Tighten the lockring to the maker’s specification
Fit the lockring tool fully and use the cassette or hub maker’s documented tightening value. Use a torque wrench only when it is set for that exact value and the adapter arrangement is appropriate. Park Tool provides a general installation sequence, but your cassette maker’s specification takes priority.
The chain whip is normally not needed for installation, but follow the tool and cassette instructions. Keep the wheel supported and the tool aligned. Stop if the lockring bottoms out before the cassette is tight, the splines slip, the freehub turns with abnormal play, or the lockring threads feel damaged.
Step 8: Reinstall the wheel and check retention
Place the wheel back into the frame without forcing the derailleur, rotor, or axle. Follow the bicycle and wheel maker’s retention sequence. Confirm the wheel is centered, the axle or quick release is secure, and the rotor runs in the caliper without a new rub.
Do not adjust the derailleur before confirming wheel seating. A wheel that sits differently changes the cassette-to-derailleur relationship and can make a good adjustment look wrong.
Step 9: Check chain and derailleur compatibility
Inspect the existing chain for wear, stiff links, damage, length, and speed compatibility. A worn chain can skip on a new cassette, and a new cassette does not make a short, long, or incompatible chain safe. Use the chain-wear guide before a road test.
Recheck the derailleur’s limit travel, indexing, pulley clearance, and chain route. The rear derailleur indexing guide covers the adjustment checks. If the cassette range, derailleur, or hanger changed, do not assume the previous setting carries over.
Step 10: Verify the repair without rider load
With the bicycle stable, turn the cranks slowly and shift through the permitted sprockets one click at a time. Check that:
- every sprocket is seated and the cassette has no lateral movement;
- the chain stays on the smallest and largest permitted sprockets;
- the derailleur does not approach the spokes;
- the chain does not bind, skip, or contact the derailleur cage;
- the wheel, axle, brake rotor, and lockring remain secure; and
- no grease, cleaner, or lubricant has reached a braking surface.
Make the first ride a controlled low-load check away from traffic and steep descents. Do not stand on the pedals to test a newly installed cassette. Stop at any skip, chain drop, delayed shift, rotor rub, loose axle, or unusual drivetrain noise.
The derailleur hanger alignment guide addresses a hanger that prevents the derailleur from tracking the new cassette. Do not use the barrel adjuster to hide a bent hanger.
Frequently asked questions
Can I replace only one cassette sprocket?
Some cassettes use separate sprockets, while others use carriers or matched shifting profiles. Replace parts only when the maker supports that service and the replacement matches the rest of the stack. A single new cog may not mesh correctly with a worn chain or neighboring sprockets.
Do I need a new chain with a new cassette?
Not automatically, but inspect chain wear, damage, length, and compatibility. A worn chain may skip on a new cassette. If the chain is replaced, size and connect it according to its maker rather than copying a worn chain blindly.
Why is my new cassette loose?
Possible causes include a missing spacer, wrong freehub interface, incorrect lockring, a carrier that is not seated, damaged splines, or insufficient tightening to the maker’s specification. Do not ride while the cassette has lateral movement.
Can I install a larger cassette without changing the derailleur?
Only if the derailleur, shifter, chain, hanger, freehub, and maker’s compatibility chart support the range. A larger sprocket can change capacity, pulley clearance, chain length, and indexing. Do not guess from the number of teeth alone.
What if the rear cogs are a freewheel?
Use the freewheel maker’s removal and installation procedure and the correct freewheel tool. This article covers a cassette on a freehub, not a threaded freewheel assembly.
Product selection
These examples were selected from Bright Data Amazon listing and specification research retrieved September 2, 2026. This is not hands-on testing. Confirm cassette versus freewheel, lockring interface, guide pin, chain whip fit, hub standard, and the cassette maker’s procedure before applying force.
Chain-whip and lockring set
Cassette Removal Tool Sets - Chain Whip & Lock Ring Tool for Shimano HG
A reference set when the freehub and lockring interface are confirmed
Selected from the verified CYCLISTS listing. Confirm the cassette family and tool fit before using leverage.
Best for: Riders servicing a compatible Shimano HG cassette at home
Key specifications: Listing identifies a chain whip, lockring tool, guide pin, hardened steel, and 7 to 11-speed coverage
Trade-off: A generic-looking lockring tool may not fit every cassette, freewheel, or disc-brake lockring
Check price on AmazonAdjustable cassette holder
Pedro's Vise Whip II Cassette Removal Tool Unisex Adult Black Fit 9-23 Tooth Gears
A focused option when the cassette geometry falls within the listed range
Selected from the verified Pedro's listing. Use the lockring tool and wheel maker's procedure for the complete service.
Best for: Riders wanting a dedicated cassette-holding tool
Key specifications: Listing identifies an adjustable locking tool for 9 to 23 tooth gears and 40 to 46 mm lockrings with opposing notches
Trade-off: The stated gear and lockring ranges still require confirmation against the exact cassette
Check price on AmazonHow we researched this guide
This is research-based cassette-service guidance, not a hands-on installation or a claim about a specific hub. DataForSEO research on September 2, 2026 showed a strongly instructional SERP led by Park Tool and REI, with tool-selection questions. Park Tool’s procedure and Shimano and SRAM system documentation were used to separate cassette identification, chain compatibility, and adjustment. Exact lockring, axle, bearing, and torque limits remain with the relevant maker.
Bottom line
Identify cassette versus freewheel, buy the correct lockring tool and cassette interface, preserve the spacer order, install the sprockets on the keyed freehub, and use the maker’s lockring specification. Reinstall and secure the wheel before checking the chain and derailleur. Stop for a loose cassette, damaged freehub, wrong tool, brake contamination, or a compatibility question.
Sources
- Park Tool, “Cassette Removal and Installation,” retrieved September 2, 2026, https://www.parktool.com/en-us/blog/repair-help/cassette-removal-and-installation
- REI, “How to Change a Bike Cassette,” retrieved September 2, 2026, https://www.rei.com/learn/expert-advice/change-bike-cassette.html
- Park Tool, “Chain Compatibility,” retrieved September 2, 2026, https://www.parktool.com/en-us/blog/repair-help/chain-compatibility
- Park Tool, “Chain Length Sizing,” retrieved September 2, 2026, https://www.parktool.com/en-us/blog/repair-help/chain-length-sizing
- Park Tool, “Rear Derailleur Adjustment,” retrieved September 2, 2026, https://www.parktool.com/en-us/blog/repair-help/rear-derailleur-adjustment
- Shimano, “General Operation,” retrieved September 2, 2026, https://si.shimano.com/en/pdfs/dm/GN0001/DM-GN0001-26-ENG.pdf
- SRAM, “1x Mechanical Road Systems User Manual,” retrieved September 2, 2026, https://www.sram.com/globalassets/document-hierarchy/user-manuals/sram-road/drivetrain/1x-mechanical-road-systems-user-manual.pdf
