Rear Derailleur Indexing: A Step-by-Step Adjustment Guide
Adjust a cable-operated rear derailleur by checking the drivetrain, limits, cable path, indexing, hanger, and pulley alignment in the maker's sequence.
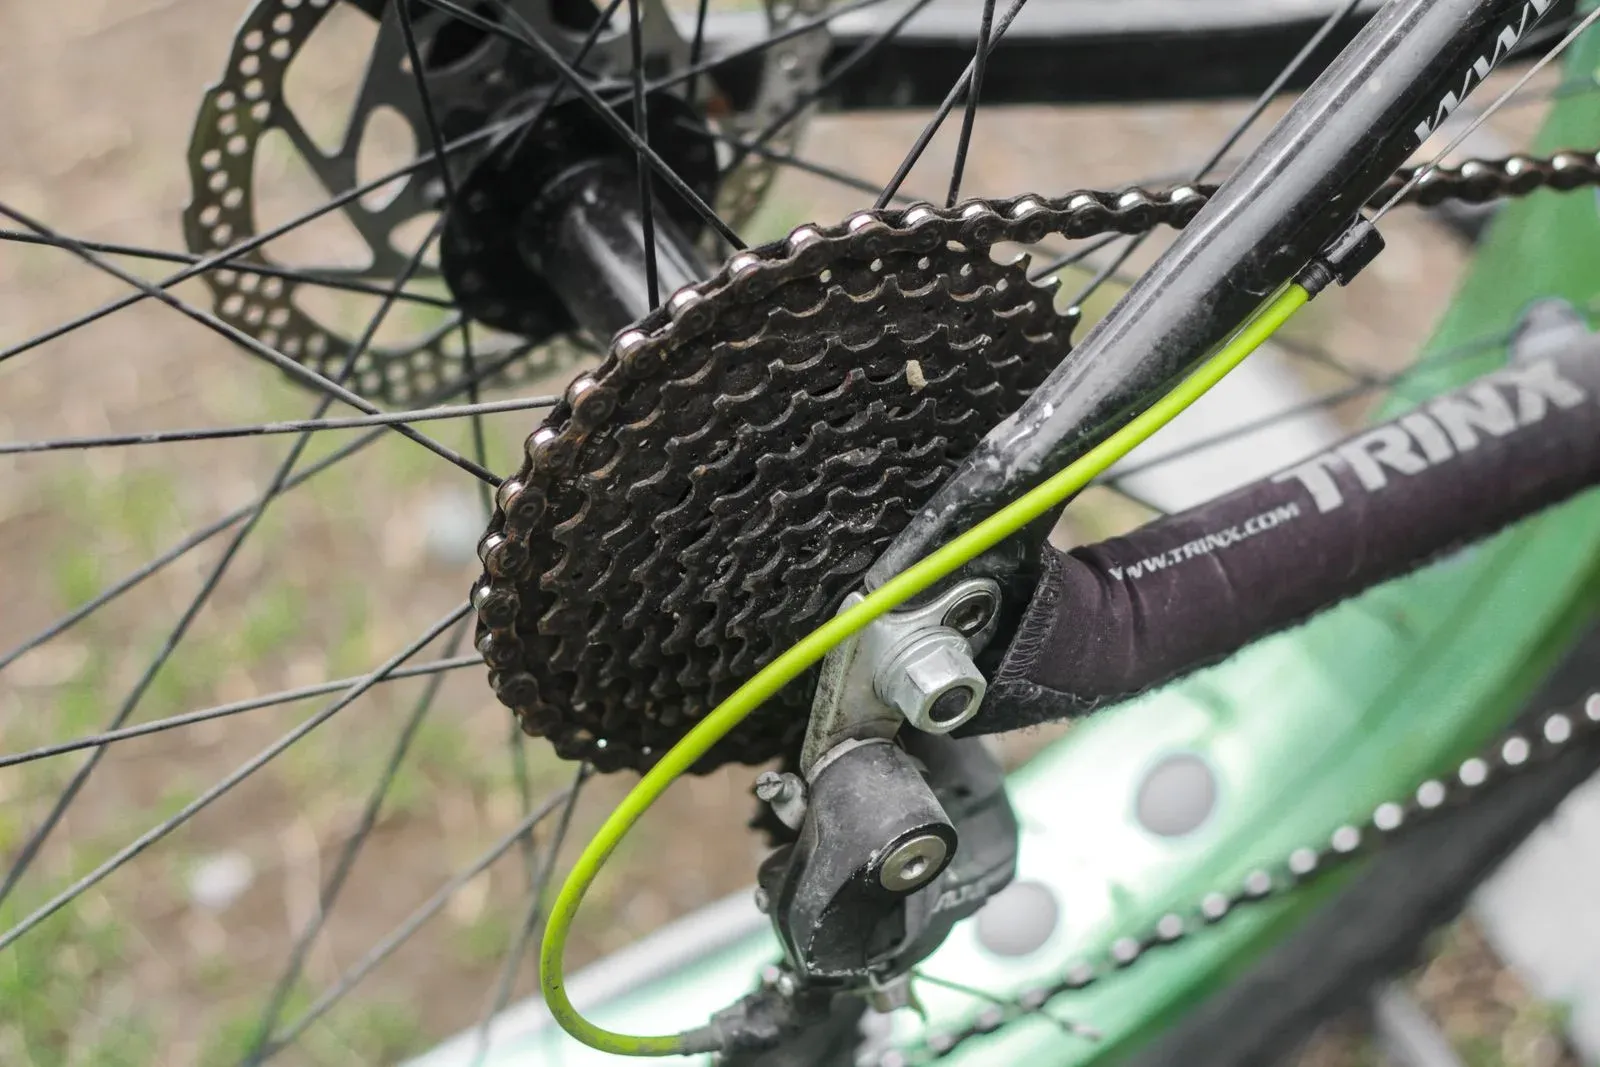
Table of Contents
- What is rear derailleur indexing?
- Which problems should you fix before indexing?
- What tools and information do you need?
- Step 1: secure and identify the drivetrain
- Step 2: inspect the cable and housing
- Step 3: check the derailleur’s travel limits
- Step 4: attach the cable with the maker’s baseline
- Step 5: index the middle of the cassette
- Step 6: check the entire permitted range
- Step 7: evaluate pulley clearance and hanger alignment
- How do you verify the adjustment before riding?
- Why does indexing keep drifting?
- Frequently asked questions
- Product selection
- How we researched this guide
- Bottom line
- Sources
Rear derailleur indexing aligns the guide pulley and chain with each rear sprocket as the shifter moves through its indexed positions. A safe adjustment starts with a sound wheel, cassette, chain, derailleur, hanger, cable, and housing. Then use the exact derailleur maker’s order for limit screws, cable attachment, indexing, and pulley clearance. A barrel adjuster cannot repair a bent hanger, worn chain, loose cassette, or wrong chain length.
This guide covers common cable-operated, indexed rear derailleurs. Electronic shifting, internally geared hubs, friction shifters, and systems with a motor-specific procedure need their own manuals. Start with the bike drivetrain maintenance hub, then review the mechanical gear adjustment guide for the broader inspection. The cassette cleaning guide, chain wear guide, and chainline guide help resolve mechanical causes before indexing.
The front derailleur chain-rub guide addresses the separate front-cage problem. The hanger alignment guide covers a tool-based hanger diagnosis.
Key Takeaways
- Indexing is cable and pulley alignment, not a substitute for a straight hanger, secure wheel, compatible cassette, sound chain, or correct derailleur.
- Set or verify travel limits before fine indexing so the chain cannot run toward the spokes or past the smallest sprocket.
- Make one small documented change at a time, test only in a controlled low-load setting, and stop for a derailleur near the spokes, a loose wheel, or damaged drivetrain.
What is rear derailleur indexing?
Indexing is the relationship between each click at the shifter and the rear derailleur’s movement to the matching cassette sprocket. The shifter pulls or releases a defined amount of cable, and the derailleur moves the chain laterally. Cable friction, hanger alignment, limit settings, pulley wear, cassette position, and chain condition all influence whether the chain lands cleanly.
Park Tool’s Rear Derailleur Adjustment, retrieved September 2, 2026, separates derailleur installation, limit adjustment, cable tension, and indexing. SRAM’s Rear Gear Adjustment, retrieved September 2, 2026, likewise directs inspection of the chain, cassette, chainrings, cable system, and hanger rather than treating indexing as a single screw adjustment.
Which problems should you fix before indexing?
Do not index around a mechanical fault. Inspect these conditions first:
- the rear wheel is fully seated and retained by the frame and hub maker’s procedure;
- the cassette or freewheel is the correct type, tight, and free of lateral movement;
- the chain is compatible, correctly joined, routed through the pulleys, and within its maker’s wear condition;
- the chain length is correct for the chainring, cassette range, derailleur capacity, and any suspension position;
- the derailleur, hanger, cage, pulley wheels, and cable anchor are straight and secure;
- the cable and housing are not kinked, crushed, corroded, frayed, contaminated, or incorrectly routed;
- the chainline, chainrings, cassette, and frame have no new interference; and
- the shifter clicks and returns through its permitted range.
Use the bike chain sizing guide if the derailleur is overextended in a large gear or leaves excessive slack in a small gear. If a new chain skips on a favorite sprocket, read the cassette wear guide before turning the barrel adjuster. A bent hanger or a cassette that moves laterally needs repair, not indexing.
What tools and information do you need?
Gather the bicycle, derailleur, shifter, cassette, chain, and wheel manuals; a stable work stand or support; clean rags; a compatible hex or Torx tool; cable cutters if the cable must be replaced; and the exact adjustment information for the model. Use a work light so the guide pulley, sprocket teeth, cable path, and limit-screw labels are visible.
Find the derailleur model before starting. Shimano’s rear derailleur dealer manual, retrieved September 2, 2026, illustrates model-specific high-limit and setup steps. Other Shimano families and other makers can use a different sequence, cable route, pulley system, or setting method.
Do not borrow a torque value, pulley clearance, limit direction, or cable path from a different model. If the model is unreadable, the hanger is questionable, or the derailleur has entered the spokes, have a qualified technician identify it.
Step 1: secure and identify the drivetrain
Switch the drivetrain to a safe, stable condition. If the bicycle is an e-bike, switch assist and throttle controls off and follow the bicycle maker’s battery guidance. Keep the chain, cassette, derailleur, and wheel clear of fingers and clothing.
Count the rear sprockets, identify the largest and smallest, note the front chainrings, and record the chain and derailleur model if available. Confirm whether the rear mechanism is a cassette or freewheel. Look for crash damage, a loose axle, a bent hanger, a missing pulley bolt, a damaged cable stop, and a chain routed outside a pulley.
Do not begin with cable tension if the wheel is not correctly seated. A wheel position error changes every relationship the derailleur is trying to index.
Step 2: inspect the cable and housing
The cable must move smoothly enough for the shifter’s command to reach the derailleur. Check the housing ends, ferrules, stops, bends, exposed cable, anchor bolt, and barrel adjuster. Look for corrosion, fraying, crushed housing, an end that has pulled out of a stop, or a cable routed on the wrong side of an anchor.
Replace a cable or housing only with parts and routing supported by the component maker. Do not lubricate a sealed system or force a sticky cable through a housing if the manual says to replace it. A contaminated or kinked system can make a correct index setting change as the bars turn or the cable settles.
Step 3: check the derailleur’s travel limits
Limit screws define how far the derailleur can travel at the ends of the cassette. They are a protection against the chain leaving the smallest sprocket or entering the spokes. Follow the exact maker sequence and markings. Set the limit only after the hanger, wheel, cassette, derailleur, and cable attachment are known to be sound.
With the bicycle secured and the drivetrain unpowered, observe the guide pulley relative to the smallest and largest permitted sprockets. Do not place fingers between the chain and cassette. If the chain can fall toward the spokes, stop and correct the limit or obtain service before turning the cranks under load.
Do not use a limit screw to fix a click-to-click error across the middle sprockets. That error is usually indexing, cable, hanger, chain, or cassette related. Do not turn both limit screws at once without recording the baseline.
Step 4: attach the cable with the maker’s baseline
Shift to the position specified by the derailleur maker before releasing or attaching the cable. Set the barrel adjuster to the documented baseline, leave enough adjustment for fine indexing, and attach the cable along the correct path. Do not pull the cable as hard as possible or crush it under a bolt.
The exact cable pinch position and required tension differ by derailleur. Confirm the cable is not trapped under a washer, routed around the wrong side of the anchor, or rubbing a frame stop. Trim and cap a cable only after the adjustment is stable.
Step 5: index the middle of the cassette
Use the maker’s starting sprocket and shift direction. Turn the cranks by hand or use the procedure’s safe method while watching the chain and guide pulley. Make one small barrel-adjuster change, then test the same shift again. Record the direction and result so you do not lose the baseline.
If the chain hesitates moving to a larger sprocket, the cable command may be insufficient or restricted. If it hesitates moving to a smaller sprocket, friction, excess cable pull, or a different mechanical issue may be present. These are diagnostic tendencies, not a universal direction for every shifter. Follow the model manual and do not force a shift.
The guide pulley should track the selected sprocket without persistent chatter or chain rub. If the best setting makes one end of the cassette unsafe, stop. A bent hanger, wrong cassette, poor chainline, cable fault, or incompatible shifter and derailleur can prevent a valid setting.
Step 6: check the entire permitted range
Shift through the permitted rear sprockets one click at a time with light, controlled crank movement. Confirm that the chain stays on the intended sprocket, the derailleur does not approach the spokes, the chain does not overshift past the smallest sprocket, and the cage and chain do not bind in the large-chainring and large-sprocket combination.
Check the chain in the combinations the bicycle maker permits. Do not force extreme cross-chain combinations just to fill a checklist. A chain that is too short, too long, worn, stiff, incorrectly joined, or incompatible can show a problem only at one end of the range. The chain wear guide and chainring symptoms guide help separate those faults.
Step 7: evaluate pulley clearance and hanger alignment
Pulley clearance and hanger alignment are distinct from indexing. The B-tension or equivalent adjustment changes derailleur geometry according to the exact drivetrain manual. Do not copy a generic gap or screw count because cassette size, derailleur design, and maker procedure vary.
If the guide pulley does not track the sprocket plane across the cassette, if the derailleur body is bent, or if indexing is good in one end and impossible in the other, suspect hanger alignment or a compatibility problem. The hanger alignment guide addresses that diagnosis. A qualified mechanic with the appropriate gauge should handle an uncertain or damaged hanger.
How do you verify the adjustment before riding?
Verify the drivetrain on a stable bicycle first. Confirm every permitted shift, the chain route, wheel retention, derailleur clearance, cable security, crank movement, cassette tightness, and the absence of cracks or bent teeth. Then make a low-load ride in a controlled area away from traffic, obstacles, and steep descents. Shift gently and stop at the first skip, drop, rub, delayed response, or unusual noise.
Do not stand on the pedals to test an index setting. Do not ride if the chain moves toward the spokes, the derailleur is bent, the wheel is loose, or a chain or sprocket is damaged. If a chain broke during the repair history, consult the chain-breakage guide and inspect the complete drivetrain before any road test.
Why does indexing keep drifting?
Drift after adjustment usually means the cable or housing is settling, the cable is damaged or contaminated, the derailleur or hanger is moving, the cassette or wheel is loose, the chain is worn, or the original setting was compensating for another fault. A barrel adjuster can hide a cable problem temporarily but cannot make a bent interface straight.
Recheck the cable stops, housing seats, derailleur mounting, hanger, wheel, cassette, chain, and chainline. If the setting changes when the handlebars turn, when the suspension moves, or after a single shift, stop and find the movement. Do not keep adding tension without a baseline.
Frequently asked questions
Which screw adjusts rear derailleur indexing?
Indexing across the cassette is generally fine-tuned with the barrel adjuster or an electronic control, while limit screws control the travel ends. The exact sequence depends on the derailleur and shifter. Do not use a limit screw to correct a middle-sprocket alignment problem.
Should the guide pulley line up exactly with every cog?
It should track the selected sprocket according to the maker’s setup procedure. The visual relationship changes as the derailleur moves, and pulley clearance is a separate adjustment. If the pulley cannot follow the cassette across its range, inspect the hanger, derailleur, cable, cassette, and compatibility.
Why does my bike shift up but not down?
Cable friction, housing, cable routing, barrel setting, shifter condition, derailleur spring movement, hanger alignment, or a damaged drivetrain can affect one direction. Inspect the cable path and mechanical condition before making repeated tension changes.
Can a new chain fix bad indexing?
Only if the old chain was the cause and the new chain is compatible, correctly sized, joined, routed, and within the drivetrain’s design. It cannot fix a bent hanger, loose cassette, cable fault, damaged derailleur, or incorrect limit.
Is indexing the same as derailleur adjustment?
No. Indexing is one part of adjustment. A complete setup also includes compatibility, mounting, hanger and wheel condition, chain routing and length, limit travel, cable path, pulley geometry, and final verification.
Can I index an electronic rear derailleur with this guide?
No. Electronic systems have firmware, battery, pairing, trim, crash mode, and maker-specific adjustment procedures. Use the exact system manual and keep the drive system unpowered while inspecting mechanical parts.
Product selection
These examples were selected from Bright Data Amazon listing and specification research retrieved September 2, 2026. This is not hands-on testing. Cable cutters and pullers support a procedure but cannot compensate for a bent hanger, incompatible derailleur, damaged housing, or a manufacturer’s different adjustment method.
Cable and housing cutter
Park Tool CN-10 Professional Cable and Housing Cutter
A focused workshop tool when cable service is actually the fault
Selected from the verified Park Tool listing. Follow the cable maker's routing and end-treatment instructions.
Best for: Riders replacing compatible derailleur cable and housing
Key specifications: Listing identifies cutting jaws for bicycle cable and index housing plus a cable-end crimper
Trade-off: A clean cable cut does not set indexing or prove that the hanger and derailleur are aligned
Check price on AmazonCable cutter alternative
Pedro's Bicycle Cable Cutter, Black/Yellow
A useful maintenance reference when the cable path and component manual agree
Selected from the verified Pedro's listing. Stop if the cable, housing, or derailleur system is not identified.
Best for: Riders servicing compatible brake or derailleur cable and housing
Key specifications: Listing identifies heat-treated steel, cushioned grips, high leverage, and cable-end work
Trade-off: A cutter cannot correct cable tension, limit-screw setup, pulley geometry, or hanger alignment
Check price on AmazonHow we researched this guide
This is research-based adjustment guidance, not a workshop test or a claim about a specific derailleur. DataForSEO research on September 2, 2026 showed strong informational demand around Shimano adjustment, H and L screws, and rear indexing. We used Park Tool, SRAM, and Shimano documentation to separate limits, cable indexing, pulley geometry, and hanger problems. Exact screw directions, clearances, torque values, and compatibility remain with the relevant maker.
Bottom line
Index a rear derailleur only after the wheel, cassette, chain, chainline, hanger, derailleur, cable, and housing are sound. Follow the model’s order for limits, cable attachment, indexing, and pulley clearance, changing one small variable at a time. Stop for a derailleur near the spokes, a loose wheel or cassette, damaged chain, or a setting that cannot hold across the permitted gears.
Sources
- Park Tool, “Rear Derailleur Adjustment,” retrieved September 2, 2026, https://www.parktool.com/en-int/blog/repair-help/rear-derailleur-adjustment
- SRAM, “Rear Gear Adjustment,” retrieved September 2, 2026, https://www.sram.com/de/service/articles/rear-gear-adjustment
- Shimano, “Rear Derailleur Dealer Manual,” retrieved September 2, 2026, https://si.shimano.com/en/pdfs/dm/MARD011/DM-MARD011-06-ENG.pdf
- Shimano, “General Operation,” retrieved September 2, 2026, https://si.shimano.com/en/pdfs/dm/GN0001/DM-GN0001.pdf
- Park Tool, “When to Replace a Chain on a Bicycle,” retrieved September 2, 2026, https://www.parktool.com/en-us/blog/repair-help/when-to-replace-a-chain-on-a-bicycle
- Park Tool, “Chain Length Sizing,” retrieved September 2, 2026, https://www.parktool.com/en-us/blog/repair-help/chain-length-sizing