Bike Brake Lever Pulls to the Handlebar: Causes and Fixes
Find why a bike brake lever pulls to the handlebar, run safe wheel and pad checks, and know when a leak or cable fault means stop riding.
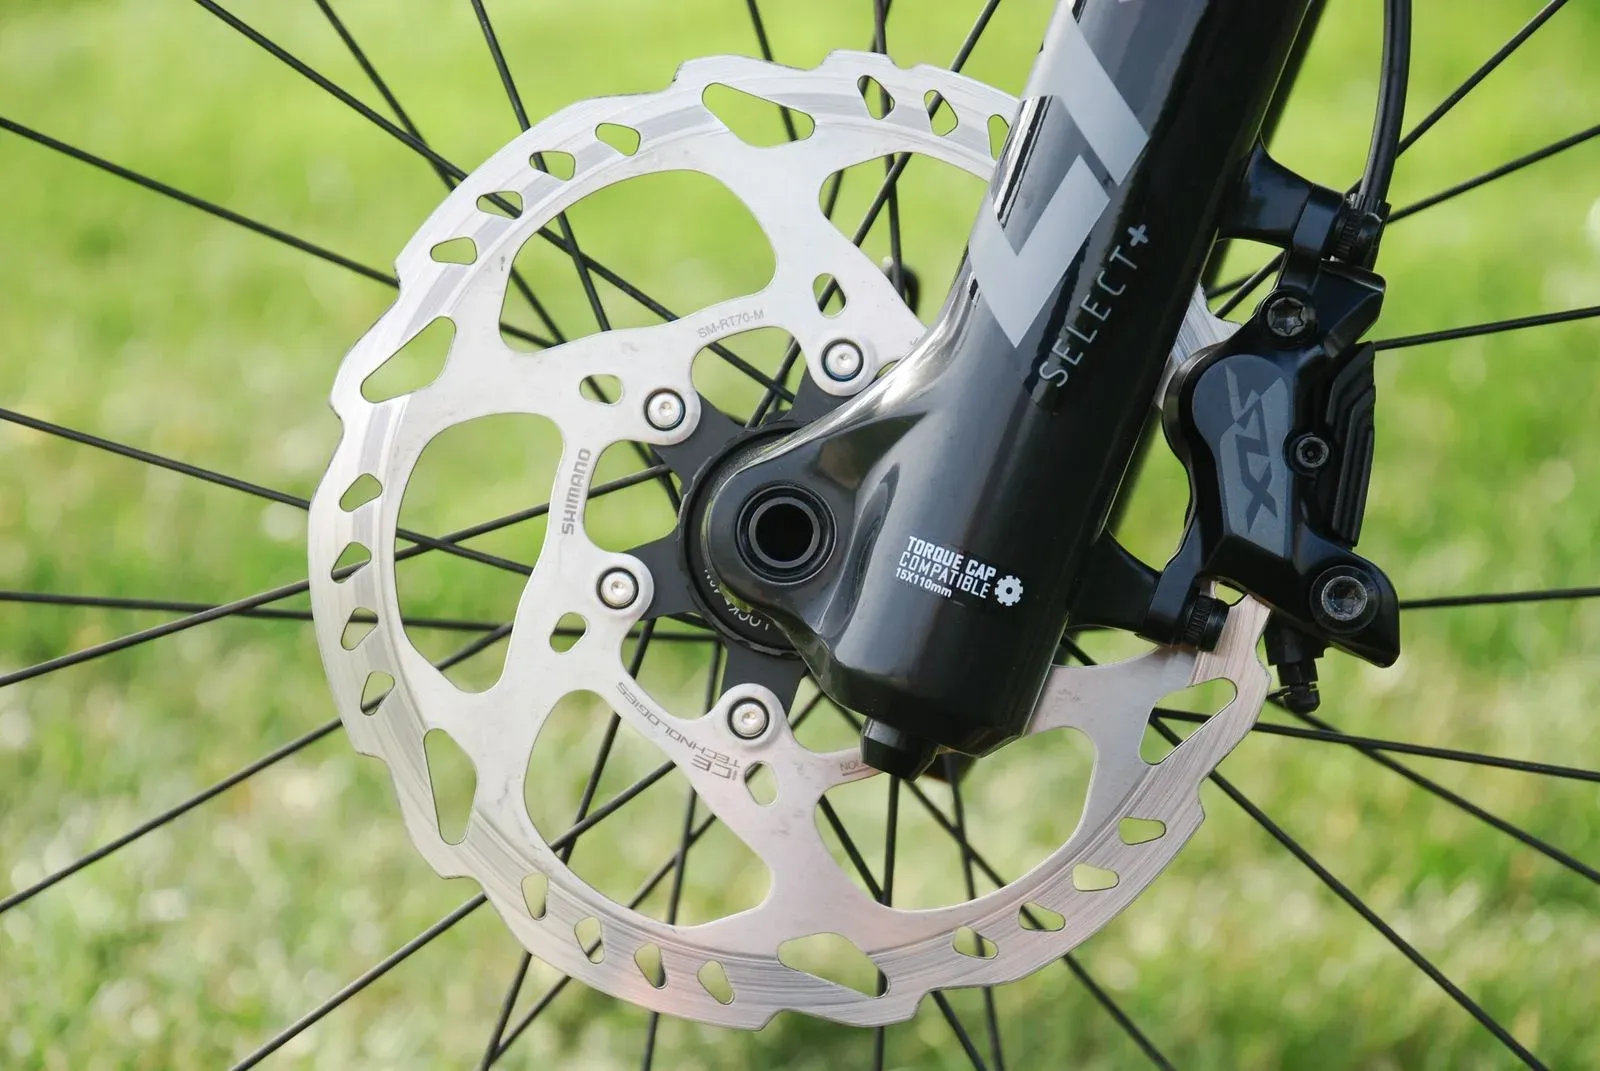
Table of Contents
- Why does my bike brake lever pull to the handlebar?
- What should you do first?
- Check the wheel, rotor, and pad position
- If the brake is mechanical, check the cable path
- If the brake is hydraulic, check for a system fault
- Could worn or contaminated pads cause long travel?
- Could the rotor or caliper be the real problem?
- What is the safe repair sequence?
- When should a mechanic inspect the bike?
- Frequently asked questions
- Is it safe to ride if the brake lever touches the handlebar?
- Why does my brake lever pull farther after removing a wheel?
- Can I tighten the brake cable to fix long travel?
- Does a soft hydraulic lever always need bleeding?
- Can new brake pads fix a lever that reaches the bar?
- What if the lever becomes normal after pumping it?
- How we researched this guide
- Bottom line
- Sources
A bike brake lever that pulls to the handlebar is a stop-riding fault until the cause is identified and the brake passes the exact maker’s checks. Possible causes include a cable or housing problem, worn or displaced pads, a wheel or rotor issue, hydraulic air or leakage, a caliper or piston fault, or a lever problem. Do not compensate by squeezing harder, tightening a random adjuster, or riding to a shop.
Do not ride with a long or soft lever
Stop for a lever that reaches the handlebar, a sudden change in travel, weak or inconsistent braking, a frayed cable, a kinked or leaking hose, fluid near the lever or caliper, a loose wheel or caliper, a cracked or damaged rotor, or a pad retainer that is not secure. Walk the bicycle or arrange qualified service.
Why does my bike brake lever pull to the handlebar?
Long lever travel means the brake is not creating or transmitting its normal movement before the lever reaches the bar. The fault can be at the lever, cable or hose, caliper, pad, rotor, wheel, or interface between them. A lever can also feel long after wheel removal or a pad change when a hydraulic lever was squeezed with the wheel or pad spacer out.
Do not diagnose from feel alone. Shimano’s hydraulic disc-brake manual directs riders to check brake operation, leakage, pad condition, rotor damage, lever security, and abnormal noises before riding and warns about operating the lever with the wheel removed (retrieved September 2, 2026). The exact manual for your brake controls.
The bike brake-pad wear guide covers pad inspection. A long lever plus weak braking is more urgent than a lever that merely feels different after a documented setup.
What should you do first?
Stop in a safe place and do not ride in traffic or on a descent to test the brake. Turn an e-bike off and follow the bicycle maker’s battery instructions. Let hot components cool. Keep fingers away from the rotor and do not squeeze a hydraulic lever with the wheel removed.
Record:
- which lever changed, front or rear;
- whether the change was sudden or gradual;
- whether braking is weak, noisy, pulsing, or absent;
- whether the wheel, rotor, pads, caliper, cable, hose, or lever was recently serviced;
- whether the bicycle suffered an impact, transport incident, or wet or dirty ride.
Use the front-wheel disc-brake installation guide if wheel removal preceded the symptom. If the wheel, axle, fork, frame, or brake is damaged, stop and arrange inspection.
Check the wheel, rotor, and pad position
With the bicycle stable and the wheel installed, confirm that the wheel is fully seated in the frame or fork and that the thru-axle, quick release, or axle nuts are secured by the exact procedure. Inspect the rotor, caliper, pads, spring, pin, clip, and retainer without touching the braking surface.
Look for:
- a rotor outside the caliper or a wheel that is not centered;
- a loose rotor bolt or lockring;
- a caliper, pad, spring, or retainer that moves;
- pads that are worn, displaced, contaminated, or not the identified part;
- a cracked, sharply damaged, or badly bent rotor;
- a wheel, hub, axle, dropout, fork, or frame with play or damage.
Do not use a random spacer to take up lever travel. Do not continue if the wheel moves, the rotor rubs heavily, the pad retainer is missing, or the rotor or mount is damaged. The tubeless wheels and tire guide provides related wheel checks.
If the brake is mechanical, check the cable path
Mechanical disc brakes use a cable and housing, but the correct inspection depends on the exact lever and caliper. Check that the cable housing is seated at every stop, the cable is not frayed or kinked, the lever pivot returns, the caliper arm moves as the manual describes, and the cable anchor and pad adjusters are secure.
Do not turn the barrel adjuster until the pad loses engagement. Do not use cable tension to conceal a damaged caliper mount, worn pad, bent rotor, loose wheel, stretched housing, or incorrect lever pull. If the cable is frayed, corroded, trapped, or cannot move normally, stop and replace or service it using the maker procedure.
Some mechanical calipers have fixed and moving pad adjusters. Others use different clearance and alignment methods. Identify the exact model before changing an adjuster, and never invent a torque or clearance. The hydraulic-versus-mechanical comparison explains why architecture changes the service path.
If the brake is hydraulic, check for a system fault
Inspect the lever, hose, fittings, caliper body, seals, and pad area for fluid. Do not taste or touch brake fluid, open the circuit, add fluid, or start a bleed procedure without the exact maker’s instructions, approved fluid, tools, and training. Fluid types and bleed methods are not universal.
If the lever feels spongy, travels farther after repeated pulls, or changes suddenly, air, a leak, hose damage, piston movement, pad position, or another hydraulic fault is possible. A hydraulic lever can also change if it was pulled while the wheel or approved pad spacer was absent. Park Tool’s SRAM hydraulic bleeding guide treats bleeding as a technical, model-specific service procedure (retrieved September 2, 2026).
Do not pump a weak lever as a ride test. Keep the bicycle parked and ask a qualified mechanic or the brake maker for the next step. A leak, damaged hose, protruding piston, contaminated pad, or lever that reaches the bar is not a normal adjustment.
Could worn or contaminated pads cause long travel?
They can contribute, but do not assume the pads are the only cause. Pad thickness, backing plate, spring, retainer, caliper position, rotor condition, and wheel seating all matter. Identify the exact caliper and pad code before ordering replacements. Do not fit a pad by outline or use a thin pad to create clearance.
If oil, grease, chain lube, sealant, or an unapproved cleaner reached the pad or rotor, follow the maker’s replacement and cleaning instructions. Shimano warns that oil or grease can prevent correct braking and that some commercial brake cleaners or silencing agents can damage seals for its covered system. The disc-brake pad replacement tutorial covers pad and retainer identification.
After an approved repair, reinstall the wheel correctly, operate the lever gradually, and verify firm predictable feel before a controlled check. New pads or a new rotor may require the exact maker bed-in procedure. Do not bed in a brake that still has long travel.
Could the rotor or caliper be the real problem?
Yes. A rotor that is loose, cracked, severely bent, too thin for its maker limit, contaminated, or incompatible can change braking and lever feel. A loose or misaligned caliper, damaged mount, sticky piston, or hub with play can do the same. The bent-rotor decision guide covers the repair-or-replace question.
Do not straighten a severely damaged rotor, move a mount, or use a guessed pad or rotor limit. The rubbing disc-brake guide covers wheel, hardware, caliper, piston, and rotor diagnostic order. A long lever with heavy rubbing or weak braking stays parked.
What is the safe repair sequence?
The safe sequence is diagnosis before adjustment:
- Stop riding and record the changed lever and recent work.
- Inspect wheel retention, rotor, caliper, pads, retainer, cable or hose, and visible damage.
- Identify the exact brake, lever, caliper, rotor, and pad models.
- Follow the maker’s wheel, cable, pad, caliper, hydraulic, or bleed procedure.
- Recheck lever feel, wheel retention, rotor clearance, hardware, and braking while stationary.
- Use a clear, low-risk area for a cautious check only after the brake passes all prior steps.
Do not skip from step one to a ride. Stop for any unresolved cause, uncertain part, fluid leak, damaged structure, or change in braking. The brake-squeal guide covers noise, but a long lever is a separate safety fault.
When should a mechanic inspect the bike?
Use a qualified mechanic when the brake model is unknown, a cable or hose is damaged, the hydraulic system leaks, the wheel will not seat, a hub or mount has play, the rotor is cracked or badly bent, the lever reaches the bar after the documented procedure, pads are contaminated, or the cause is unclear. Seek inspection after a crash or transport impact affecting the wheel, fork, frame, axle, caliper, rotor, or lever.
Do not ride to a shop on a public route with a brake that cannot slow the bicycle normally. Walk it or arrange transport.
Frequently asked questions
Is it safe to ride if the brake lever touches the handlebar?
No. Treat that condition as a stop-riding fault until the exact cause is corrected and the brake passes the maker’s checks. A lever at the bar can leave too little movement or control for an emergency stop.
Why does my brake lever pull farther after removing a wheel?
On a hydraulic brake, squeezing the lever while the wheel or approved pad spacer is out can allow pistons to move outward. Reinstall the wheel only by the exact procedure and ask a mechanic if the pads or pistons are displaced. Do not force the wheel or pump the lever repeatedly.
Can I tighten the brake cable to fix long travel?
Only after identifying a mechanical system and following its exact cable and pad procedure. Cable tension cannot repair a frayed cable, damaged housing, worn or contaminated pad, bent rotor, loose wheel, or caliper fault. Do not adjust until pad engagement and lever safety are confirmed.
Does a soft hydraulic lever always need bleeding?
No. Air is one possibility among a leak, hose problem, piston issue, pad position, caliper fault, or another service error. Do not bleed by a generic recipe. Identify the brake and use its maker procedure or a qualified mechanic.
Can new brake pads fix a lever that reaches the bar?
Only if the exact diagnosis shows that pad condition is the cause and the complete brake is otherwise sound. New pads do not fix a leak, air, damaged hose, loose wheel, bent rotor, bad mount, wrong pad, or lever fault. Bed in replacements only after normal lever feel returns.
What if the lever becomes normal after pumping it?
Do not treat pumping as a repair. A changing lever can indicate air, leakage, pad or piston movement, wheel position, or another fault. Keep the bicycle parked until the exact cause is found and the brake passes a documented inspection.
How we researched this guide
This is research-based brake-safety guidance, not a hands-on lever, cable, bleed, stopping-distance, pressure, or braking-performance test. We reviewed Shimano’s current hydraulic user manual, Park Tool’s disc-pad and SRAM bleed references, and BikeRideReview’s wheel and pad guides on September 2, 2026. We did not invent a universal lever travel, cable adjustment, pad limit, hydraulic pressure, fluid, torque, or bleed procedure.
Bottom line
A brake lever at the handlebar means stop first. Check wheel seating, rotor, pads, caliper, cable or hose, and visible leakage, then use the exact maker procedure or a qualified mechanic. Ride only after lever feel and braking are firm, predictable, and normal for that system.
Sources
- Shimano, “Hydraulic Disc Brake User Manual,” retrieved September 2, 2026, https://si.shimano.com/en/pdfs/um/8VR0A/UM-8VR0A-009-ENG.pdf
- Park Tool, “Disc Brake Pad Removal & Installation,” retrieved September 2, 2026, https://www.parktool.com/en-us/blog/repair-help/disc-brake-pad-removal-installation
- Park Tool, “Brake Bleeding for SRAM Hydraulic Brakes,” retrieved September 2, 2026, https://www.parktool.com/en-us/blog/repair-help/brake-bleeding-for-sram-hydraulic-brakes-using-the-bkd-1
- Park Tool, “Wheel Removal and Installation,” retrieved September 2, 2026, https://www.parktool.com/en-int/blog/repair-help/wheel-removal-and-installation