How to Replace Bike Disc Brake Pads
Replace bike disc brake pads by identifying the exact brake, fitting approved pads and retainers, protecting the rotor, and bedding in the system safely.
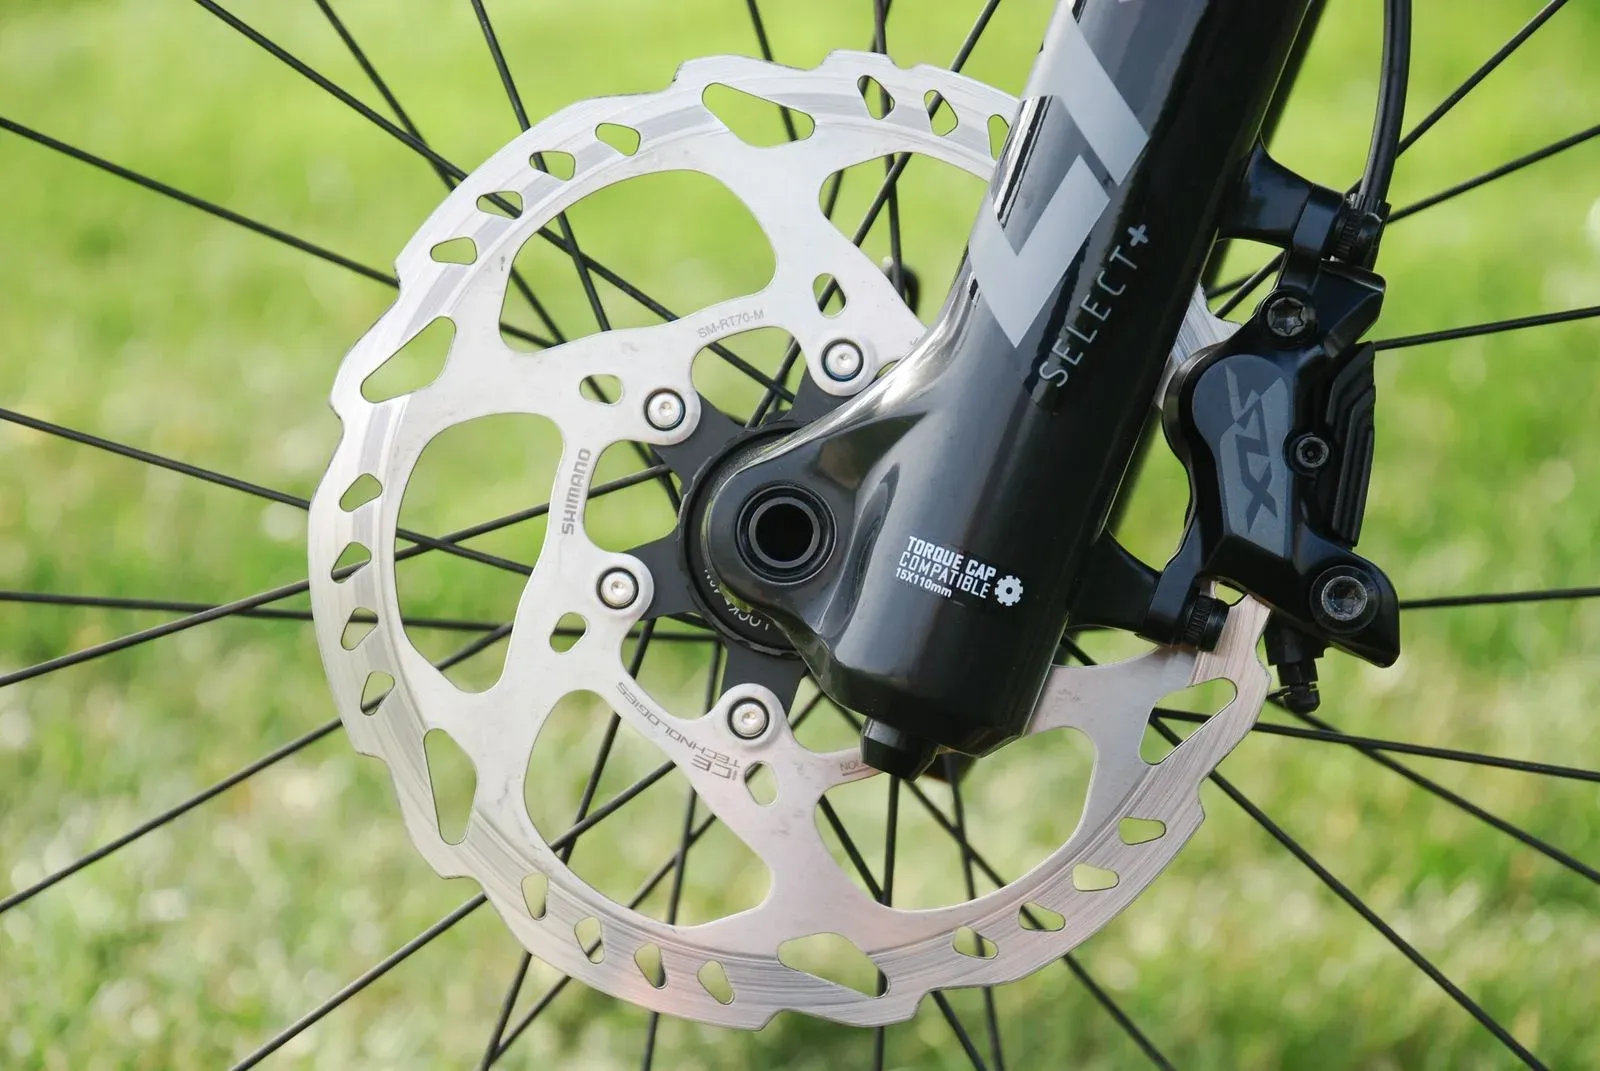
Table of Contents
- Before you replace the pads
- When should you use a mechanic?
- Step 1: Identify the pad and brake system
- Step 2: Stabilize the bicycle and protect the brake
- Step 3: Remove the wheel and old pads as the manual directs
- Step 4: Inspect the rotor, caliper, and wheel
- Step 5: Reset the caliper only as specified
- Step 6: Install the new pads and retainer
- Step 7: Reinstall the wheel and check the brake
- Step 8: Bed in the new pads
- Final inspection after the first controlled test
- Common replacement mistakes
- Frequently asked questions
- Product selection
- How we researched this guide
- Bottom line
- Sources
Replace bike disc brake pads only after identifying the exact brake and pad model, reading the current brake maker’s procedure, and checking the rotor, caliper, wheel, retainer, and lever. Remove and install the pads with the wheel and hydraulic system protected, keep oil and grease away from every braking surface, reinstall the wheel correctly, then bed in the new pads according to the maker’s instructions. A new pad cannot make a damaged rotor, leaking hose, loose wheel, or weak brake safe.
Brake faults are stop-riding conditions
Do not ride with metal-to-metal contact, weak or inconsistent braking, a lever that reaches the handlebar, a fluid leak, a cracked or loose pad, a damaged rotor, loose wheel or axle, missing retainer, damaged hose or cable, or a brake system you cannot identify. If the battery or motor adds unexpected power, turn the system off and resolve that fault before any brake work.
Before you replace the pads
Disc brake pads are not universal. Identify the brake maker and caliper model, pad shape and compound, rotor model or compatibility, pad retainer, spring, pin or bolt, and whether the system is hydraulic or mechanical. A lever logo may not identify the caliper. Use the bicycle, brake, and pad manuals together.
Prepare a stable work area, eye protection, clean gloves, the exact replacement pads, the maker-specified pad spacer or piston tool, the correct hand tools, and only the cleaning product the brake maker approves. Keep chain lube, grease, tire sealant, suspension oil, fingerprints, and general-purpose spray away from pads and rotors.
The brake-pad wear inspection guide helps decide whether replacement is needed. The winter braking guide covers wet, cold, and low-visibility stop conditions separately. This tutorial covers pad replacement, not a universal brake adjustment or bleed procedure.
When should you use a mechanic?
Have a qualified bicycle mechanic take over if the brake or pad model is unknown, the rotor is cracked or badly damaged, the caliper mount is loose, the hydraulic hose or lever leaks, the pistons will not move as the manual describes, the mechanical cable is frayed, the wheel or axle will not seat, the brake remains weak after the documented procedure, or the correct retainer and pad cannot be confirmed.
Do not open a hydraulic system, bleed fluid, replace a hose, straighten a rotor, file a pad, or alter a caliper mount unless the exact maker procedure and your qualifications support it. Do not use a replacement pad with a similar outline as a substitute for an identified part.
Step 1: Identify the pad and brake system
Record the caliper model, pad code, rotor type, pad material, and retainer arrangement. Check the brake maker’s current service manual for:
- the approved pad part number and compound;
- whether the pad has a front and rear face or an arrow;
- pad spring orientation and whether a pin, bolt, clip, or magnet is used;
- whether the wheel must be removed;
- the pad spacer and piston-reset procedure;
- cleaning, wheel-installation, lever, and bed-in instructions;
- any model-specific torque or inspection values.
Shimano’s current manual site says its dealer manuals are intended primarily for professional mechanics and publishes model-specific technical documents (Shimano Manuals, retrieved September 2, 2026). Use a manual for the exact brake, not a general picture. SRAM likewise publishes a separate MTB Disc Brake Pad Replacement user manual through its model service pages (SRAM DB5 service documents, retrieved September 2, 2026).
Step 2: Stabilize the bicycle and protect the brake
- Turn off an e-bike and remove its battery if the maker directs it. Keep the motor from starting while your hands are near the rotor or wheel.
- Place the bicycle in a stable stand or support it so the wheel and brake can be accessed without tipping.
- Let the rotor and caliper cool. Shimano warns that disc rotors and calipers become hot during use and that the rotor can cut fingers (Hydraulic Disc Brake User Manual, retrieved September 2, 2026).
- Cover the rotor or keep clean hands and tools away from it. Do not touch the pad face with greasy gloves.
- If the wheel will be removed, obtain the exact pad spacer before squeezing the hydraulic lever. Do not squeeze a hydraulic lever with the wheel or pad spacer out unless the brake maker explicitly permits that procedure.
Take a photograph of the pad and retainer before removal. It is a reference only, not a substitute for the manual.
Step 3: Remove the wheel and old pads as the manual directs
Follow the exact wheel-removal method for the bicycle and brake. Release a thru-axle, quick release, or axle nut only with the correct procedure, and keep the wheel, rotor, spacers, and retainer parts clean. If the wheel is difficult to remove, stop instead of forcing the rotor through the caliper.
Remove the pad pin, bolt, clip, magnet, or retaining spring in the order the brake manual shows. Keep the old parts arranged so you can compare them with the replacement. Do not use a screwdriver on the friction surface or pry against a seal. If a piston or pad is stuck, identify the model-specific reset process or use a mechanic.
For a mechanical caliper, do not turn an adjuster randomly to create room. For a hydraulic caliper, do not push a piston back with a contaminated tool or force it past the maker’s procedure. A piston that moves unevenly, leaks, or will not retract is a service issue.
Step 4: Inspect the rotor, caliper, and wheel
Before installing the new pads, inspect the surfaces the manual identifies:
- rotor cracks, deformation, deep scoring, loose bolts or lockring, and contamination;
- caliper body, seals, mounts, pad slot, piston faces, and cable or hose;
- pad spring, pin, bolt, clip, magnet, and other retention hardware;
- wheel, hub, axle, dropout or thru-axle, bearing, tire, and rotor alignment;
- electrical motor cable, if the wheel is on a converted e-bike.
Do not diagnose a rotor or caliper from a single noise or a shiny mark. If oil, grease, chain lube, or sealant reached a pad, follow the brake maker’s replacement instruction. Shimano warns that oil or grease on pads or the rotor can prevent correct brake operation (Disc Brake Service Instructions, retrieved September 2, 2026). The exact brake maker’s cleaning product and procedure take priority.
The disc-brake rubbing guide covers persistent contact after the pad and wheel are correctly installed. Do not ride to see whether a contaminated or misaligned brake settles.
Step 5: Reset the caliper only as specified
New pads usually need the caliper or pad clearance returned to the position specified by the brake maker. The method differs:
- A hydraulic system may require the pistons to be pushed back with a model-approved spacer or tool after the old pads are removed.
- A mechanical system may use a pad-adjustment screw and cable or barrel adjustment, but the exact order and clearance belong to the brake manual.
- Some calipers have a spring, magnet, wear indicator, or pad plate that must be positioned before the pads enter the slot.
Do not press the brake lever with the pads or spacer removed. Do not use a flat tool that can scratch a piston, seal, rotor, or pad face. Do not add fluid, loosen a bleed screw, or turn a caliper-mount bolt as a substitute for the pad procedure.
If the pistons do not reset evenly, a piston seal leaks, or the pad slot is damaged, stop and use a mechanic. Do not compensate for a hydraulic problem with an extra-thin pad or for a caliper problem with a random spacer.
Step 6: Install the new pads and retainer
- Compare the new pads with the identified old parts without touching the friction faces. Confirm the shape, thickness, backing plate, spring, and retainer.
- Orient the pads and any arrow or marked side exactly as the manual shows.
- Insert the spring, pads, pin, bolt, clip, magnet, or other retainer in the specified sequence. The retainer must be fully seated and positively secured.
- Use only the maker’s specified tool and torque for a threaded retainer. Do not invent a value from the bolt diameter or a similar brake.
- Keep the friction surfaces clean. If a pad face is contaminated or damaged during installation, follow the maker’s replacement instruction rather than sanding it as a universal fix.
The bike tire and wheel guide covers wheel and tire service that can affect rotor alignment. Keep the rotor away from oil and do not rest the bicycle on a rotor in a way that bends it.
Step 7: Reinstall the wheel and check the brake
Reinstall the wheel using the exact hub, frame, fork, thru-axle, quick-release, or axle-nut procedure. Confirm that the wheel is fully seated, the axle is retained, the rotor is between the pads, and the motor cable has the same safe route if the bicycle is electric.
Operate the lever only after the wheel and pads are installed, or when the maker’s manual says the spacer may be removed. Apply the lever gradually and check for a firm, predictable action, correct pad movement, rotor clearance, and no fluid leak. For a mechanical system, check cable seating and the maker’s adjustment. Do not ride if the lever reaches the bar, the pad drags continuously, the wheel moves, the rotor contacts a caliper, or braking is weak.
The existing front-wheel installation guide for disc brakes and rear-tire guide for disc-brake bikes provide wheel-service context. They do not replace the exact wheel and brake manuals.
Step 8: Bed in the new pads
New pads and a new or reused rotor need the brake maker’s bed-in procedure before ordinary riding. Bed-in changes braking behavior, so use a flat, clear, traffic-free area with no pedestrians, vehicles, hazards, or steep descent. Follow the exact maker’s speed, braking, repetition, cooling, and front or rear brake instructions.
Shimano’s hydraulic disc-brake user guidance describes a controlled process in a flat safe area and warns that braking force increases during the bed-in period (Hydraulic Disc Brake User Manual, retrieved September 2, 2026). That is a model-family example, not a universal speed, count, or stopping-distance rule. SRAM systems have their own service documents and should be bedded in according to the exact manual.
During bed-in, use one brake at a time only as the maker directs, keep control of the bicycle, and stop for vibration, contamination, scraping, a lever change, a leak, a loose wheel, a damaged rotor, or unexpected loss of braking. Never use traffic or a downhill route as the test area.
Final inspection after the first controlled test
Let the brake cool as the maker directs, then inspect the pad retainer, pads, rotor, caliper, axle, wheel, cable or hose, and e-bike motor cable. Confirm that nothing moved, rubbed, leaked, or became contaminated. Check that both front and rear brakes work correctly before a normal ride.
If the brake still squeals, rubs, pulses, feels weak, or changes lever travel, use the symptom as a reason to inspect, not proof that the pads need another adjustment. The brake-pad wear guide explains why noise and lever feel do not identify one fault. Stop riding until the maker or a mechanic resolves the cause.
Common replacement mistakes
- Buying a pad by shape or speed of the bicycle instead of the exact caliper and pad code.
- Reusing a bent, missing, or unapproved pad pin, spring, clip, or magnet.
- Squeezing a hydraulic lever with the wheel and pad spacer removed.
- Touching the friction face or rotor with oily fingers.
- Using an unapproved spray or solvent on seals, pads, or a rotor.
- Resetting pistons with a sharp or dirty tool.
- Inventing a pad-retainer or caliper-mount torque.
- Reinstalling a wheel without checking axle seating, rotor position, and brake action.
- Riding without following the exact bed-in procedure.
Frequently asked questions
Can I replace bike disc brake pads myself?
Yes, when you can identify the exact brake and pad, follow its manual, use the approved tools and retainers, and complete the wheel, lever, and bed-in checks. Use a mechanic for unknown, leaking, damaged, contaminated, or weak systems.
How do I know which disc brake pads fit my bike?
Identify the caliper model and pad code, then confirm the maker’s approved pad and compound. Bicycle type, rotor diameter, lever brand, and a similar pad outline are not enough.
Do I need to remove the wheel to replace disc brake pads?
Follow the exact brake manual. Some systems allow access with the wheel installed, while others require removal for the retainer or piston procedure. Never force a pad through the caliper or squeeze a hydraulic lever with the pad spacer missing.
Do new bike disc brake pads need to be bedded in?
Yes, follow the brake maker’s bed-in procedure. New pad behavior changes during that process. Use a clear, flat area and stop for any loss of braking, leak, rotor damage, loose wheel, or unexpected lever change.
Can I clean contaminated bike disc brake pads?
Do not assume cleaning will make contaminated pads safe. Follow the exact brake maker’s instruction; Shimano service documents direct replacement when oil or grease reaches covered pads. Have a mechanic inspect the rotor and caliper if contamination or its source is uncertain.
Why do the new pads rub the rotor?
Possible categories include a wheel that is not seated, a retainer or pad that is misinstalled, piston or caliper position, rotor damage, or a mechanical adjustment issue. Stop riding and use the exact brake and wheel procedure. Do not keep riding to wear a clearance into the pads.
Product selection
These examples were selected from Bright Data Amazon listing and specification research retrieved September 2, 2026. This is not hands-on testing. Match the pad shape, compound, retainer, rotor, and brake model to the maker’s documentation before ordering, and stop if the listing does not identify the exact fit.
Resin pad example
TEKTRO E10.11 Disc Brake Pads, Resin Compound for Smooth & Powerful Braking
A sensible model-specific option when the caliper and pad shape match
Selected from the verified TEKTRO listing. Confirm pad identity and retainer details in the brake manual.
Best for: Riders whose Tektro system documentation names the E10.11 pad
Key specifications: Listing identifies an organic resin compound and selected Tektro hydraulic brake models
Trade-off: The listed model coverage is not approval for every Tektro, TRP, or Shimano caliper
Check price on AmazonShimano resin pad example
Shimano B05S-RX Bike Disc Brake Pad and Spring - Resin Compound, Stainless Steel Back Plate
A useful reference choice when the B05S-RX family is explicitly approved
Selected from the verified Shimano listing. Confirm the complete brake system before installation.
Best for: Riders with a compatible Shimano two-piston caliper
Key specifications: Listing identifies a resin compound, stainless steel back plate, spring, and selected Shimano brake models
Trade-off: A model list cannot replace checking the exact caliper, pad shape, and retainer
Check price on AmazonHow we researched this guide
This is research-based brake-service guidance, not a hands-on pad replacement, stopping-distance, rotor, or brake-performance test. We reviewed Park Tool’s disc-pad removal guidance, Shimano’s current manual and service instructions, SRAM’s service-document index, and existing BikeRideReview brake and wheel references. We did not install a pad, invent a torque or wear threshold, or generalize one brake maker’s procedure to another system.
Bottom line
Identify the exact brake and pad, protect the rotor, remove and reset components only as the maker directs, install the approved pads and retainer, seat the wheel, check the lever and braking surfaces, and bed in the pads in a safe area. Stop for damage, contamination, leaks, weak braking, rubbing, loose hardware, or any uncertain step.
Sources
- Park Tool, “Disc Brake Pad Removal & Installation,” retrieved September 2, 2026, https://www.parktool.com/en-us/blog/repair-help/disc-brake-pad-removal-installation
- Shimano, “Manuals,” retrieved September 2, 2026, https://si.shimano.com/en/manual
- Shimano, “Hydraulic Disc Brake User Manual,” retrieved September 2, 2026, https://si.shimano.com/en/pdfs/um/8VR0A/UM-8VR0A-009-ENG.pdf
- Shimano, “Disc Brake Service Instructions,” retrieved September 2, 2026, https://si.shimano.com/en/pdfs/si/8A10B/SI-8A10B-001-ENG.pdf
- SRAM, “DB5 Service Documents,” retrieved September 2, 2026, https://www.sram.com/en/service/models/db-db5-a1