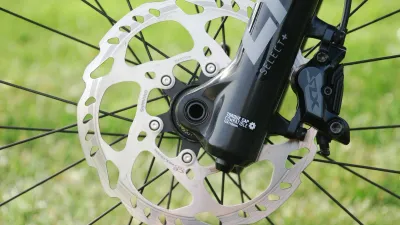
How to Fix a Rubbing Bike Disc Brake
Find the cause of a rubbing bike disc brake, check wheel seating and rotor alignment, and choose a safe adjustment or repair without guessing.
Table of Contents
- Why is my bike disc brake rubbing?
- Before you inspect a rubbing brake
- Step 1: Confirm the wheel and rotor are seated
- Step 2: Find when and where the contact happens
- Step 3: Correct a wheel-seating or installation problem
- Step 4: Check a mechanical caliper’s alignment
- Step 5: Check a hydraulic caliper safely
- Step 6: Decide whether the rotor or hardware needs service
- Step 7: Recheck the complete brake before riding
- Common rubbing patterns and next actions
- When should a mechanic fix the brake?
- Frequently asked questions
- How we researched this guide
- Bottom line
- Sources
A rubbing bike disc brake is usually traced to wheel seating, rotor position, caliper alignment, pad clearance, or a brake component that is damaged or contaminated. Start with a safe, cool bicycle: confirm the wheel is fully seated, find where the contact occurs, and follow the exact brake maker’s adjustment or service procedure. Do not ride to wear away the rubbing.
Stop riding for a brake fault
Do not ride if the lever feels soft, reaches the handlebar, braking is weak or inconsistent, the wheel is loose, the rotor is cracked or badly bent, a caliper or mount moves, fluid is leaking, a cable or hose is damaged, or the brake rubs so heavily that the wheel cannot turn normally. Walk the bicycle or arrange a qualified inspection.
Why is my bike disc brake rubbing?
The rubbing location gives a useful first clue, but it is not a diagnosis by itself. A continuous scrape can come from a wheel that is not seated, a caliper that is not centered, a piston that is not retracting, a pad or spring that is installed incorrectly, or a rotor that is bent. A light, repeating contact at one point as the wheel turns points toward rotor runout or another rotating part, while contact through the whole rotation can point toward clearance or alignment.
Park Tool’s disc-brake rotor truing guide also lists wheel seating, hub-bearing play, caliper alignment, cable drag, sticky hydraulic pistons, frame mounts, and loose rotor hardware among possible causes (retrieved September 2, 2026). Treat that list as a set of inspection paths, not permission to adjust every part at once.
The current bike disc brake pad wear guide helps separate rubbing from a pad that is worn, contaminated, or damaged. This tutorial focuses on locating rubbing and choosing the next safe action.
Before you inspect a rubbing brake
Work on a stable bicycle with the motor off if it is an e-bike. Remove the battery only when the bicycle maker directs that step. Let the rotor and caliper cool, use clean hands, and keep chain lube, grease, tire sealant, and general-purpose spray away from pads and rotors. Rotor edges can be sharp.
Have the bicycle, brake, wheel, and axle manuals available. Identify whether the brake is hydraulic or mechanical, the rotor mounting style, the wheel-retention system, and the exact caliper model. A lever logo or wheel diameter does not identify every service procedure.
If you need to remove the wheel, read the existing disc-brake wheel installation guide or the exact rear-wheel instructions first. Never squeeze a hydraulic lever with the wheel or approved pad spacer removed. Park Tool’s wheel-removal guidance explains this hazard (retrieved September 2, 2026).
Step 1: Confirm the wheel and rotor are seated
The first fix is to restore the wheel to the position the frame or fork designed. Do not begin by moving the caliper, because an incorrectly seated wheel can make a correct caliper appear misaligned.
- Put the bicycle in a stable stand or support it without placing a load on the rotor.
- Inspect the thru-axle, quick-release skewer, or axle nuts for the correct closed or secured position. Use the maker’s procedure for the exact retention system.
- Check that the axle is fully engaged in the dropouts and that the wheel sits straight in the frame or fork.
- Inspect the rotor for loose bolts or a loose lockring, but do not invent a torque value. Use the rotor and hub maker’s instructions.
- Spin the wheel gently and listen. Do not use a fast spin as a substitute for a brake check.
If the axle will not seat, the wheel rocks, the hub has play, the rotor fasteners are loose, or a dropout, fork, frame, or hub is damaged, stop. Do not force the axle or ride for another opinion. The rear wheel’s drive-side installation and rotor clearance can differ, so use the rear tire and disc-brake wheel guide when that is the affected wheel.
Step 2: Find when and where the contact happens
With the wheel correctly seated and the bicycle supported, identify the pattern without placing fingers near the rotor.
- Rotate the wheel slowly by the tire or rim, not by the rotor.
- Look through the caliper opening from a safe angle. Note whether the rotor is centered between the pads and whether the contact is continuous or repeats once per rotation.
- Mark the approximate clock position of a repeating contact with your eyes or a removable note on the tire. Do not mark the braking surface.
- Gently apply and release the brake lever only with the wheel installed and the hydraulic system protected. Observe whether the clearance returns or the lever stays changed.
- Stop if the wheel becomes harder to turn, the rotor heats, the caliper shifts, or the lever feels different.
Do not use a business card, feeler gauge, or a guessed gap as a universal specification. Rotor and pad clearances vary by brake family. A wheel that spins quietly on a stand can still have a dangerous brake fault under load.
Step 3: Correct a wheel-seating or installation problem
If the rubbing began after a tire change, transport, wheel removal, or axle service, compare the wheel position with the maker’s installation instructions before adjusting the brake. The rotor must pass through the caliper without force, the axle must be retained correctly, and any required spacers must be present and in the correct order.
Release and reinstall the wheel only if you understand the exact retention procedure. Keep the rotor clean. For a hydraulic brake, install the maker-approved pad spacer whenever the wheel is out and protect the lever from accidental pressure. After reinstalling, operate the brake gradually and check for firm, predictable feel, full axle retention, and the same rubbing pattern.
If reseating changes the rubbing, do not assume the problem is solved until you complete a stationary brake check and a controlled low-risk check permitted by the maker. If the wheel still moves, the rotor still contacts heavily, or the lever is not normal, stop and use a mechanic.
Step 4: Check a mechanical caliper’s alignment
Mechanical disc brakes use a cable to move one or more pads, but the caliper, pad adjusters, cable housing, and rotor still have to work together. A cable that is kinked, frayed, contaminated, or routed under tension can imitate a caliper-alignment problem.
First identify the exact caliper manual. If that manual permits caliper alignment, follow its sequence for loosening, centering, and securing the caliper. Some mechanical calipers are aligned by positioning the body relative to the rotor, while others rely on fixed and moving pad adjusters. Do not use a generic squeeze-the-lever sequence unless the maker specifies it for your caliper.
Check that the cable housing is seated, the cable is not frayed, and the lever returns normally. Inspect pad adjusters for their intended range. Do not back an adjuster out until the pad loses safe engagement, and do not compensate for a bent mount with cable tension.
If contact remains after the documented procedure, or the caliper mount, cable, pad retainer, or rotor is damaged, stop. The replacement pad tutorial covers pad identification and retainer checks as a separate procedure.
Step 5: Check a hydraulic caliper safely
Hydraulic pistons should retract and move as the brake maker’s system permits. A sticky piston, contaminated pad, swollen seal, trapped air, hose problem, or incorrect pad or rotor can leave a hydraulic rotor rubbing. Moving the caliper randomly can hide the cause and create a new alignment or mount problem.
Do not open the hydraulic circuit, loosen a bleed screw, add fluid, press a piston with a sharp tool, or squeeze the lever with the wheel out unless the exact manual authorizes the action. Shimano’s hydraulic brake user manual warns against pressing the brake lever when the wheel and rotor are removed because pistons can protrude (retrieved September 2, 2026).
With the wheel installed, inspect the hose, lever, caliper, seals, pad retainer, and rotor for leaks, damage, or contamination. Check whether the brake returns to its normal feel after a gentle lever release. If the piston movement is uneven, the seal leaks, the lever is soft, or the rubbing worsens after braking, stop and arrange service.
If the maker’s manual describes a caliper-alignment procedure for your model, use only that procedure and its specified tools and fasteners. A generic gap or torque copied from another brake is not a safe repair.
Step 6: Decide whether the rotor or hardware needs service
A repeating rub can indicate a rotor that is not running true, but the rotor is not the only rotating or fixed part to inspect. Check wheel seating, hub play, rotor bolts or lockring, caliper mounts, pad springs, pad pins, and the frame or fork mount in the order the maker recommends.
Park Tool says a small rotor bend may be trued with a rotor tool, while a badly bent rotor, especially after impact, is often best replaced. It also notes that repairability can be difficult to judge. Do not turn its example deviation into a universal wear or runout limit. Use the rotor maker’s service limit if one exists, and replace a rotor when it is cracked, dangerously damaged, below its exact minimum thickness, contaminated beyond the maker’s process, or not safely repairable.
The bent rotor fix-or-replace guide covers that decision in more detail. Stop for a severe bend, sharp damage, loose hardware, repeated contact after correct wheel seating, or any uncertainty about a structural part.
Step 7: Recheck the complete brake before riding
After the documented adjustment or installation, perform a complete stationary check:
- The wheel is fully seated and the axle or quick release is secured.
- The rotor is the correct type and is not cracked, loose, badly deformed, or contaminated.
- The pad retainer, pads, springs, and caliper hardware are present and secured.
- The lever feels firm and returns normally.
- A cable or hose is undamaged, correctly routed, and not leaking.
- The wheel rotates without severe continuous contact.
- Both brakes slow the bicycle normally in a safe, controlled check area.
Do not conduct the first check in traffic, on ice, on a steep descent, or at high speed. Stop immediately for a new noise, vibration, fluid leak, lever change, loss of braking, wheel movement, or rotor damage. The winter braking guide covers early, gentle braking and low-traction stop conditions.
Common rubbing patterns and next actions
| What you observe | Possible categories | Safe next action |
|---|---|---|
| Rub began after wheel removal | Wheel seating, axle, missing spacer, rotor position | Reinstall the wheel by its exact manual |
| Contact repeats once per rotation | Rotor runout, rotor fastener, hub or wheel issue | Inspect; use maker limits or a mechanic |
| Rub is continuous after lever release | Caliper, pad, piston, retainer, or wheel alignment | Stop if heavy; follow the exact brake procedure |
| Noise appears after a wet or dirty ride | Grit or contamination | Clean only with an approved process; inspect pads |
| Lever is soft or pulls farther | Air, leak, hose, cable, pad, or piston fault | Do not ride; arrange qualified service |
| Rub follows an impact | Rotor, wheel, fork, frame, or mount damage | Stop and inspect the whole affected area |
This table narrows the inspection order. It does not identify a failed part from sound alone.
When should a mechanic fix the brake?
Use a qualified bicycle mechanic when the brake model is unknown, a rotor or mount is cracked or badly bent, the wheel will not seat, the hub has play, the hydraulic system leaks, the lever reaches the handlebar, a cable or hose is damaged, the piston will not move as specified, or the documented adjustment does not restore normal braking. Seek inspection after a crash or impact that may have affected the fork, frame, axle, hub, caliper, rotor, or handlebar.
Do not ride a bicycle with a brake fault to a shop on a public road. Walk it or arrange transport. A rubbing sound can be minor, but it can also be the first visible symptom of a loose or damaged system.
Frequently asked questions
Can I fix a rubbing disc brake by loosening the caliper?
Only when the exact brake maker’s procedure permits that adjustment and you can secure the caliper with the specified hardware and method. First confirm wheel seating and rotor condition. Do not loosen a caliper mount as a guess, and do not ride if the brake remains weak, loose, or heavily rubbing.
Is a little disc-brake rub normal?
Some brake systems can make a light intermittent noise, especially when clearances are small, but sound alone does not establish that a brake is safe. A new or worsening rub, continuous contact, wheel resistance, lever change, or visible damage needs inspection. Do not use a universal clearance value.
Why does my rotor rub in one spot?
A repeating contact can come from rotor runout, a loose rotor interface, wheel or hub play, or a caliper that is not positioned correctly. Check wheel seating and fasteners first, then follow the rotor maker’s limits. Do not straighten a severely bent or cracked rotor without qualified guidance.
Can I ride with a rubbing hydraulic brake?
Do not ride until you know the cause and the brake passes a stationary safety check. A rub can accompany a sticking piston, contaminated pad, leaking seal, incorrectly seated wheel, or damaged rotor. Never squeeze the lever with the wheel removed.
Will new brake pads stop the rubbing?
Not necessarily. New pads can still rub if the wheel, rotor, caliper, piston, pad retainer, or mount is wrong, and contaminated or damaged parts may make the new pads unsafe. Identify the exact pad and follow the replacement procedure before bedding in anything.
How we researched this guide
This is research-based diagnostic guidance, not a hands-on adjustment, rotor-truing, braking-performance, stopping-distance, or clearance test. We reviewed Park Tool’s rotor-truing, wheel-removal, and pad-service guidance and Shimano’s current hydraulic brake user manual on September 2, 2026. We did not invent a rotor runout limit, pad clearance, fastener torque, or universal hydraulic or mechanical adjustment sequence.
Bottom line
Fix rubbing in order: cool and protect the bicycle, confirm wheel seating, identify the rubbing pattern, inspect the rotor and hardware, and use only the exact mechanical or hydraulic brake procedure. Stop for damage, leaks, weak or changed lever feel, loose parts, or an unresolved cause.
Sources
- Park Tool, “Disc Brake Rotor Truing,” retrieved September 2, 2026, https://www.parktool.com/en-us/blog/repair-help/disc-brake-rotor-truing
- Park Tool, “Wheel Removal and Installation,” retrieved September 2, 2026, https://www.parktool.com/en-int/blog/repair-help/wheel-removal-and-installation
- Park Tool, “Disc Brake Pad Removal & Installation,” retrieved September 2, 2026, https://www.parktool.com/en-us/blog/repair-help/disc-brake-pad-removal-installation
- Shimano, “Hydraulic Disc Brake User Manual,” retrieved September 2, 2026, https://si.shimano.com/en/pdfs/um/8VR0A/UM-8VR0A-009-ENG.pdf
- Shimano, “Manuals,” retrieved September 2, 2026, https://si.shimano.com/en/manual