Brake Upgrades for E-Bike Conversions: What Extra Speed Requires
Plan e-bike conversion brake upgrades by checking mass, speed, terrain, rotor and caliper compatibility, lever control, fit, and a qualified inspection.
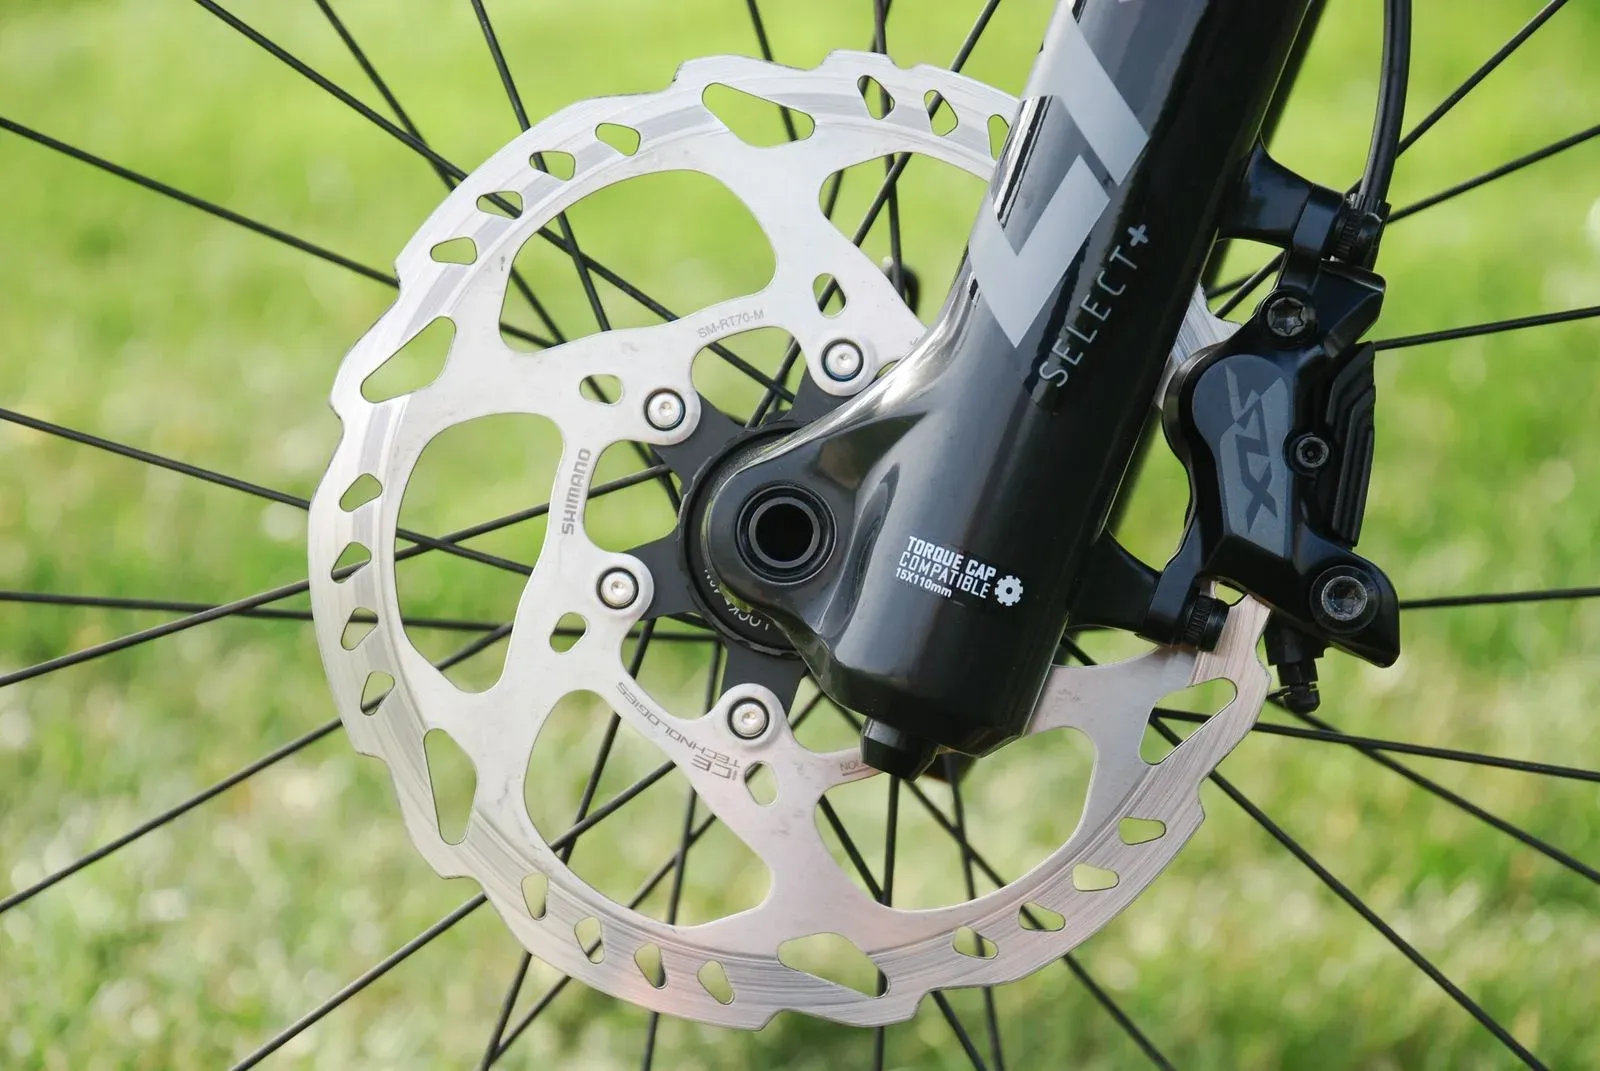
Table of Contents
- Why can a conversion need a brake review?
- Step 1: Document the bicycle before buying parts
- Step 2: Separate service from an upgrade
- Step 3: Choose the upgrade level by the actual problem
- Step 4: Check wheel, axle, and dropout interfaces
- Step 5: Install and bed in according to the maker
- Step 6: Verify the finished system before riding
- How large should an e-bike conversion rotor be?
- Common mistakes to avoid
- Frequently asked questions
- How we researched this guide
- Bottom line
- Sources
An e-bike conversion does not create one universal brake-upgrade requirement. The right decision depends on the complete bicycle, including its actual mass, speed, cargo, hills, surface, brake condition, wheel and rotor fit, and the limits published by the brake, fork, frame, tire, and conversion-kit makers. Extra speed and mass can increase the work the brakes must do, but a marketing watt number cannot tell you which caliper, rotor, pad, or lever is safe.
Start with an inspection of the existing braking system. Identify the brake type, lever, caliper, rotor or rim, pad compound, mounts, cable or hose routing, tire, and wheel. Repair worn or damaged parts before considering an upgrade. If the motor, battery, wheel, axle, or controller changes the bicycle’s load or speed, have a qualified bicycle technician assess the finished combination.
Use our electric bike conversion kit guide for the whole-system decision. The brake-pad wear guide is a useful inspection starting point, while the front versus rear hub motor guide explains why wheel and brake interfaces change with motor position.
Key Takeaways
- Do not choose an e-bike conversion brake upgrade from speed or motor wattage alone.
- Match rotor diameter, rotor type, pad material, caliper, adapter, mount, lever, wheel, fork, and frame to the maker’s compatibility information.
- A torque arm or stronger axle retention solves a different problem from braking. Inspect both before riding.
Why can a conversion need a brake review?
The brakes must control the complete moving bicycle and rider. A conversion can add a motorized wheel, battery, controller, rack hardware, wiring, and cargo. A rider may also travel faster, start more often, descend longer hills, or carry more weight after electrification. Those changes can increase heat, lever force, pad wear, tire demand, and the consequences of a poor setup.
That does not mean every converted bicycle needs larger rotors or hydraulic brakes. A well-maintained system with documented compatibility may be appropriate for its intended use. The correct first question is not “What is the strongest brake?” It is “What does this bicycle and brake system maker approve for the load, wheel, mount, rotor, pad, and use?”
Shimano’s compatibility documentation maps particular calipers and pad types to particular rotor sizes, rather than treating all disc brakes as interchangeable (Disc brake caliper and rotor compatibility, retrieved September 2, 2026). Use that model-specific approach for any brand.
Step 1: Document the bicycle before buying parts
By the end of this step, you should have a parts record that a brake maker or qualified mechanic can evaluate. Disconnect the battery and keep the motor from starting while inspecting the bicycle.
Record:
- Front and rear brake type: rim, mechanical disc, hydraulic disc, drum, coaster, or another system.
- Lever model or markings, caliper model, rotor marking, rotor diameter, rotor thickness, and pad shape if visible.
- Fork and frame brake mounts, adapter position, axle type, dropout spacing, wheel size, tire size, and fender clearance.
- Cable or hose routing, lever reach, housing condition, hose length, and whether a brake cut-off sensor is installed.
- Motor, battery, controller, rack, cargo, and expected gross weight from their documented specifications.
- Intended route: flat or hilly, paved or loose, dry or wet, frequent stops or long descents, and any local speed or equipment rule.
Photograph the markings and measure only with a suitable tool. Do not infer a rotor size from a product photograph or an “e-bike brake” label. If the model number is missing, treat compatibility as unknown and ask the maker.
Step 2: Separate service from an upgrade
By the end of this step, you should know whether the existing brakes need service before any performance decision. An upgrade cannot compensate for a contaminated pad, loose mount, stretched cable, air in a hydraulic line, damaged hose, bent rotor, worn rim, loose wheel, or incorrect quick-release setup.
Inspect the pads or shoes for the wear limit specified by the brake maker. Look for contamination, glazing, cracks, uneven wear, movement in the caliper, damaged cable housing, leaks, lever travel that reaches the handlebar, rotor rub, rim sidewall wear, and loose fasteners. Stop riding if a structural part is cracked, a hydraulic system leaks, a rotor is damaged, or the wheel is not retained.
Our brake-pad wear guide covers visual checks and stop conditions. Follow the exact brake maker’s service manual for cleaning, pad replacement, cable adjustment, hydraulic bleeding, and fastener procedures. Shimano’s dealer manuals are intended primarily for professional mechanics and include model-specific installation information (Shimano manuals, retrieved September 2, 2026).
Step 3: Choose the upgrade level by the actual problem
By the end of this step, you should have a defined objective rather than a generic shopping list. Possible objectives are restoring braking, improving lever control, adding heat capacity for a documented use, matching a new wheel, adding a compatible brake cut-off signal, or replacing a brake system that the maker does not approve for the conversion.
Pads or shoes
Use only a pad or shoe compound and shape approved for the caliper, rotor, or rim. A different compound can change friction, noise, heat behavior, and compatibility. Do not mix a metal pad with a rotor marked for resin-only use. Shimano’s rotor documentation explicitly distinguishes pad-material compatibility and notes that some rotors are for resin pads only (Genuine parts disc brake rotors, retrieved September 2, 2026).
Rotor or rim interface
If a larger rotor is considered, verify the fork or frame mount, adapter standard, caliper clearance, rotor thickness, bolt or lockring interface, wheel dish, spoke clearance, and maker approval. A larger diameter is not automatically compatible, and an adapter can move the caliper into a fork, frame, spoke, or hub-motor clearance problem.
Caliper and lever
Mechanical and hydraulic systems have different cable, hose, lever-pull, pad, and service requirements. Pair caliper and lever parts as the maker specifies. A hydraulic lever can require a matching hose, olive, insert, fluid, bleed procedure, and compatible caliper. A brake cut-off sensor is an electrical control feature, not a substitute for a functioning mechanical brake. The controller guide explains how a cut-off signal belongs to the controller’s approved inputs.
Complete brake system
When the existing parts are obsolete, damaged, or incompatible with the new wheel, a documented complete brake system may be the cleanest option. It still has to fit the fork, frame, rotor, wheel, tire, axle, and controls. Ask the manufacturer or a qualified mechanic to resolve any mismatch before purchasing.
Step 4: Check wheel, axle, and dropout interfaces
By the end of this step, the brake upgrade should not hide a wheel-retention problem. A conversion wheel can change rotor position, hub width, axle hardware, freewheel or cassette clearance, and caliper space. Grin’s bike-compatibility guidance shows why dropout shape and spacing affect hub-motor fit and describes separate rotor-alignment and caliper-clearance checks (Bike Compatibility, retrieved September 2, 2026).
Dry-fit the wheel with the battery disconnected. Confirm that the axle seats fully in the approved dropout, the wheel is centered, the rotor is in the caliper, the tire clears the frame and fork, the brake adapter is correctly oriented, and the caliper does not contact the hub, spokes, rotor, or fasteners. Do not solve a rotor rub by filing a fork, bending a frame, removing a retention feature, or adding random washers.
The torque-arm guide covers the separate question of axle torque and dropout retention. The wheel-size guide covers the tire, rim, motor, and brake fit questions. The hub-motor axle and dropout guide covers axle dimensions and retention in more detail.
Step 5: Install and bed in according to the maker
By the end of this step, the brake maker’s installation and bedding instructions should be complete and documented. High-current electrical work should remain separate from brake service, and hydraulic work should go to a qualified technician if you do not have the required tools and training.
Use the exact fastener, adapter, rotor, pad, hose, cable, and fluid instructions for the model. Keep grease, chain lubricant, cleaning residue, and fingerprints off braking surfaces. Route cables and hoses so steering, suspension travel, wheel removal, and battery access do not pull or pinch them.
Follow the maker’s bedding procedure on a controlled, legal route. Avoid traffic, steep descents, wet contamination, and full-load experiments until the brake system passes its inspection. Bed-in is not a license to test a questionable conversion at speed. If the lever feels inconsistent, the brake rubs, the wheel moves, the rotor discolors unusually, or stopping control is not predictable, stop and have the system assessed.
Step 6: Verify the finished system before riding
By the end of this step, you should have a written go or no-go record. With the battery still disconnected, check wheel retention, rotor or rim alignment, lever operation, pad contact, cable and hose routing, mount security, tire clearance, and any brake cut-off sensor. Then perform a gentle low-speed check in a controlled area and recheck the hardware.
Do not use a downhill ride, a passenger, or a maximum-power launch as the first test. Increase the test demand only after the bicycle responds predictably and the brake maker’s limits remain satisfied. Have a qualified technician inspect the bicycle if the conversion changes gross weight, expected speed, axle forces, brake mount, or control wiring beyond the maker’s instructions.
How large should an e-bike conversion rotor be?
There is no universal rotor size for a conversion. Rotor diameter, thickness, pad material, caliper, adapter, mount, wheel, fork, frame, rider mass, route, and maker approval all matter. Shimano’s compatibility tables list approved combinations and note that braking power differs by rotor size, which is why a larger rotor still needs a complete compatibility check (CUES brake compatibility, retrieved September 2, 2026).
Do not install a 203 mm or 220 mm rotor because a forum post calls it stronger. Ask the brake and bicycle makers for the permitted size and mount type, then have a mechanic check clearances and installation.
Common mistakes to avoid
Buying by wattage alone
Motor watt labels do not specify the brake load or the complete bicycle’s speed. Match the actual wheel, rider, cargo, terrain, and component limits instead.
Swapping a rotor without checking the caliper
Rotors differ in diameter, thickness, mount, width, and pad compatibility. A rotor that bolts on can still be wrong for the caliper or adapter.
Ignoring the tire and wheel
Brakes act through the tire and wheel. A brake upgrade cannot approve a tire, rim, axle, rotor position, fork, or dropout that is not compatible.
Treating an e-brake sensor as a brake
An e-brake sensor can request motor cut-off when the controller supports it. It does not create friction, stop the bicycle, or repair a mechanical or hydraulic fault.
Filing or spacing without documentation
Unapproved filing, random spacers, missing washers, and poor fastener engagement can weaken retention or misalign the rotor. Stop and obtain the maker’s dimensions or a qualified inspection.
Frequently asked questions
Do e-bike conversion kits need better brakes?
Some do, and some do not. The answer depends on the complete bicycle’s mass, speed, route, brake condition, wheel and mount compatibility, and the brake and bicycle maker’s limits. Budget for a qualified inspection before deciding that a larger rotor or different brake is necessary.
Are hydraulic brakes always better for a conversion?
No. Hydraulic and mechanical brakes have different lever, hose, pad, mount, service, and compatibility requirements. Choose the documented system that fits the bicycle and intended use, not a label that promises more power.
Can I use a larger rotor to handle extra speed?
Only if the caliper, adapter, fork or frame mount, wheel, hub, spokes, rotor thickness, and brake maker all approve it. A larger rotor can improve leverage in an approved combination, but it cannot correct a loose wheel, wrong caliper, damaged fork, or unsuitable tire.
Should I add brake cut-off sensors?
They can be useful when the controller and brake levers support them, but they are optional control inputs rather than stopping hardware. The mechanical or hydraulic brake must still stop the bicycle if the battery is disconnected or the controller does not respond.
When should a shop do the work?
Use a qualified bicycle technician for hydraulic bleeding, uncertain mounts, unusual rotor adapters, wheel or axle fit problems, damaged forks or frames, high-speed or heavy-load conversions, and any high-current wiring close to the controls. Follow the exact component maker’s limits when the conversion exceeds a normal bicycle setup.
How we researched this guide
This is research-based brake-planning guidance, not a braking test, stopping-distance measurement, installation report, or hands-on conversion. DataForSEO research on September 2, 2026 showed mixed commercial and transactional results for conversion brake queries, with product pages and advice pages appearing together. We used manufacturer compatibility documentation and a bicycle brake manual source, and we did not assign a universal rotor size, speed threshold, stopping distance, or performance result.
Bottom line
Review the brakes because the conversion changes a complete vehicle, not because a certain watt label guarantees an upgrade. Document the current system, service defects first, confirm exact rotor and caliper compatibility, verify wheel and dropout fit, follow maker bedding instructions, and obtain a qualified inspection when limits are unclear. A brake upgrade is safe only when the whole bicycle remains compatible.
Sources
- Shimano, “Disc brake caliper and rotor compatibility,” retrieved September 2, 2026, https://si.shimano.com/pdfs/cues/technical-assets/CUES_Technical_Documents_LC_SHB_COMP_01.pdf
- Shimano, “Disc brake rotors,” retrieved September 2, 2026, https://si.shimano.com/en/pdfs/sm/CY25_GENUINE_PARTS/CY25_GENUINE_PARTS_O.pdf
- Shimano, “Manuals and Technical Documents,” retrieved September 2, 2026, https://si.shimano.com/en/manual
- Grin Technologies, “Bike Compatibility,” retrieved September 2, 2026, https://ebikes.ca/resources/getting-started/bike-compatibility.html
- Grin Technologies, “Ebike Parts Explained,” retrieved September 2, 2026, https://ebikes.ca/resources/getting-started/ebikes-parts-explained.html
- U.S. Consumer Product Safety Commission, “CPSC Urges Consumers to Not Buy or Use Universal Chargers with Micromobility Products Due to Fire Hazard,” retrieved September 2, 2026, https://www.cpsc.gov/Newsroom/News-Releases/2024/CPSC-Urges-Consumers-to-Not-Buy-or-Use-Universal-Chargers-with-Micromobility-Products-Due-to-Fire-Hazard