How to Replace a Bike Chain and Set the Correct Length
Replace a bike chain safely by identifying the drivetrain, sizing from the exact manual, using the approved connector, and checking every gear before riding.
Table of Contents
- What do you need before replacing a bike chain?
- Which chain should you buy?
- Step 1: Stabilize the bicycle and remove the old chain
- Step 2: Inspect the drivetrain before sizing
- Step 3: Choose the correct sizing method
- Step 4: Size a derailleur chain
- Step 5: Size a single-speed or fixed-gear chain
- Step 6: Cut the chain at the correct section
- Step 7: Route the chain and join it
- Step 8: Verify the installation before riding
- Chain care after replacement
- Frequently asked questions
- Product selection
- How we researched this guide
- Bottom line
- Sources
Replace a bike chain by identifying the chain and drivetrain, removing the old chain, sizing the new chain with the bicycle and drivetrain maker’s method, cutting only the correct section, joining it with the approved connecting pin or master link, and checking routing and every permitted gear before riding. Do not use a universal “add two links” rule. A wrong length, incompatible connector, reversed quick link, stiff link, or damaged drivetrain can make the chain separate or skip under load.
Do not ride an uncertain chain installation
Stop if the chain is cracked, bent, pitted, stiff, incorrectly joined, routed outside a derailleur pulley, too tight, too slack, or skipping. Stop for damaged chainrings, cassette sprockets, freewheel threads, derailleur parts, wheel retention, or a drivetrain you cannot identify. Use a qualified mechanic when the manual, connector, or final length is uncertain.
What do you need before replacing a bike chain?
Gather the exact replacement chain, its approved connecting pin or master link, the compatible chain tool, master-link pliers if required, eye protection, a stable work area, and the bicycle or component manuals. Keep the replacement chain clean and keep chain lubricant away from brake rotors, pads, rims, tires, and electrical parts.
First record:
- bicycle type and whether it has a derailleur, single-speed, fixed gear, internal gear hub, or an e-bike drive;
- number of rear sprockets and front chainrings, if applicable;
- chain maker, exact model, speed family, direction, and connection method;
- rear derailleur model and the bicycle or frame’s suspension procedure;
- cassette or freewheel, chainring, hub, and any e-bike shift-cutoff requirements;
- the maker’s chain-length method and whether a connecting pin or master link is single-use.
The existing bike-chain sizing guide covers chain identification and length checks. Use the master-link compatibility guide before buying a quick link by appearance or speed count alone.
Which chain should you buy?
Choose the chain specified for the exact drivetrain family, speed, tooth profile, width, and connection system. “Ten-speed” or “12-speed” is a starting field, not complete compatibility. Road, mountain, flat-top, transmission, internal-gear, single-speed, and e-bike chains can have different profiles or joining requirements.
Match the chain to the current cassette or freewheel, chainrings, derailleur, and approved joining part. Do not assume that a narrower chain is better, that a chain marketed for an e-bike fits every e-bike, or that a master link from the same speed count is safe. Shimano’s chain manual directs users to use only the chain, connecting part, and tool specified in its table and warns that an unsuitable combination can separate or skip (Chain Installation and Removal, retrieved September 2, 2026).
The bike chain-tool guide helps match a tool to the connection method. A chain tool that can push a pin out is not automatically approved for installing every connecting pin.
Step 1: Stabilize the bicycle and remove the old chain
- Put the bicycle in a repair stand or on a stable surface where it cannot tip. Keep fingers, clothing, and tools clear of the wheels, chainrings, and derailleur cage.
- Shift to the smallest front chainring and smallest rear sprocket if the drivetrain maker permits that position. This reduces tension on a derailleur chain.
- If a rear wheel must be removed, follow the wheel maker’s procedure. Protect a hydraulic brake with the specified pad spacer and never squeeze the lever with the rotor out unless the brake maker explicitly permits it.
- Find the existing master link. If the chain has one and the link maker allows removal, use compatible master-link pliers. Otherwise, use the chain tool on a section that is not a previously installed connecting pin or link.
- Keep the old chain intact until the new chain is sized from the current drivetrain instructions. It is a comparison aid only, because a worn or previously mis-sized chain can mislead you.
Park Tool’s Chain Length Sizing guide recommends checking the old chain and distinguishes master-link chains from connecting-rivet chains (retrieved September 2, 2026). Do not cut through a connector the maker says should not be reused or removed.
Step 2: Inspect the drivetrain before sizing
Replacing a chain will not correct a damaged or worn drivetrain. Clean enough dirt away to see the chainrings, cassette or freewheel, derailleur pulleys, chain guide, hub, and frame clearance. Check for hooked or broken teeth, a loose cassette or chainring, a bent derailleur, a stiff pulley, a damaged chain guide, a poor chainline, or a frame or suspension condition that changes chain length.
The chain-skip diagnostic explains why a new chain can skip on worn sprockets or a damaged drivetrain. The worn-chainring guide covers tooth symptoms. Stop and ask a mechanic when the cassette, freewheel, chainring, derailleur, crank, hub, or frame is damaged.
For a full-suspension bicycle, follow the frame maker’s specified suspension position and procedure when checking chain growth. Do not disconnect a shock, compress suspension, or reach near pivots unless you are qualified and the manual permits it.
Step 3: Choose the correct sizing method
Use the method in the exact rear-derailleur, chain, or bicycle manual. Common options include:
- Compare with an acceptable old chain: align inner plates with inner plates and outer plates with outer plates, account for the new connector, and remember that a worn chain may have lengthened.
- Largest chainring to largest rear sprocket: route the new chain around those sprockets without the rear derailleur, use the maker’s stated addition, and confirm that the connector ends match.
- Direct wrap or single-speed method: route around the chainring and rear cog, choose the shortest joinable length that preserves the hub or dropout adjustment, and follow the bicycle maker’s tension rule.
- Special drivetrain method: use the exact method for a wide-range, internal-gear, belt-adjacent, full-suspension, transmission-specific, or e-bike drivetrain.
Park Tool’s guide explains that the largest-to-largest process changes by sprocket size and drivetrain configuration, and directs readers to check exceptions before cutting (Chain Length Sizing, retrieved September 2, 2026). The method below is a framework for applying the manual, not a universal measurement.
Step 4: Size a derailleur chain
For a derailleur bicycle, begin with the exact maker’s largest-sprocket and largest-chainring method when that is the prescribed method:
- Route the chain around the largest rear sprocket and largest front chainring, bypassing the rear derailleur.
- Keep the chain fully engaged on both sprockets and pull the lower run snug without forcing the chain or pulling the frame.
- Use the manual’s reference point and addition. Account for the half of a master link that the maker says to include, if applicable.
- Confirm that the two ends will form the correct inner-to-outer or inner-to-inner connection for the approved joining part.
- Mark the cut point and check it again. Do not remove a second section until you are certain of the count and connector.
The finished chain must allow the largest permitted combination without pulling the derailleur cage to its limit, while the smallest permitted combination must not hang loose or contact itself. Do not force a cross-chain combination that the bicycle maker forbids. If the chain length changes because the cassette, chainring, derailleur, wheel, or frame changed, size it from the new configuration, not only from the old chain.
Step 5: Size a single-speed or fixed-gear chain
Set the sliding dropout, eccentric bottom bracket, or other tensioning system at the bicycle maker’s position for measuring. Route the chain around the chainring and rear cog, bring the ends together, and identify the shortest length that joins with useful adjustment travel. Follow the chain maker’s end-type and connector instructions.
Find the tightest point by rotating the cranks or wheel as the hub and frame manual permits. The chain must not bind at that point, and it must not fall loose at the least-tensioned point. Set final tension only to the bicycle or hub maker’s specification. Do not use chain length to force an axle, cog, chainring, or dropout into alignment.
If the bicycle has an internal gear hub, coaster brake, eccentric, chain tensioner, or unusual dropout, use its exact service manual. Ask a mechanic if the chainline, axle retention, tension, or brake linkage is unclear.
Step 6: Cut the chain at the correct section
Place the chain in a compatible chain tool and drive the pin straight as the tool maker directs. Cut only at a section that can receive the approved connector. Do not push out a connecting pin or reuse a joining section if the chain maker says not to. Keep the removed section until the installation is complete in case you need to verify the count.
Protect your eyes from a pin or tool slip. Do not crush side plates, flare a rivet, or force a tool that does not fit the chain. If the chain tool bends the plate or leaves a cracked, stiff, or loose link, discard the affected joining section and follow the maker’s replacement instructions.
Step 7: Route the chain and join it
Route the chain through the correct side of every derailleur pulley, around the chainring, and over the rear sprocket. Check the derailleur cage, guide plates, chain guide, and any clutch or shift-cutoff component. A chain routed outside a pulley can appear to work while shifting and can damage the cage or chain.
Join the chain with the exact connecting pin or master link. Check its direction, front or rear face, arrow, plate position, and seating from the manual. Shimano’s QUICK-LINK manual, for example, says to install the arrow in the crank rotation direction for the covered link and to ensure both sides are inserted securely (QUICK-LINK instructions, retrieved September 2, 2026). That instruction belongs to the covered Shimano link family, not every quick link.
For a connecting rivet, use the maker’s tool and procedure, then inspect the pin projection and link movement. For a master link, use the approved closing method and check that the plates are fully seated. Do not rely on a click or a visual guess. Do not reuse a link that the maker defines as single-use.
The master-link compatibility guide covers speed, chain profile, direction, model, and reuse checks. If the connector will not seat correctly without force, stop.
Step 8: Verify the installation before riding
With the bicycle stable and the power off, slowly rotate the cranks by hand. Check that:
- the chain stays on every permitted chainring and sprocket;
- both derailleur pulleys are correctly wrapped;
- the chain has no stiff link, open plate, twist, crack, or unusual noise;
- the derailleur cage is not pulled beyond its travel;
- the chain does not bind, contact the frame, or strike a tire, brake, motor, or guard;
- the connector is fully seated in the correct direction;
- the wheel, axle, brake, and any e-bike motor cable are correctly secured;
- the chain tension is within the exact bicycle or hub manual’s rule.
If the wheel was removed, reinstall it and confirm positive retention, rotor clearance, and brake operation. Do not test a questionable installation by standing on the pedals. Start with a low-load, traffic-free test and stop for skipping, binding, poor shifting, a loose link, chain drop, unusual noise, or any brake, wheel, or steering problem.
For an e-bike, keep assistance off until the mechanical check passes. Then use the maker’s startup and brake-cutoff procedure. Do not use motor power to spin the chain during an inspection.
Chain care after replacement
Clean and lubricate the chain with products and intervals suited to the maker’s instructions and riding conditions. Wipe excess lubricant away from braking surfaces and the outside of the chain. The winter chain-care guide covers wet, salty, and cold-weather inspection. The chain-cleaning guide explains why an unsuitable solvent can damage a chain or contaminate a brake.
Check chain wear with a compatible tool and the chain maker’s limit rather than waiting for a failure. A new chain can expose wear in the cassette, freewheel, or chainring. The drivetrain maintenance guide gives a broader inspection sequence.
Frequently asked questions
Can I replace a bike chain myself?
Often, if you can identify the drivetrain, obtain the exact chain and connector, use the compatible tool, and verify the installation. Stop and ask a mechanic when the chain, connector, drivetrain, wheel, brake, suspension, or e-bike system is uncertain.
Can I replace a bike chain without a chain tool?
Only when the exact chain uses a maker-approved removable master link and you have the approved removal and closing method. A master link tool is not universal, and a chain without a removable link still needs the maker’s specified cutting and joining process.
Is adding two links a safe chain-sizing rule?
No. The required length depends on the drivetrain, sprocket size, chain construction, derailleur, suspension, connector, and maker’s method. Use the exact manual.
Should the new chain be the same length as the old chain?
Only as a comparison after confirming that the old chain was correctly sized and the drivetrain has not changed. Wear, a prior repair, or a different cassette, chainring, derailleur, wheel, or frame can make the old length wrong.
Why is the new chain skipping?
Possible causes include an incorrectly joined or routed chain, a stiff link, worn sprockets or chainrings, poor indexing, a loose cassette or chainring, or a freehub problem. Stop applying heavy load and use the chain-skip diagnostic before riding.
Can I reuse a bike master link?
Only if the exact link maker expressly permits reuse and the link passes its inspection. Shimano’s covered QUICK-LINK instructions direct replacement with a new link when replacing the chain (QUICK-LINK instructions, retrieved September 2, 2026). Follow the exact chain and link manual.
Product selection
These examples were selected from Bright Data Amazon listing and specification research retrieved September 2, 2026. This is not hands-on testing. Confirm the exact chain, speed family, connector, length method, and maker instructions before buying or installing a product.

Dedicated bench chain tool
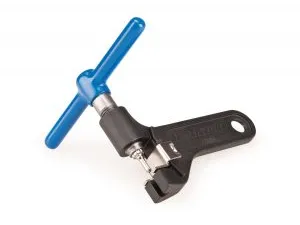
Park Tool Chain Tool - CT-3.3
A dedicated option when the exact chain falls within the listed compatibility
Selected from the verified Park Tool listing. Confirm the chain model and joining method in the component manual.
Best for: Riders replacing compatible multi-speed chains at home
Key specifications: Listing identifies 5 to 12-speed derailleur chains and 1/8-inch and 3/16-inch single-speed chains
Trade-off: A chain tool does not choose the correct chain length or connector
Check price on Amazon
Compact chain tool
Park Tool CT-5 Mini Chain Brute Chain Tool
A portable choice when the chain and the maker's joining method match
Selected from the verified Park Tool listing. Check the chain and connector instructions before use.
Best for: Riders carrying a small tool for compatible chain work
Key specifications: Listing identifies 5 to 12-speed derailleur chains, 1/8-inch single-speed chains, and a replaceable pin
Trade-off: Compact size does not replace master-link pliers or establish the correct chain length
Check price on AmazonHow we researched this guide
This is research-based repair guidance, not a hands-on installation, drivetrain test, chain-strength test, or riding review. We reviewed Park Tool’s chain sizing and replacement guidance, Shimano chain and QUICK-LINK manuals, and the current internal chain-maintenance references. We did not size a particular bicycle, approve a connector, or invent a universal length, torque, or wear threshold.
Bottom line
Identify the drivetrain and connector, size from the exact maker’s method, cut at the correct section, join with the approved part, and verify routing, movement, tension, wheel retention, and braking before riding. If the count, connector, drivetrain, or final check is uncertain, stop and use a qualified mechanic.
Sources
- Park Tool, “Chain Length Sizing,” retrieved September 2, 2026, https://www.parktool.com/en-us/blog/repair-help/chain-length-sizing
- Park Tool, “Chain Replacement: Derailleur Bikes,” retrieved September 2, 2026, https://www.parktool.com/en-us/blog/repair-help/chain-replacement-derailleur-bikes
- Shimano, “Chain Installation and Removal,” retrieved September 2, 2026, https://si.shimano.com/en/pdfs/dm/CN0002/DM-CN0002-01-ENG.pdf
- SRAM, “Chains User Manual,” retrieved September 2, 2026, https://docs.sram.com/en-US/publications/6sfLCOGTn6FE98W8vXLqm0/UM%20-%20Chains