Tubeless vs. Inner Tubes: Which Bike Tire Setup Is Better?
Tubeless is best for lower pressure, puncture sealing, and trail grip. Inner tubes are simpler, cleaner, and easier for occasional riders to maintain.
Choose tubeless when lower pressure, trail traction, and automatic sealing of small tread punctures justify extra setup and maintenance. Choose inner tubes when you value simple installation, predictable roadside replacement, and less ongoing attention.
Both systems can be reliable when the tire, rim, pressure, and installation are correct. Tubeless is an upgrade for a specific use case, not a requirement for every bicycle.
Tubeless vs. tubes at a glance
| Factor | Tubeless | Inner tube |
|---|---|---|
| Small tread punctures | Sealant may close them while riding | Usually requires a patch or replacement tube |
| Pinch flats | No tube to pinch | Possible when pressure is too low or impacts are hard |
| Low-pressure traction | Strong advantage on compatible tires | Limited by pinch-flat risk |
| Setup | More exacting | Familiar and usually simpler |
| Maintenance | Sealant checks and periodic cleaning | Pressure checks and repairs when needed |
| Roadside fallback | Plug or install a spare tube | Patch or install a spare tube |
| Compatibility | Tire, rim, tape, valve, and sealant must work together | Tube must match wheel, tire, and valve |
When tubeless is worth it
Tubeless is most useful for mountain, gravel, and some road riders who benefit from lower pressure and ride where small punctures are common. Removing the inner tube eliminates pinch flats, while liquid sealant can close some small holes in the tread.
Lower pressure can enlarge the tire’s contact patch and improve comfort and traction. The safe pressure range still depends on tire size, rim width, rider and bike load, terrain, casing, and manufacturer limits. Too little pressure can cause rim strikes, burping, tire squirm, or loss of control.
A tubeless-ready label matters. Park Tool’s compatibility guide explains that tubeless tires and rims use bead and rim features intended to create and retain an airtight seal. Do not treat ordinary rims and tires as compatible because a home conversion happened to hold air.
When inner tubes are the better choice
Inner tubes remain practical for commuters, casual riders, kids’ bikes, and bicycles that sit unused for long periods. Installation is usually less sensitive to rim tape condition and bead sealing, and a spare tube is easy to understand at the roadside.
Tubes are also the correct choice when the rim or tire is not approved for tubeless use. The tube must match the tire diameter, width range, and rim valve hole. A badly undersized, oversized, twisted, or pinched tube can fail even when the tire looks normal from outside.
Our guide to patching a bicycle tube covers repairable punctures. Replace the tube rather than patching damage beside the valve, at a seam, or across a large or degraded area.
Does tubeless prevent all flat tires?
No. Sealant is designed for limited punctures, not every form of damage. A sidewall cut, torn bead, damaged rim, failed tape, loose valve, or large casing hole can defeat the system. Sealant also dries over time and can be lost while closing a puncture.
Carry a compatible spare tube even on tubeless rides. A tube can provide a get-home option after some failures, but only if the tire bead, casing, and rim remain structurally safe. Remove the puncturing object and a loose tubeless valve before installing it.
For current sealant choices, see our research-based tubeless tire sealant comparison.
Is tubeless harder to maintain?
Tubeless requires more routine attention. You need to:
- check pressure before riding;
- confirm liquid sealant remains in the tire;
- top up or replace sealant on the maker’s interval;
- inspect the valve, tape, bead, and casing when air loss increases;
- clean dried sealant when servicing the tire.
Climate, tire casing, sealant formula, storage, and puncture history change the interval. Our sealant maintenance guide explains the inspection signals that matter more than a universal calendar.
Tube systems also need maintenance. Pressure naturally falls, rim tape can shift, and debris can remain embedded in a tire. Repeated flats are a fault to diagnose, not proof that tubes cannot work.
Which is faster and lighter?
The answer depends on the complete system. Removing a tube saves its weight, but tubeless adds tape, valves, and sealant. Tires and rims also differ in construction. A comparison based only on the missing tube is incomplete.
Rolling resistance varies with the exact tire, casing, pressure, surface, and speed. Tubeless can perform very well at an appropriate pressure, but an incorrect setup can erase the advantage through excess deformation, air loss, or poor handling.
Can you put a tube in a tubeless tire?
Often, yes. Many tubeless-ready tires and rims can accept a correctly sized inner tube as a temporary or permanent configuration. Confirm this with the tire and rim manufacturers first.
Before installing the tube:
- Make sure the rim and tire are structurally undamaged.
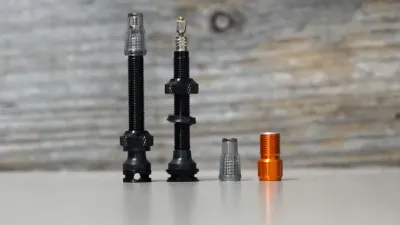
- Remove the tubeless valve from the rim.
- Remove any thorn, plug fragment, or sharp debris.
- Check that rim tape cannot cut or abrade the tube.
- Fit the tube without twisting or pinching it under the bead.
Stop if the bead is torn, the rim is cracked or dented, or the tire casing has a large cut.
Common tubeless disadvantages
The main drawbacks are compatibility constraints, mess, more setup steps, sealant maintenance, and difficult initial inflation on some tire-rim combinations. A compressor or charge pump may be needed to move enough air to seat the beads.
Some sealants also have specific material restrictions. Follow the tire, rim, insert, and sealant instructions for your exact combination.
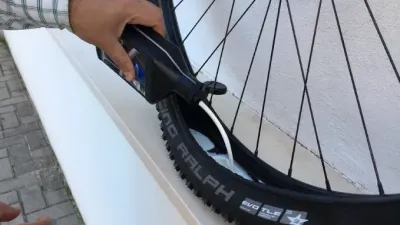
Park Tool’s installation procedure shows both pour and valve-injection methods and emphasizes checking the label for the recommended sealant amount.
How we compared
This is a research-based system comparison without new laboratory or side-by-side ride testing. We compared compatibility, puncture behavior, pressure range, maintenance, roadside repair, and common failure modes using current manufacturer and established repair documentation. The instructions and limits for the exact tire and rim take priority.
Bottom line
Tubeless earns its extra work for riders who use lower pressures and regularly face small tread punctures. Tubes remain the simpler and often smarter system for occasional riding, easy roadside replacement, and non-tubeless-compatible equipment. Choose the system you can inspect and maintain correctly.
Neither system makes a structurally damaged casing safe. Review bike tire sidewall damage and the broader replacement warning signs before adding sealant or a new tube.